The first time the ThinOX device is booted, a single window “Wizard” is shown. This initial setup window allows configuring the basic device settings. The upper part is general for all the device, while the lower part is specific and depends on the device model.
¶ General Setup

The first combo box allows selecting the language to be used for the user interface of the device. The second combo box allows selecting the language to be used for the keyboard layout of the device. The third combo box allows selecting the time-zone to be used for the device. Other parameters are configured by default and can be modified after this first initial setup using the Settings window. (e.g. IP Address is obtained automatically from a DHCP server, Video Resolution is set to Autodetect, etc.). Once the specific parameters (depending on the device model) are configured you can click "OK" button to save the configuration. The thin client starts and shows its Running Environment.
Important Tip: use ThinMan Server To obtain the best in terms of the automatic configuration of the ThinOX devices use the ThinMan Server to manage them properly. To obtain the best features on the ThinMan Server you have to configure the ThinOX device to "points" to its ThinMan Server. Read this chapter to obtain this result: ThinMan Configuration. Read the ThinMan User Guide to have more information on available features of ThinMan Server (to start a good page could be: How to Setup ThinMan Address on Thin Client).
¶ Specific Setup
The lower part of the configuration window allows to initialize the connection parameters and depends on the device model. See below for more information.
¶ C9010 - Zero Client Model

The zero client model C9010 allows running a single connection to a specific virtual infrastructure. The possible infrastructure types are Citrix XenDesktop, VMware Horizon View and Microsoft RDS.
From the wizard select the type of the connection that has to be created and then insert in the text field the farm/server hostname or IP address. You can test the Server Address only for Citrix Connection using the PNAgent site by clicking on "Test".
Clicking on "OK" will create the single connection to the infrastructure.
This device model starts in WBT/Kiosk Modality with Connections Manager not shown and it is not possible to change it (see [User Interface](/ThinOX10/Settings/User Interface) section under "User Interface" chapter). In this modality, you can access the Connections Manager by pressing CTRL + ALT + END on the keyboard (see Connections Manager for more information). Remind that this model allows creating only one connection at a time.
From the Connection Manager window you can change the configuration of the single connection (e.g. change server address, change connection parameters, etc.).
When the Connection Manager is shown pressing the F2 function key on the keyboard will open the "Settings" window (see Settings for more information).
See more information on C9010 Specific Features.
¶ D90-RFX, A90-RFX, U90-RFX and N90-RFX
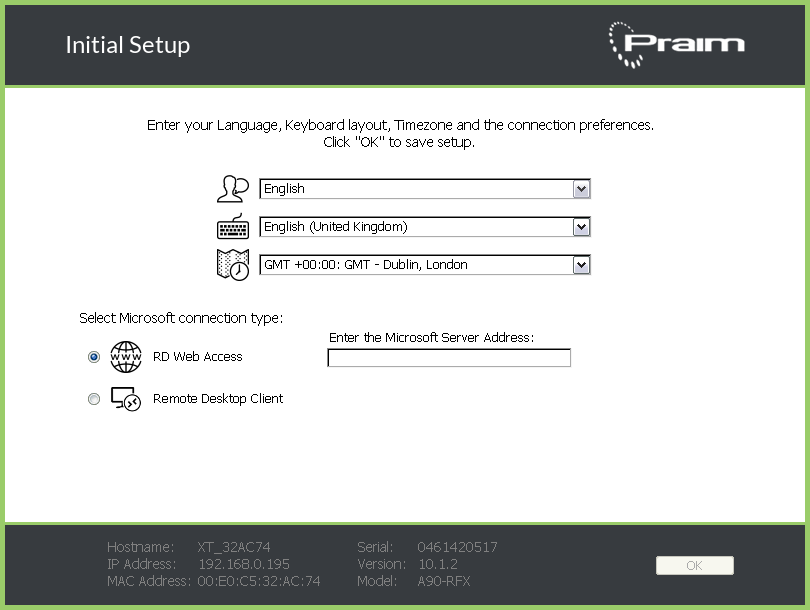
The vertical thin client models D90-RFX, A90-RFX, U90-RFX and N90-RFX allows running only one connection using the RDP Protocol. The Initial Setup wizard allows selecting the RDP Web Client Connection or the Remote Desktop Client Connection.
See more information on these models at D90-RFX, A90-RFX, U90-RFX, N90-RFX Specific Features.
¶ D90-HOR, A90-HOR, U90-HOR and N90-HOR
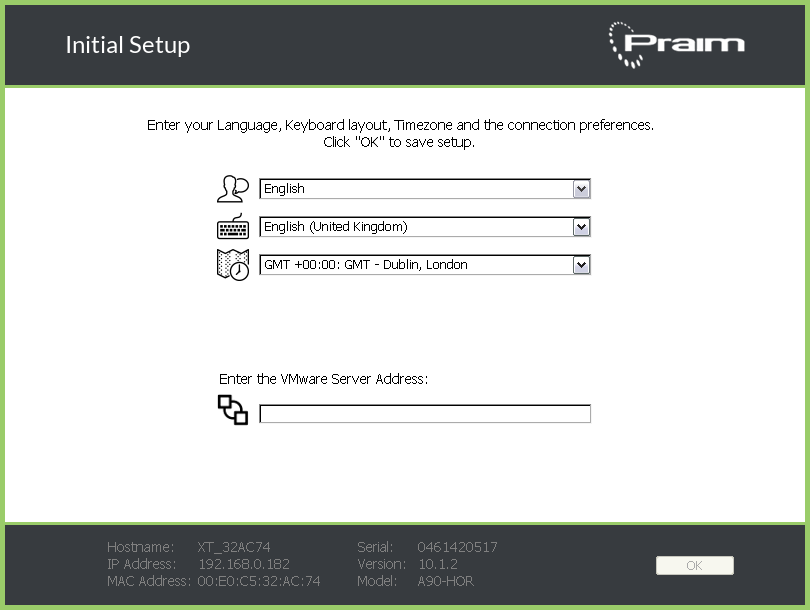
The vertical thin client models D90-HOR, A90-HOR, U90-HOR and N90-HOR allows running only one connection using the VMware Horizon View Connection.
See more information on these models at D90-HOR, A90-HOR, U90-HOR, N90-HOR Specific Features.
¶ D90-HDX, A90-HDX, U90-HDX and N90-HDX
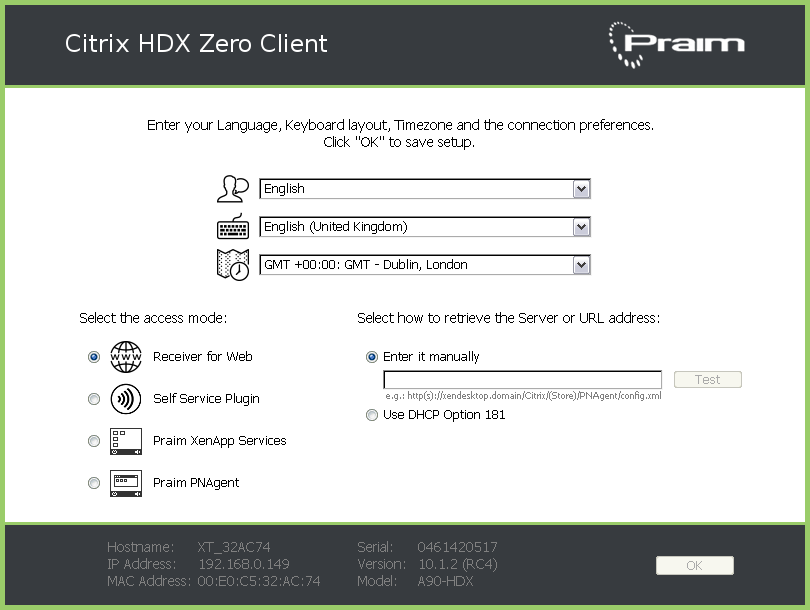
The vertical thin client models D90-HDX, A90-HDX, U90-HDX and N90-HDX allows running only one connection using the Citrix Receiver Connection.
See more information on these models at D90-HDX, A90-HDX, U90-HDX, N90-HDX Specific Features.