Praim ThinOX terminals support a Connections Manager interface.

The "Connections Manager" is displayed on the desktop of the terminal as shown below by pressing the CTRL+ALT+END hotkeys combination on the keyboard or using the right-click contextual menu on the desktop (available when the "User Interface" is Desktop).
Remind that when the Desktop Modality is enabled the connections are also visible on the desktop.
Depending on the "User Interface (see "User Interface" paragraph under [User Interface](/ThinOX10/Settings/User Interface) chapter) and on the Security parameter "Deny Connection Changes" (see Security for more information) the Connections Manager may have or not two different tabs:
- "Configuration" tab: available on Desktop Modality and WBT/Kiosk Modality if the "Deny Connection Changes" is not enabled (e.g. the first picture below is taken with the Desktop Modality with "Deny Connection Changes" not enabled);
- "Connections" tab: available on WBT/Kiosk Modality (e.g. the second picture below is taken with the WBT/Kiosk Modality with "Deny Connection Changes" enabled).
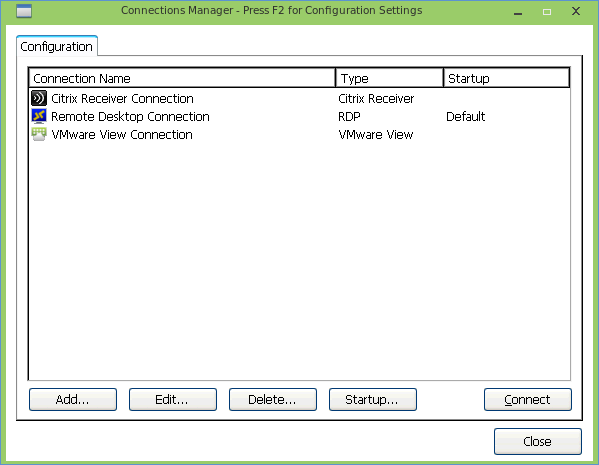
Example 01: this is the Connections Manager that will be available in the Desktop Modality with the "Deny Connection Changes" not enabled. From the buttons you can:
- "Add" a new connection;
- "Edit" an existent connection (select the connection and then press "Edit...");
- "Delete" an existent connection;
- edit the "Startup" properties of a connection (see below for more information);
- start an existent connection clicking on "Connect".
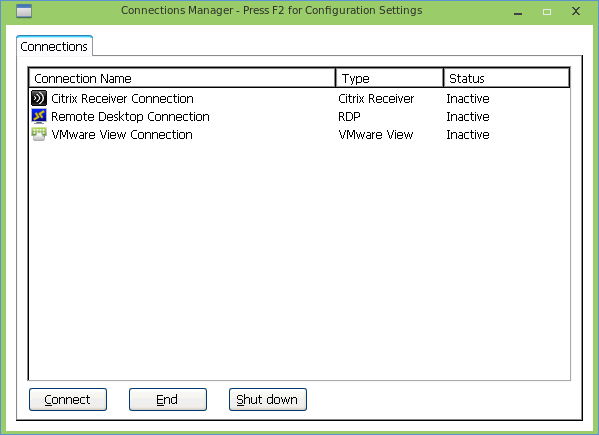
Example 02: this is the Connections Manager that will be available in the Desktop Modality with the "Deny Connection Changes" not enabled. From the buttons you can:
- start an existent connection clicking on "Connect";
- close a previously started connection clicking on "End";
- "Shut down" the terminal (will open the power management dialog with more options).
A connection can also be added using the desktop contextual menu.

Right-click the desktop and select the "Add Connection" menu.
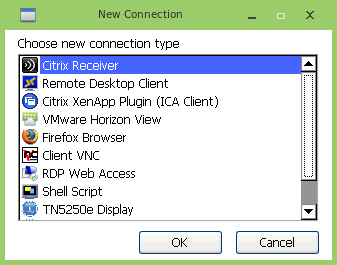
From the opened window select the type of connection that has to be created and click "OK". See next chapters for more information on every type of available connection.
¶ Startup Options
Some connection has some "Startup Options" that could be configured.
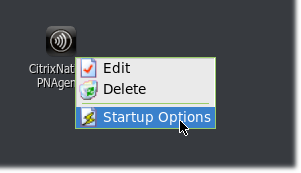
Right-click on a connection and select "Startup Options" on the menu.
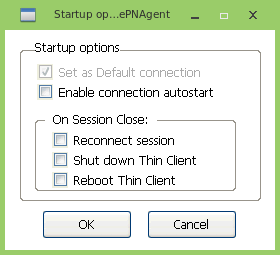
The startup options window opens and allows to enable some features:
- Enable Connection Autostart: if enabled the connection is automatically started when the thin client starts (useful in some VDI environment, when the thin client is started the connection asks for a login and then automatically the virtual desktop is started; to the user, the thin client is like a "physical" PC). "On Session Close" allows to define what happens when a connection is closing:
- Reconnect Session: the connection is started again (typically with the login request) when the connection is closed;
- Shut Down Thin Client: the thin client is powered off when the connection is closed (useful in some VDI environment, when the virtual desktop is closed this feature will power off the thin client like a "physical" PC);
- Reboot Thin Client: the is rebooted when the connection is closed;
Currently, the "On Session Close" behavior is working only for these connections:
¶ More about Connections Manager
- Citrix Receiver Connection
- Citrix Praim Desktop Client
- VMware Horizon View Connection
- Remote Desktop Client Connection
- RDP Web Client Connection
- RDP Praim Desktop Client Connection
- Firefox Browser Connection
- Client VNC Connection
- Shell Script Connection
- TN5250e Display and TN5250e Printer
- VT - xterm Terminal Emulator (PuTTY)