Citrix Receiver client requires a Citrix farm or server that is active and reachable over the network.
The default values for the Citrix Receiver parameters are reported by the screenshots.
¶ Connection tab
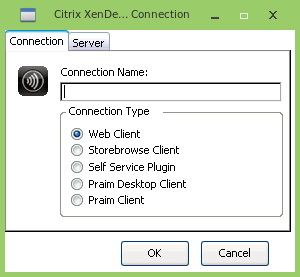
In the tab "Connection" you can change the "Connection Name" and the "Connection Type". "Connection Type" can be:
- Web Client: in this case, a Web Interface has to be provided on the server/farm;
- StoreBrowse Client: in this case, a PNAgent or Store Site has to be provided on the server/farm (for old version of Citrix XenDesktop/XenApp see ICA Global Settings in the "Advanced" tab);
- Self Service Plugin: in this case, the thin client is connected to the farm using the Self Service User Interface provided by Citrix. A PNAgent or Store Site has to be provided on the server/farm;
- Praim Desktop Client: in this case, a PNAgent or Store Site has to be provided on the server/farm;
- Praim Client: in this case, a Web Interface has to be provided on the server/farm.
See below for more information on these Connection Types.
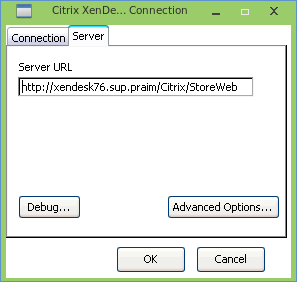
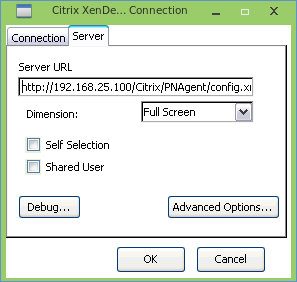
¶ Server tab

In the "Server" tab you can change the URL or the address of the Citrix server/farm.
The format of the window depends on the type of connection previously selected. In the case illustrated above the type of connection is "Praim StoreBrowse".
To change the server URL click on "..." button near the server URL.
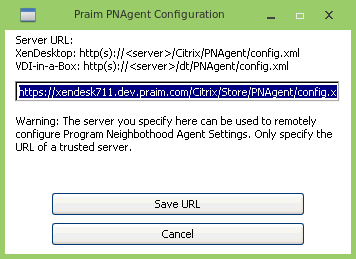
You can enter the full URL or you can enter only the server FQDN Address and let the thin client try the standard paths for the URL (as explained in Initial Installation chapter). If the server does not use the Citrix default path then you have to enter the full URL.
Address Information
Depending on the server version you could insert different pathnames. Typically try:http(s)://<servername>/Citrix/PNAgent/config.xmlorhttp(s)://<servername>/Citrix/Store/PNAgent/config.xml
The "Save URL" button save the URL on the connection.
Clicking on "Advanced Options" will show a new dialog window where you can set advanced parameters.
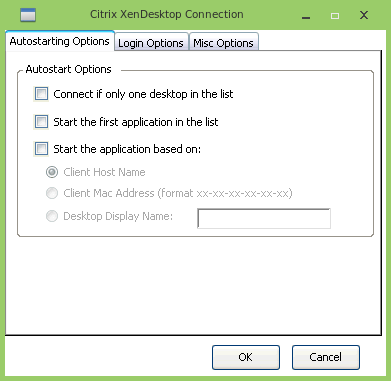
In the "Autostarting Options" tab you are allowed to set these options:
- "Connect if only one desktop in list" will automatically connect the client to the single Desktop whether there is only one available Desktop for the user.
- "Start the first application in the list" will automatically connect the first application available in the list.
- "Start the application based on": you can select to automatically connect to an application/desktop having the same name of the hostname, having the same name of the Mac Address or to a specified entered string.
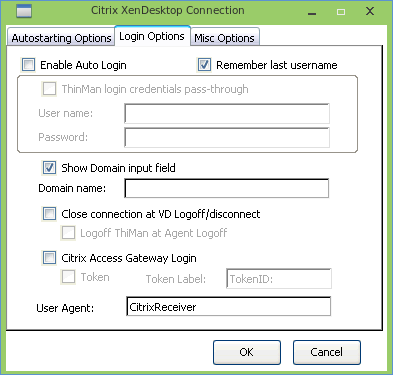
In the "Login Options" tab (available only for "Native (PNAgent)" connection type, see below for more information) you are allowed to set these options:
- "Enable Auto Login": allows you to insert predefined credential ("Username" and "Password" fields) in the connection. Enabling "ThinMan Login credential pass-through" allows the connection to use the credential provided by the user if the ThinMan Login is enabled on the device. This has to be used only if the device is under ThinMan Profile Management (see How to protect the Thin Client with ThinMan Login for more information on User Profile).
- "Show Domain input field": allows you to insert a "Domain name" into the field and to show/not show this field into the Citrix Receiver login window. The field can be precompiled with a domain name that will be used on login phase (if the domain name is not visualized on the login panel it cannot be modified by the user on login phase; the only way for the user to use a different domain in login phase is to insert in the "Username" field, a user login in the form "<domain>\<username>").
- "Close connection at VD Logoff/disconnect": when enable will close the user connection when the Virtual Desktop is logged off or disconnected (useful with VDI infrastructure).
- "Citrix Access Gateway Login" enables the connection to be used when the Access Gateway is available. You can also enable the utilization of "Token". Flag this option to allows the user to enter the token in the login phase (it adds an additional field in the login window).
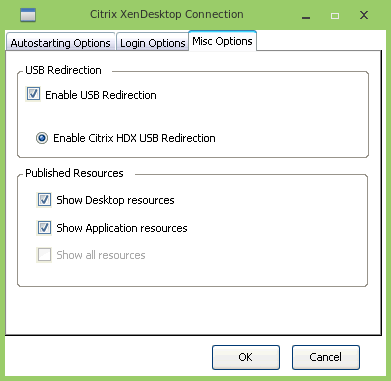
In the "Misc Options" tab you are allowed to set these options:
- "Enable USB Redirection": allows to enable or disable the HDX USB Redirection specifically on the single connection. HDX USB Redirection has to be enabled in ICA Global Settings and in Citrix HDX USB Redirection configuration applets.
- "Show Desktop resources" and "Show Applications resources": allows to visualize or not "Desktops" and "Applications" in the user interface after the login. At least one of these options has to be enabled.
¶ Reconnect Options tab
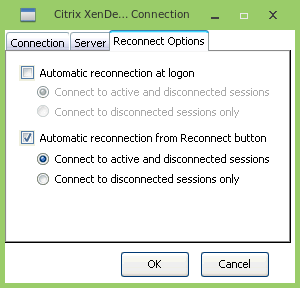
This tab is available if you load (in the "Server" tab) the config.xml files from the server.
In this tab, you can change Reconnect properties for the connection.
¶ Connection Types
Many types of connections could be used for a Citrix farm. Some suggestions:
- Web Client: connect to Citrix Farm using the browser access. Compatible with Netscaler/Website/StoreFront products. Recommended if the web login page is customized.
- Praim Desktop Client: populate the ThinOX desktop and the ThinOX start menu with desktops and applications coming from the Citrix Farm. Compatible with Netscaler/Website/StoreFront products. Recommended for Windows like user experience. Not suitable for WBT/Kiosk mode.
- Self Service Client: is the standard Citrix Receiver.
- StoreBrowse Client: shows Desktops and Applications in a resizable container. Recommended for WBT/kiosk workflow and receiver access (uses Citrix Receiver API).
- Praim Client: shows Desktops and Applications in a resizable container. Recommended for WBT/Kiosk workflow and web access (uses Citrix Web API).
¶ Web Client
The Web Client connection type will launch a browser pointing to the Citrix Web Server.
In the "Server" tab of the connection editing window, you have to insert the web address of the Citrix Farm/Server.
When the connection starts it will launch a web browser fullscreen that hows the content of the Citrix Web Site.
Once logged in the user can select which application or desktop to xecute.
To close the web browser you can use the CTRL + F4 hotkey combination on the keyboard.
To change between multiple applications you can use the ALT + TAB hotkey combination on the keyboard.
¶ StoreBrowse Client
This type of connection will connect to a Citrix StoreFront (StoreBrowse protocol) site (this mode is compatible also for legacy PNAgent services) (for an old version of Citrix XenDesktop/XenApp see ICA Global Settings in the "Advanced" tab).

In the "Server" tab of the connection editing window, you have to insert the PNAgent/StoreBrowse address of the Citrix Farm/Server. In the "Advanced Options" window it is useful to configure the "Login Options" (not available in other types of connection). This type of connection is useful when the ThinMan Login is enabled on the thin client (see How to protect the Thin Client with ThinMan Login documentation on ThinMan User Guide).
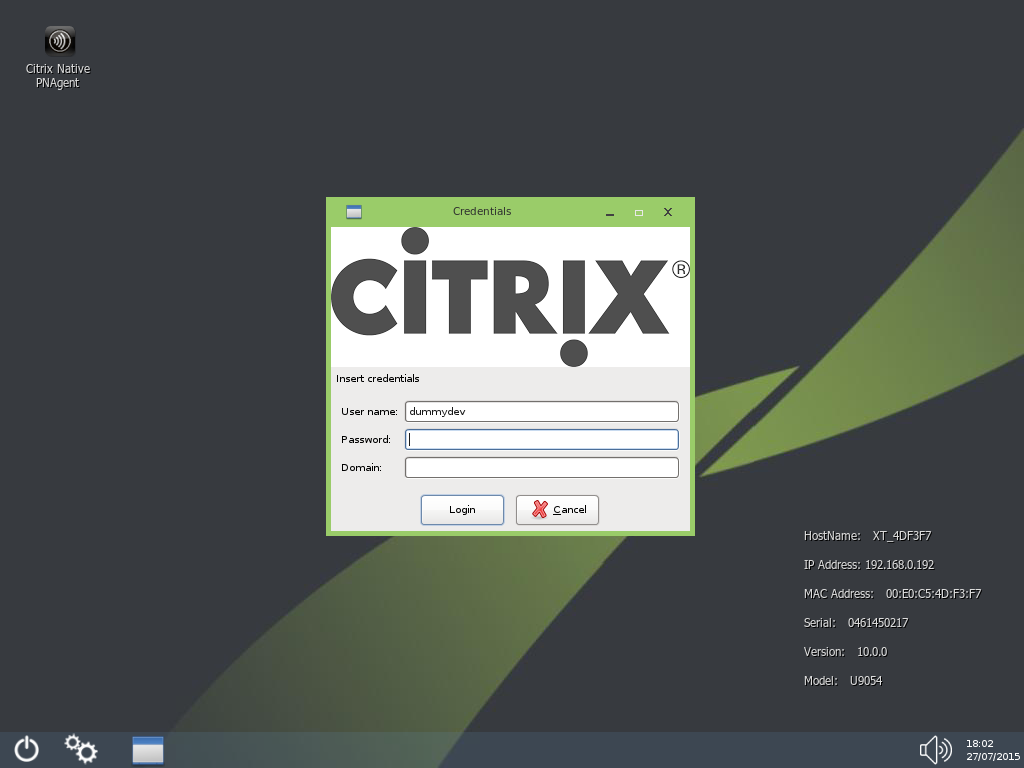
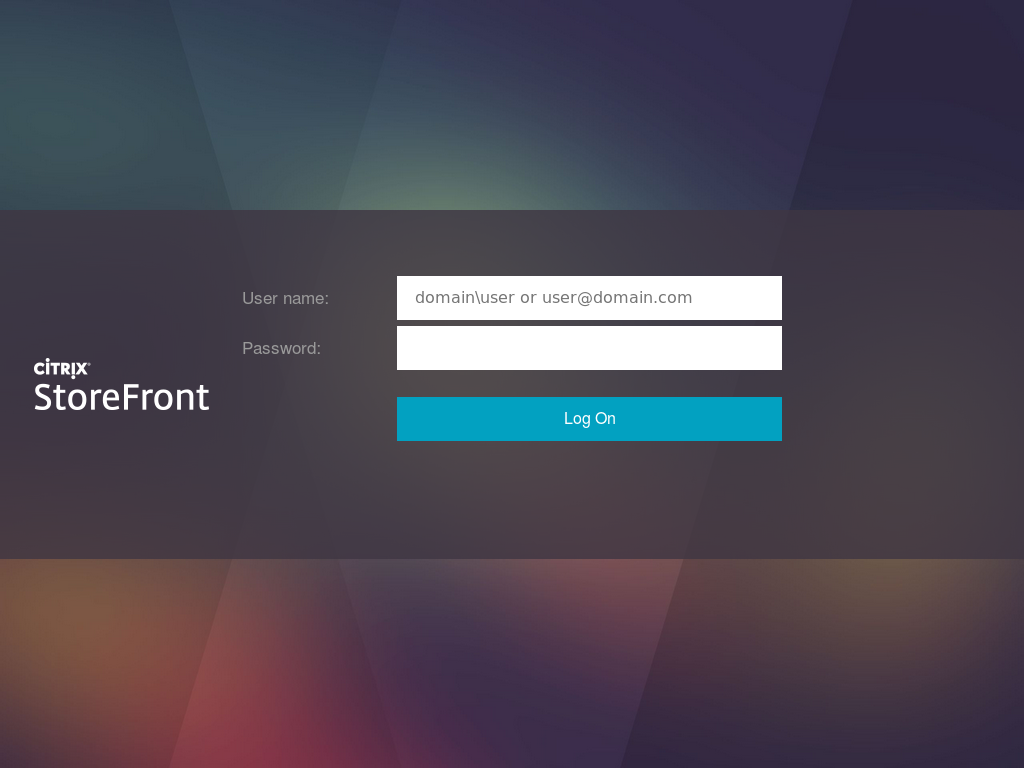
When the connection starts it will launch a dialog window with the credential request. The desktop is available to the user; the available features depend on the "User Interface" that has been chosen by the [User Interface](/ThinOX10/Settings/User Interface) panel.
With the "Configure Terminal" button a user can access to the terminal configuration (see the Security chapters for more information on which controls can be available to the user).
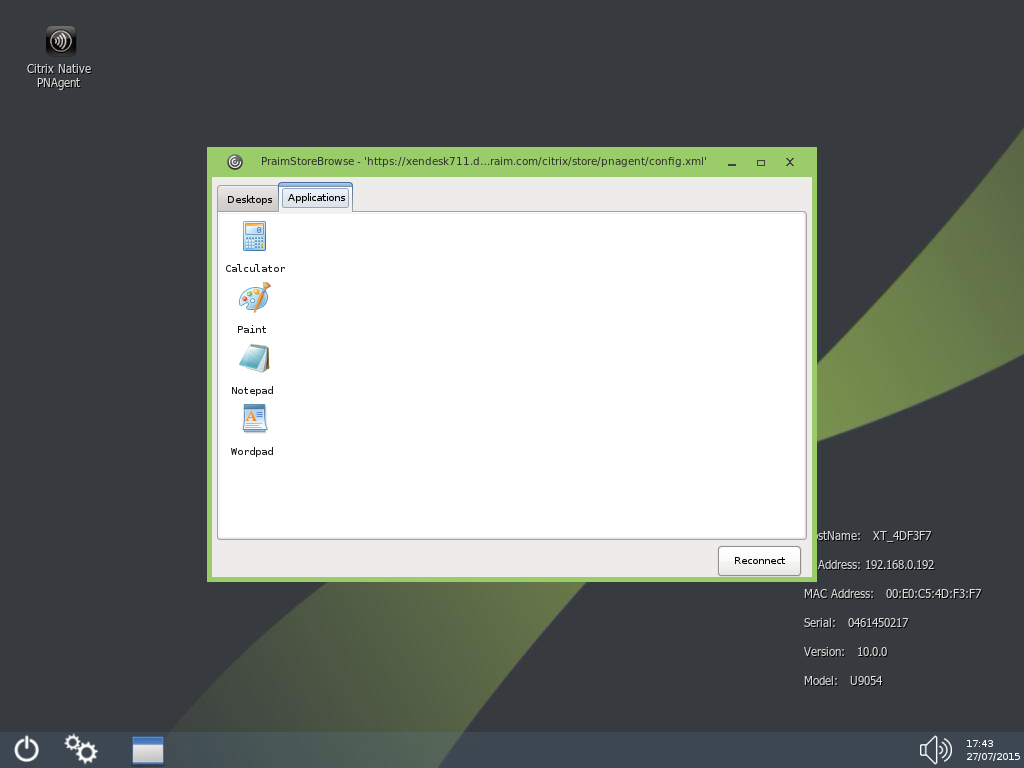
Once logged in the user can select which application or desktop to execute.
To change between multiple applications you can use the ALT + TAB hotkey combination on the keyboard (or use the taskbar if available).
¶ Self Service Plugin
This type of connection is the standard Citrix Receiver. This type of connection will connect to a Citrix Store/PNAgent site.
In the "Server" tab of the connection editing window, you have to insert the Store/PNAgent address of the Citrix Farm/Server.
"Dimension" allows to select three different types of window visualization: "Full Screen" (the window is displayed fullscreen), "Maximized" (the window is displayed maximized and undecorated, which does not mask the desktop environment's taskbar; this can be useful when users can launch seamless applications) and "Window" (the Receiver in launched into a normal window).
"Self Selection": used to disable the search box and the self-selection panel that appears on the left of the self-service UI when you click + (the plus sign). Disabling these UI elements prevents users from subscribing to extra applications.
"Shared Users": Indicates whether Shared User Mode is enabled. This allows the self-service UI to use one system user account for multiple users by removing user data from the device when users log off or close the UI.
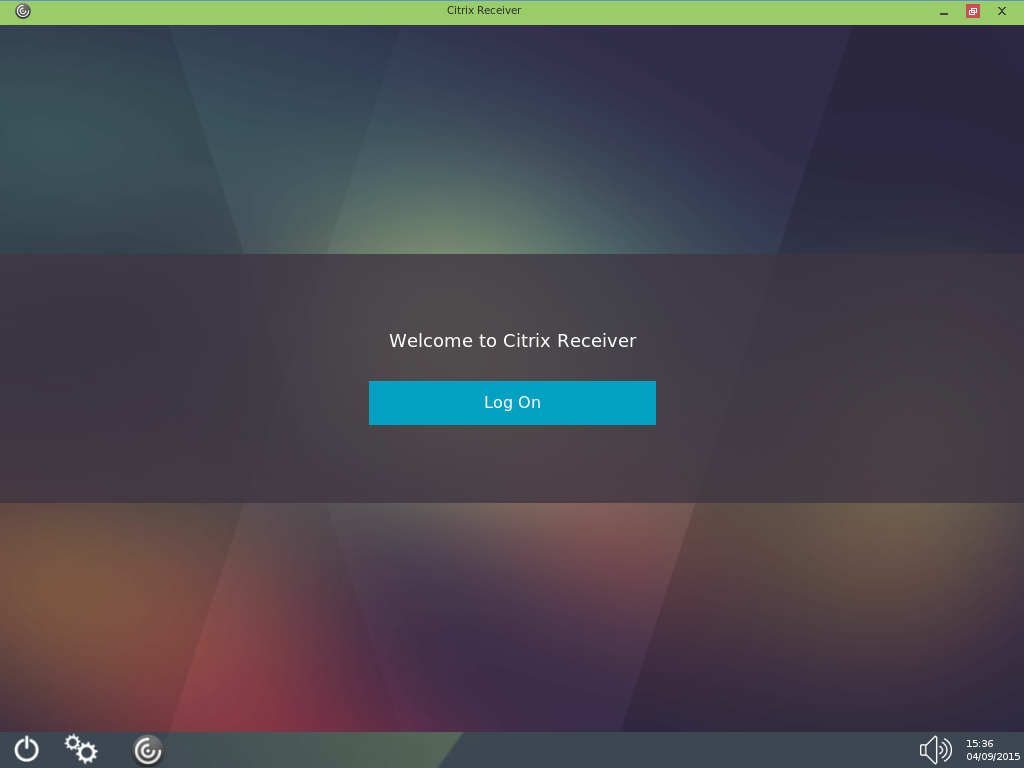
When the connection starts and you click on "Log On" there is the credential request. The desktop is available to the user; available features depend on the "User Interface" that has been chosen by the [User Interface](/ThinOX10/Settings/User Interface) panel.
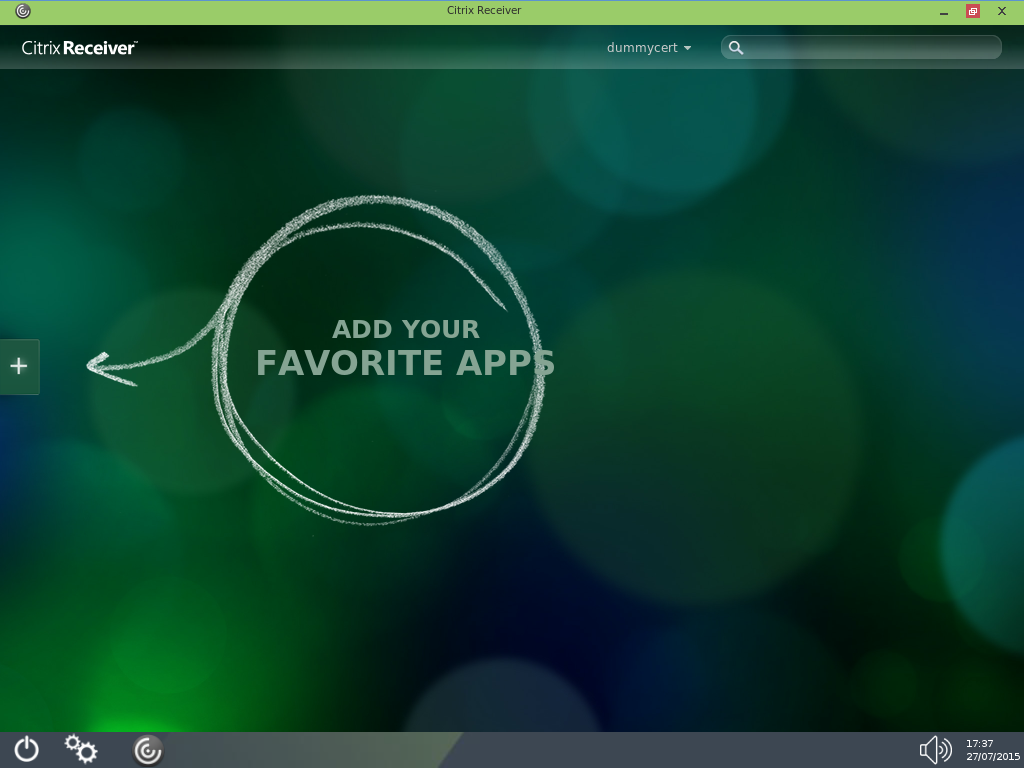
Once logged in, the user can select which application or desktop see in the "Favorite Apps" panel (depends on "Self Selection" parameter above), then he can launch them.
To change between multiple applications you can use the ALT + TAB hotkey combination on the keyboard (or use the taskbar if available).
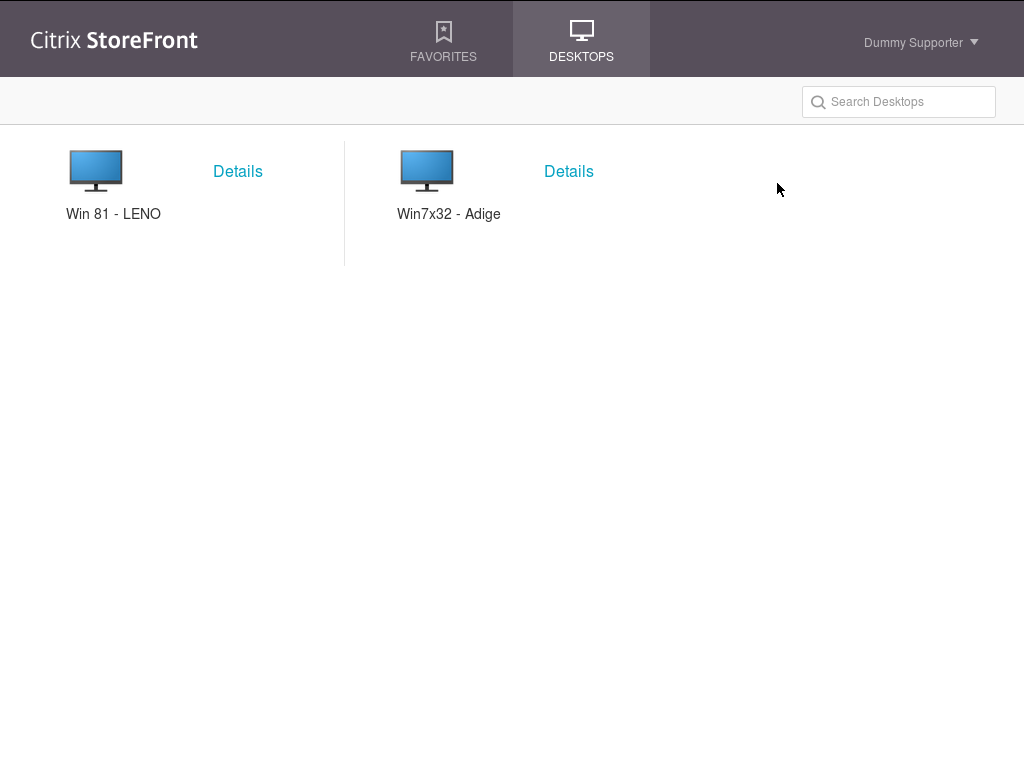
¶ Praim Client
This type of connection will connect to a Citrix StoreFront site (using the Web API protocol).
In the "Server" tab of the connection editing window, you have to insert the PNAgent/StoreBrowse address of the Citrix Farm/Server. In the "Advanced Options" window it is useful to configure the "Login Options" (not available in other types of connection). This type of connection is useful when the ThinMan Login is enabled on the thin client (see How to protect the Thin Client with ThinMan Login documentation on ThinMan User Guide).
When the connection starts it will launch a dialog window with the credential request. The desktop is available to the user; available features depend on the "User Interface" that has been chosen by the [User Interface](/ThinOX10/Settings/User Interface) panel.
With the "Configure Terminal" button a user can access to the terminal configuration (see the Security chapters for more
information on which controls can be available to the user). This connection is also
Once logged in the user can select which application or desktop to execute.
To change between multiple applications you can use the ALT + TAB hotkey combination on the keyboard (or use the taskbar if available).
This type of connection is similar to the Praim StoreBrowse connection but because it uses Web API protocol it is also compatible with a Token generator.
¶ Praim Desktop Client
This type of connection is fully explained in the link Citrix Praim Desktop Client.