To use a device within a Scheduled Activity, an Event Activity or in a Device Policy, it is essential to configure the correct ThinMan Address on the device.
The ThinMan Address can be either:
- Single Address: If there there is only one ThinMan Server in the network
- Dual Address: if both Primary and Secondary ThinMan servers are deployed.
Configuring ThinMan Address from ThinMan Console
You can set the ThinMan Address directly from the ThinMan console using Contextual Menu - Special Functions via Set ThinMan Server Address.
Best practices for Configuring ThinMan Address
Use Network Parameters for Automatic Configuration By factory default, thin clients are preconfigured to:
- First test DHCP option 163.
- If DHCP Option 163 is not configured or fails, resolve the PRAIMSERVER hostname via DNS.
Recommendation: Use network parameters to allow thin clients to connect to ThinMan out-of-the-box. This setup ensures that devices are ready to be managed through the ThinMan Profile Manager.
For detailed guidance, see How to Configure a DNS Server with PRAIMSERVER hostname and How to Configure DHCP Option 163.
Using a Non-Standard Port on ThinMan Server
By defaut, ThinMan uses the port 443 (HTTPS) for thin client connections. If this port is changed via the ThinMan Server Menu, you must inform the devices by specifying the port in the format: ThinManServerNameOrIPAddress:port. A ThinOX device manually configured to use port 1443 might look like this:
Important Notes: Automatic ThinMan Address configuration through DNS will not work if a non-standard port is used. The only automatic method to provide this configuration is via DHCP Option 163. The option's value must follow the format: ThinManServerNameOrIPAddress:port
Not using network parameters for configuration will prevent the use of Zero Config with Profile Manager.
Getting Started - Configuring Praim Devices to Contact ThinMan
For step-by-step guidance, refer to the Getting Started Guide or watch the video
¶ ThinOX
- Access the ThinMan Address Configuration Panel
- On the thin client desktop:
- Click the gear icon in the taskbar or
- Right-click the desktop and select Settings. This will open the Configuration Settings menu.
- Navigate to the Network tab.
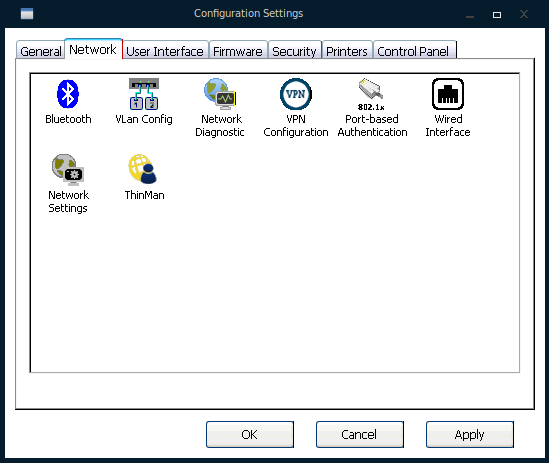 \
\ - Double-click on ThinMan icon. The ThinMan Agent window appears.
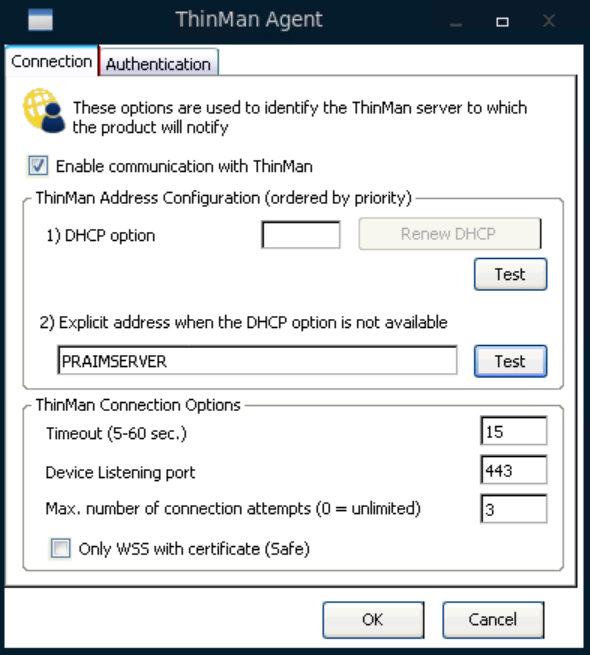
Within the ThinMan options pane, you can configure the ThinMan Address. The client will use in the following order the options to establish a connection to the ThinMan server:
-
Configuring ThinMan Address The client uses the following methods in order to connect to the ThinMan server:
- DHCP Option 163 from the DHCP Server.
- DNS to resolve the “PRAIMSERVER” hostname . Note:: Praim devices are factory-configured with these options. Properly configure your network ensures that all devices, including out-of-the-box ones, will automatically find the ThinMan Server and notify it.
-
Test Connection
Use the Test Connection button to verify the connection between the device and the ThinMan Server. Once successful, the device will appear on the ThinMan Server, with its status displayed as WSS. -
Click OK to save the settings, and then click OK again in the Configuration Settings window to finalize the configuration.
¶ Setting up Primary and Secondary ThinMan Address on ThinOX
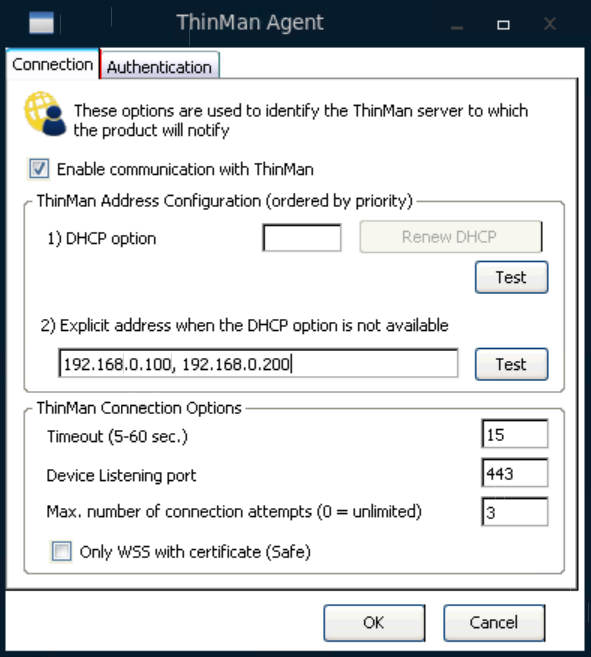
Enter the hostnames or IP Addresses of the Primary and Secondary ThinMan Server separated by a comma (,).
Example: PrimaryThinManServer,PraimSecondaryServer
Restart the thin client to apply the settings.
Tip:
Use hostnames instead of IP addresses for easier maintenance. Hostnames allow all devices to redirect to a new ThinMan Server without requiring manual reconfiguration.
¶ Agile
Read the available documentation at Agile: Configuring the ThinMan Settings.