Setup ThinMan Address on Thin Client
Read also how to setup ThinMan address on Thin Clients.
Note: DHCP Option type
In the multitude of available O.S. for DHCP Server, Option 163 can be inserted using many types of values. Praim products always expect the DHCP Option 163 as a string. Depending on the DHCP Server, enter the type of the option as "String" or "ascii" or similar other types. DO NOT USE OTHER TYPES FOR THE OPTION (e.g., Hex, Number, Integer or other, that are different from possibly string types).
Note on ThinMan listening port
If you changed the listening port of the ThinMan Server using the ThinMan Server Menu, then a DHCP Option is the better way to distribute this information to the devices. In the string add the port separated from the hostname by ":". E.g., the string could be "PRAIMSERVER:1443" or "thinman.contoso.com:1500" etc. (the number after the ":", in this case, 1443 or 1500, is the port reconfigured on the ThinMan Server). See also How to Setup ThinMan Address on Thin Client.
¶ Example for Windows 2019 DHCP Server
This example shows how to configure the DHCP Option 163 in a Windows 2019 O.S. Other O.S. may differ in menus and options. Please refer to the O.S. documentation for a correct procedure. By clicking on "Start", select "Administrative Tools" (if present) and press "DHCP".
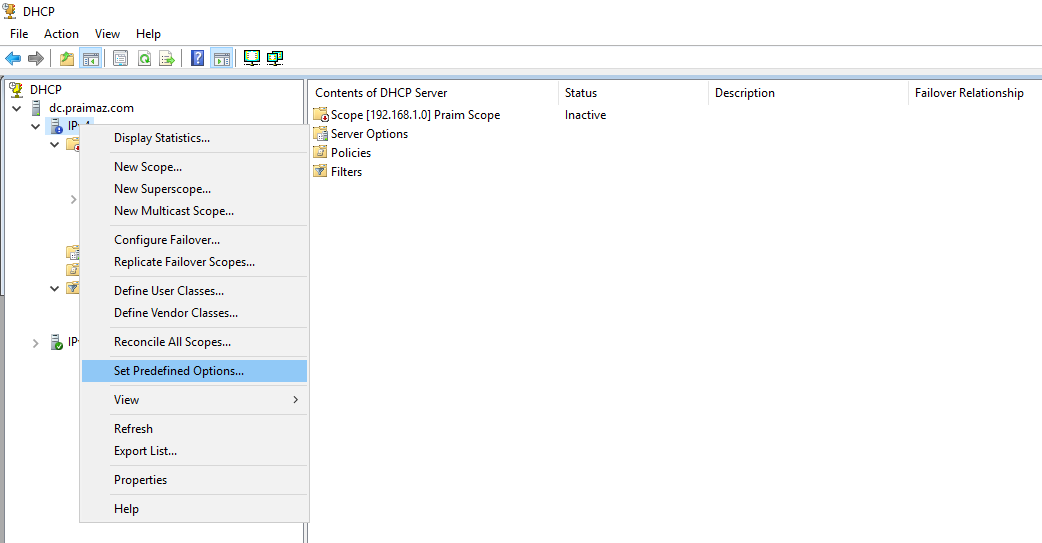
Right-click on the DHCP Server and select "Set Predefined Options..." menu.
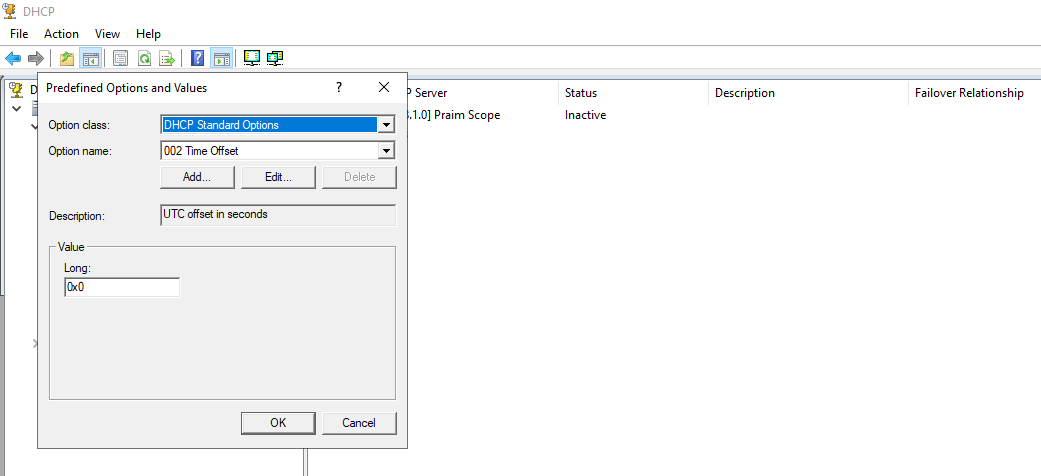
Click on "Add...".
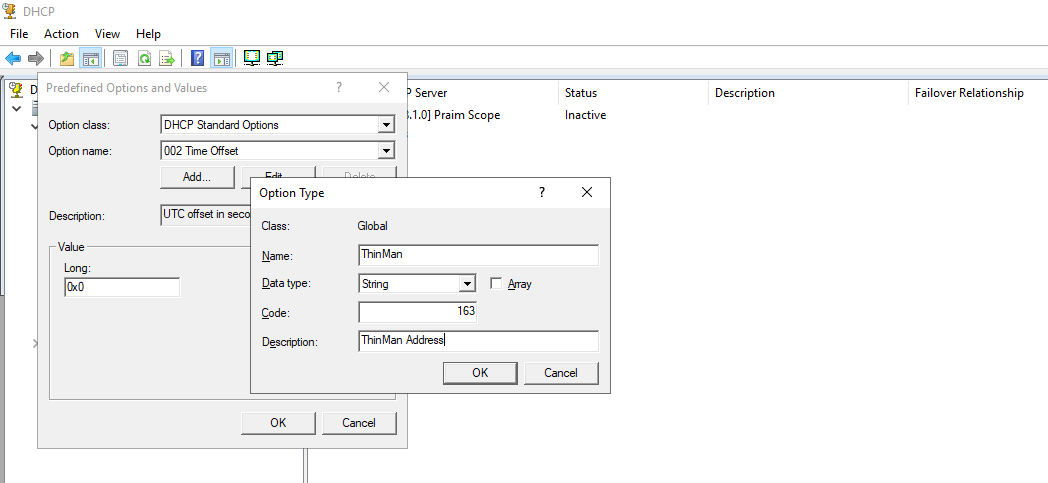
Enter "ThinMan" in the Name field, select "String" from the Data Type pull-down menu, enter "163" in the Code field and type "ThinMan Address" in the Description field. Click on "OK" to proceed.
The new option is created; you can now find it using the Option Name pull-down menu. Click on "OK" to continue.
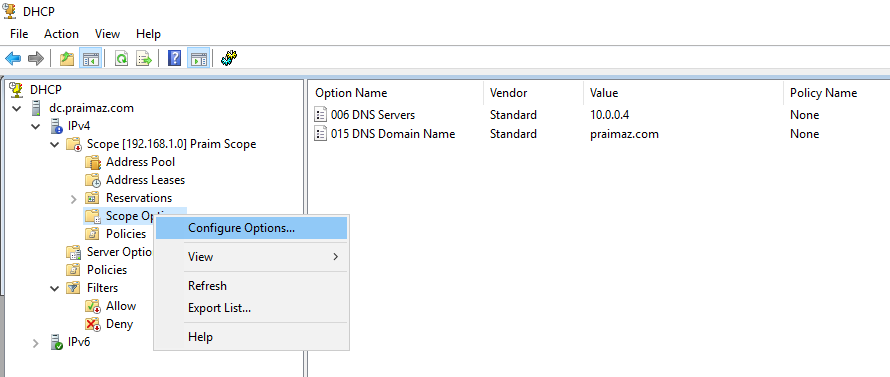
By selecting the scope and clicking on the "+" besides the name, you see a submenu.
Right-click on "Scope Options" and select "Configure Options" menu.

Scroll down the "Available Option" and tick the "163 ThinMan" option.
Enter the FQDN hostname or the IP Address of ThinMan Server in the "String Value" field.
Click on "OK" to continue.
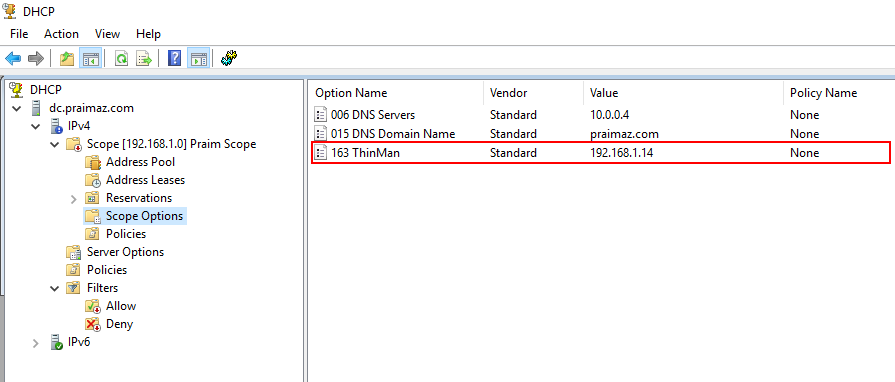
If the operation is successful, the option appears in the list.
Close the window.
¶ Example for Cisco Router
This sample is just a possible configuration that you can use in the configuration file for the DHCP Server available in a Cisco router. In the configuration file, add the line in red with the correct value for your installation (assign the value of the option to a pool). The value of the sample below is an IP Address, but it could also be an FQDN hostname. Other lines are just example DO NOT USE them in your router configuration.
-----------------------------------------------------
!
ip dhcp pool LAN
network 192.168.1.0 255.255.255.0
dns-server 192.168.1.1 192.168.1.2
default-router 192.168.1.254
option 163 ascii 192.168.1.80
!
-----------------------------------------------------
¶ Example for the Draytek Vigor Router/Firewall
This chapter is an example of how to configure the DHCP option 163 in a Draytek Vigor Router/Firewall.
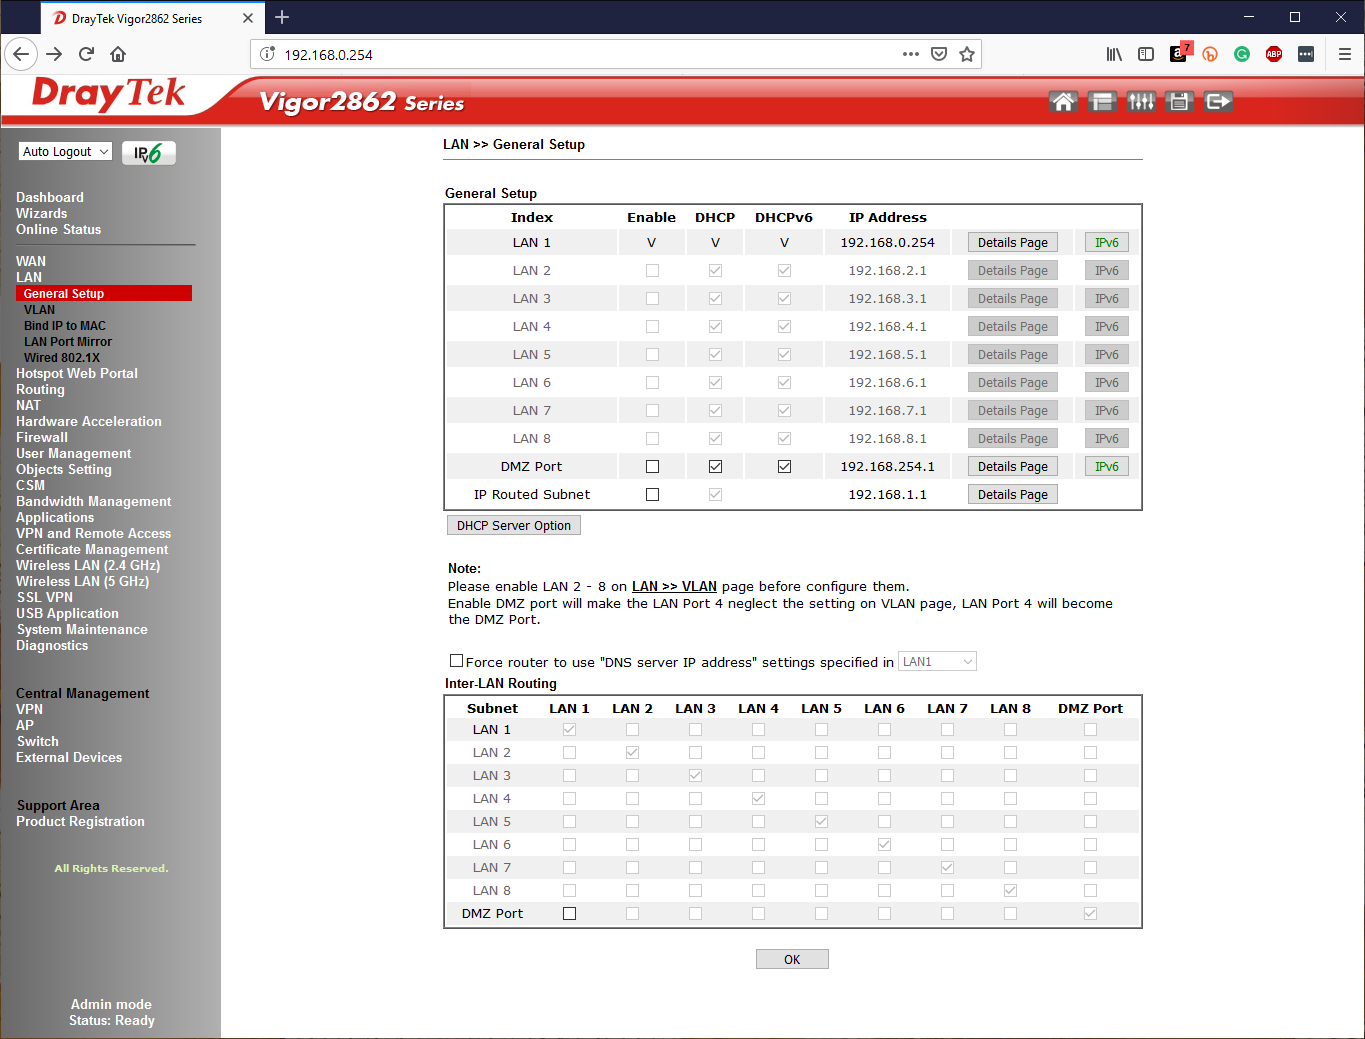
From the LAN -> General Setup page, select the DHCP Server Option button.

Select the LAN which will provide the response to the Praim request, then add the Option Number of 163 and the ThinMan server IP address or DNS name in the Data field (Data Type MUST be "ASCII Character").