Requisites
To be able to create a User Policy, it is necessary to have the Feature Pack User+. For more information, read License Versions Comparison.
Preliminary Operations
Before proceeding, make sure you have created a Connections Profile for Users. A fast way to create a Configuration Profile together with a Device Policy is to use the One Click Policy Creation.
¶ User Policy
A Users Policy is a rule that associates a Connections Profile for Users to users/groups that belong to an LDAP Server or ThinMan Local Users.
A Users Policy is activated using the ThinMan Login or the ThinMan Smart Identity in a Devices Policy.


Roaming Profile
Users Policies are helpful on Roaming Profile.
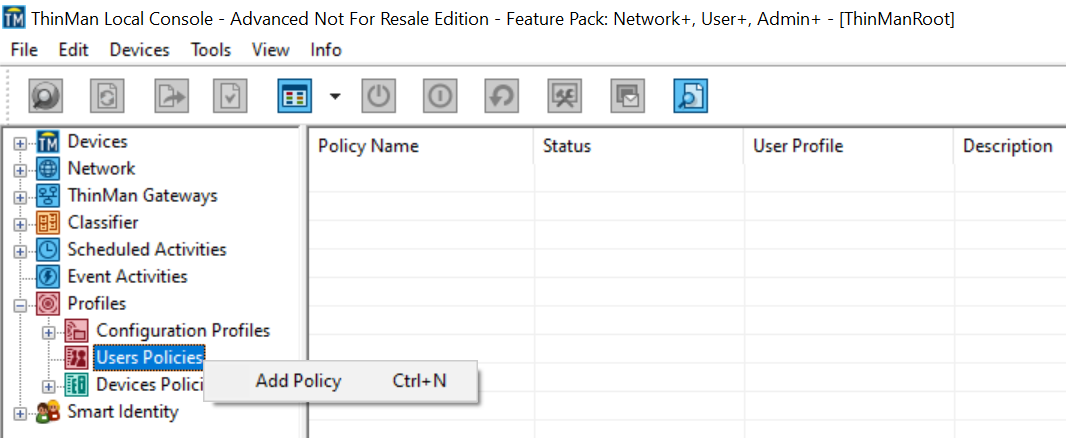
¶ Add a Users Policy
Open the Profile Manager tree.
To add a new Users Policy right click on the subtree, select Add Policy and follow the steps in the new window
A new window will appear.
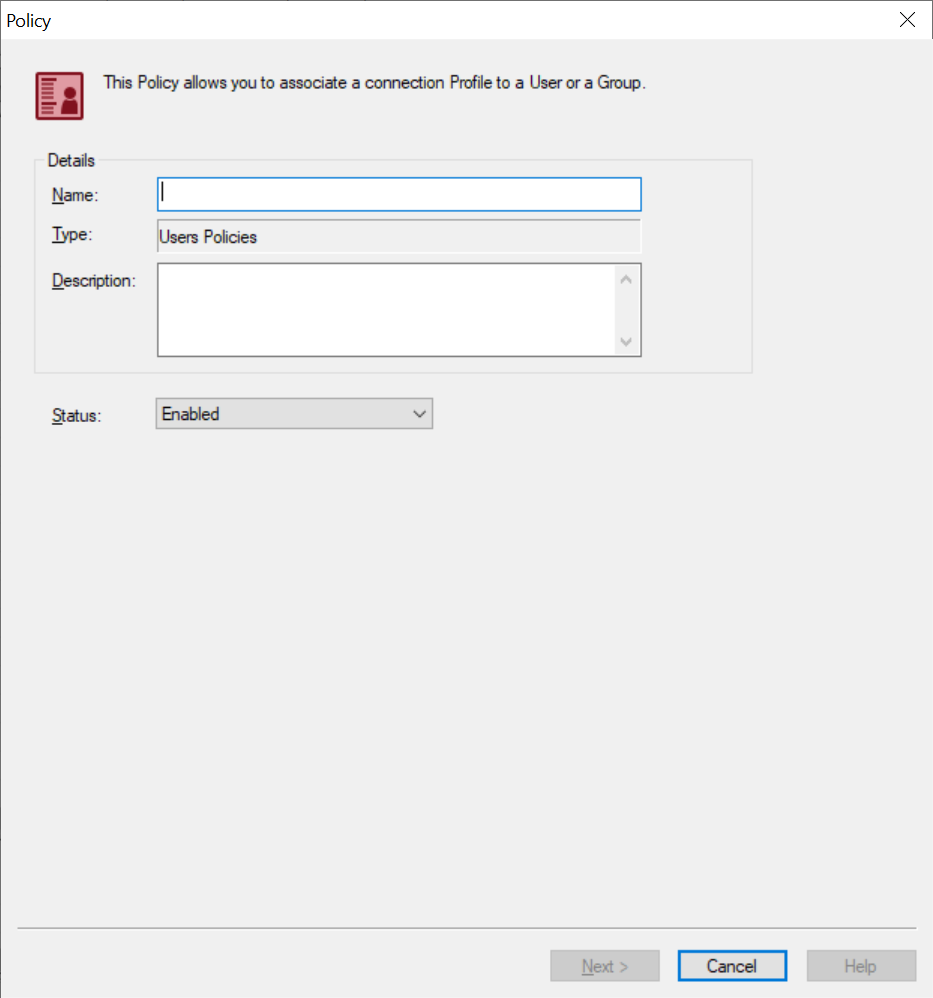
Type the name of the policy and a description (optional).
The policy will be created by default with the status Enabled (the policy is activated after creation) but you can change it to Disabled. ThinMan will evaluate only enabled policies.
Click on Next to proceed.

Select the User Profile that will be associated to this policy.
Click on Next to continue.
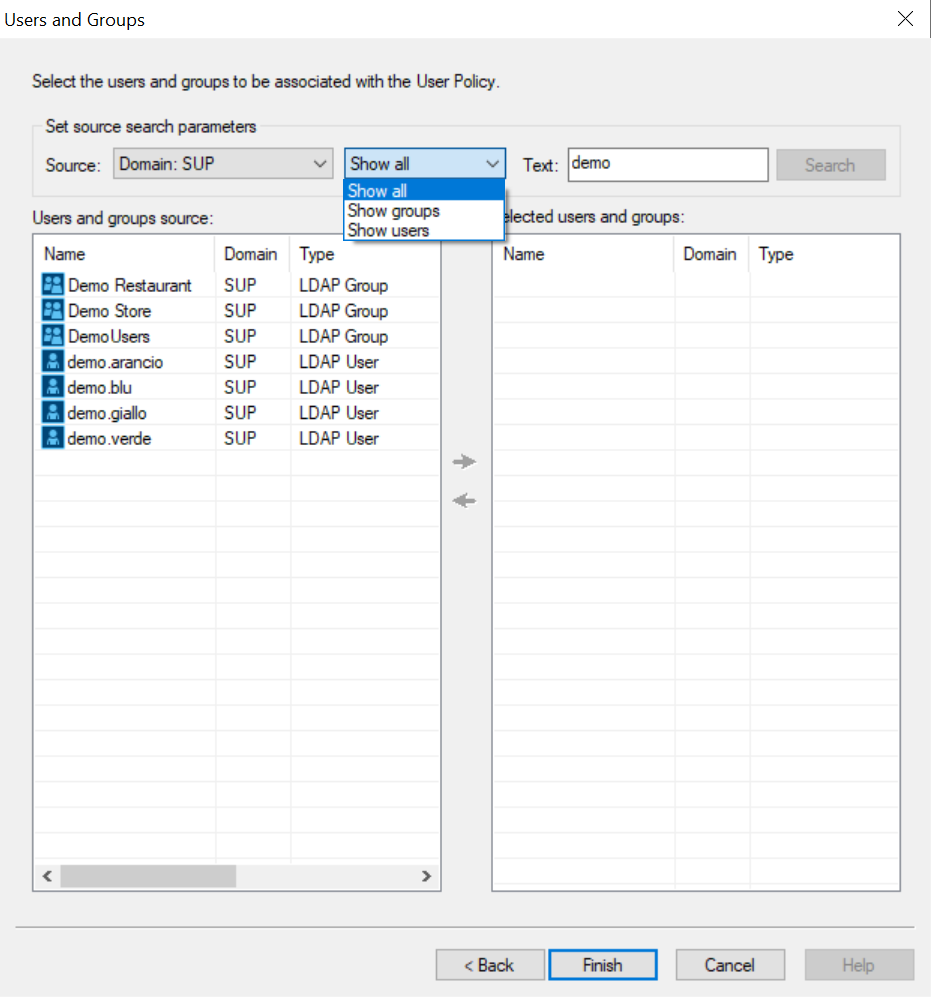
Select the users and groups that will be associated to this policy. I.e. the users for whom the previously selected User profile will be applied.
Select as Source, Domain: LDAP Server or ThinMan Local User. Then, select whether you want to Show only users, groups or both of them. If you know the name or part of the name of the group/users you are looking for, write it on the textbox. Then proceed by clicking on Search and you will see the result on the left side list. Click on -> button to add users or groups to the list on the right side or click on <- button to remove users or groups from the list.
Click on Finish to create and save the policy.
Tip
It is preferable to associate groups than users. In this way you can assign a connections profile for users by simply moving, on LDAP Server, the user from one group to another.
Finally click on Finish. A new Users Policy is created in the tree of Users Policies. You can view the Policy name, Status and Description on the Details Area.

Selecting the created Users Policy will show information about it, in particular the associated Connections Profile for User and the associated users and groups.
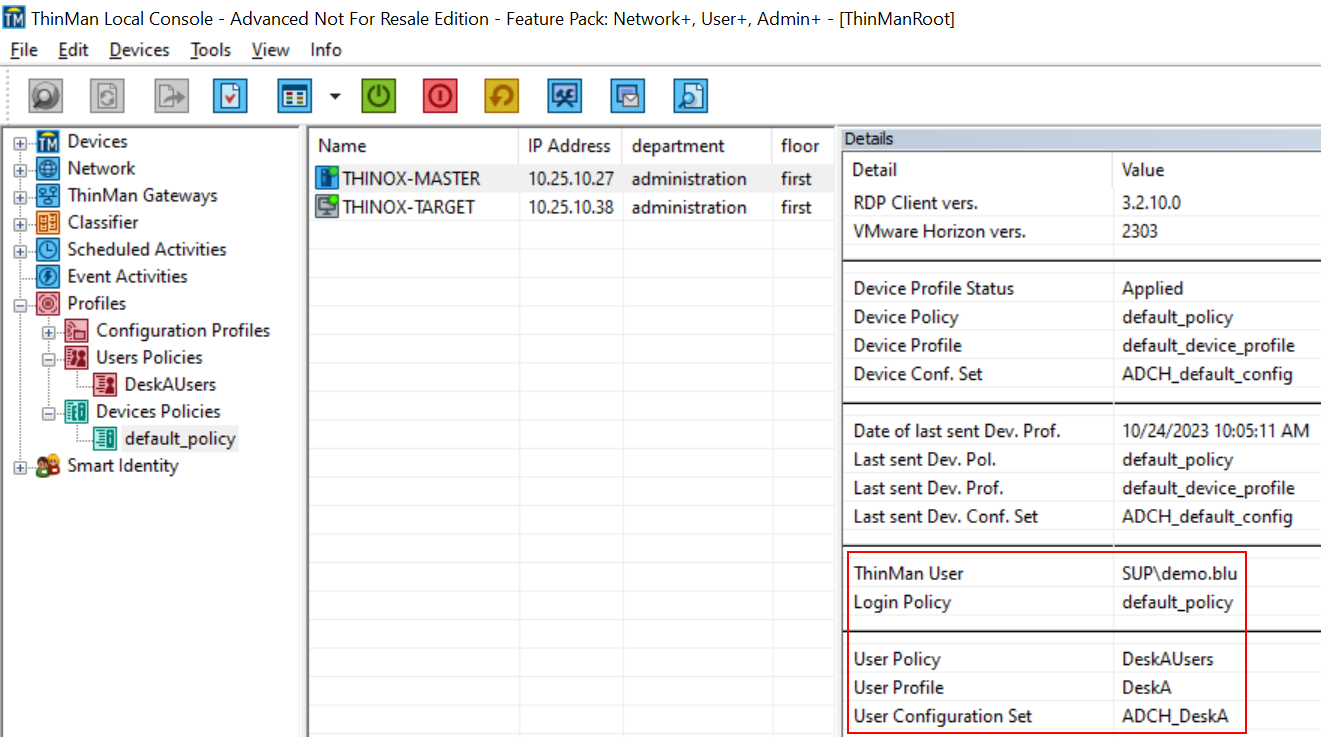
¶ Attributes for devices related to Users Policy
Once the user logs in through either ThinMan Login or ThinMan Smart Identity, the attribute values explained below will be shown on the Details area.
| ThinMan User | The logged user. |
| Login Policy | The name of the device policy where the ThinMan Login/ThinMan Smart Identity has been enabled |
| User Policy | The name of the User Policy associated to the logged user. |
| User Profile | The name of the User Profile applied on the endpoint. |
| User Configuration Set | The name of the Configuration Set applied on the endpoint. |
¶ Contextual menu of a Users Policy
Right click on a Users Policy to access its contextual menu.
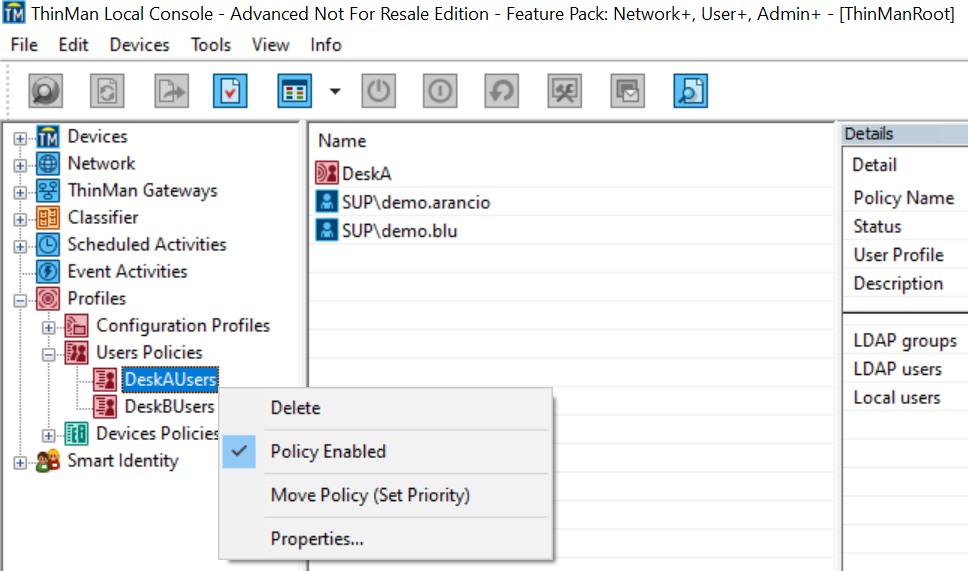
¶ Policy Enabled
The thick besides Policy Enabled indicates that the Device Policy is currently enabled. To disable it, click on that option.
¶ Move Policy
Users Policies can be ordered using this functionality. In case a user has been associated to more than one Users Policy (e.g. the user could belong to one more than LDAP group), ThinMan will apply the user policy with major priority. I.e. the first one in the users policies tree.
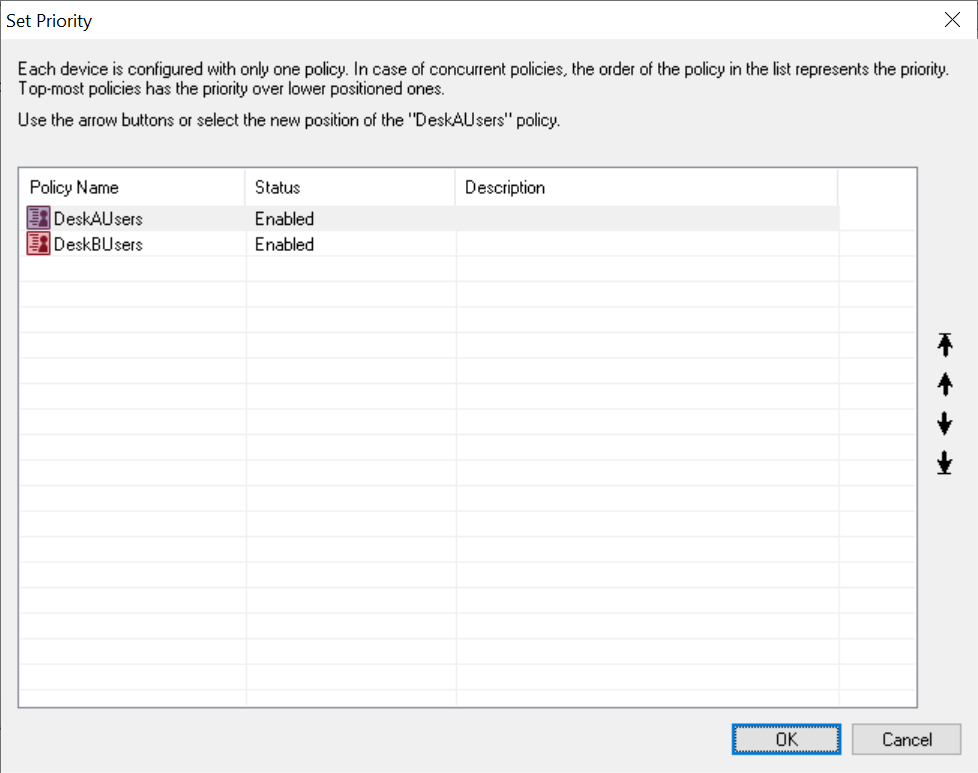
From the Users Policies tree, select the users policy you want to change priority and move it by clicking on:
- Move home: it moves the policy to the first place.
- Move up: it moves the policy one place up.
- Move down: it moves the policy one place down.
- Move end: it moves the policy to the last place.
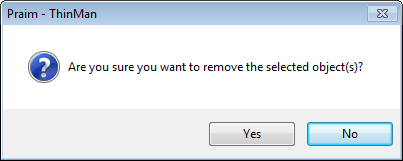
¶ Delete
If you want to delete a Users Policy, select it from the Users Policies tree and click on the Delete option.
¶ Properties
From the Users Policies tree, select the device policy and click on Properties....
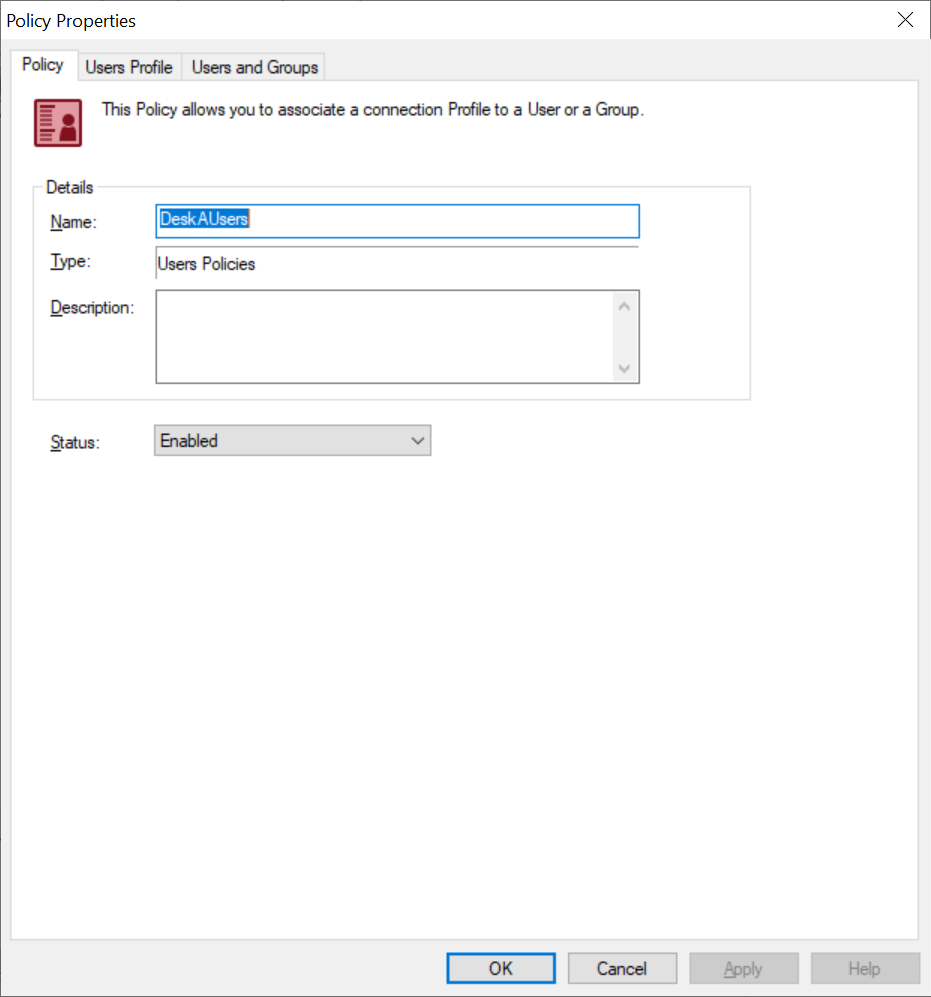
In the first tab you may change Name, Description and Status of the Users Policy . In other tabs you may change all the parameters discussed in the previous chapters.
Clicking on OK will save the changed values.