Requisites
To be able to create a User Profile, it is necessary to have the Feature Pack User+. For more information, read License Versions Comparison.
Preliminary Operations
Before proceeding, we suggest to:
- Configure the resources (connections) on a device.
- From ThinMan, receive the offline configuration of the device and save it as a template.
¶ Configuration Set
A configuration set is a group of configuration parameters of a device.
In order to create a configuration set, you need to Create a Template.
A configuration set is part of a Connections Profile for Users. Depending on how it has been created, a configuration set can be applicable to devices belonging to a certain family or to a certain model:
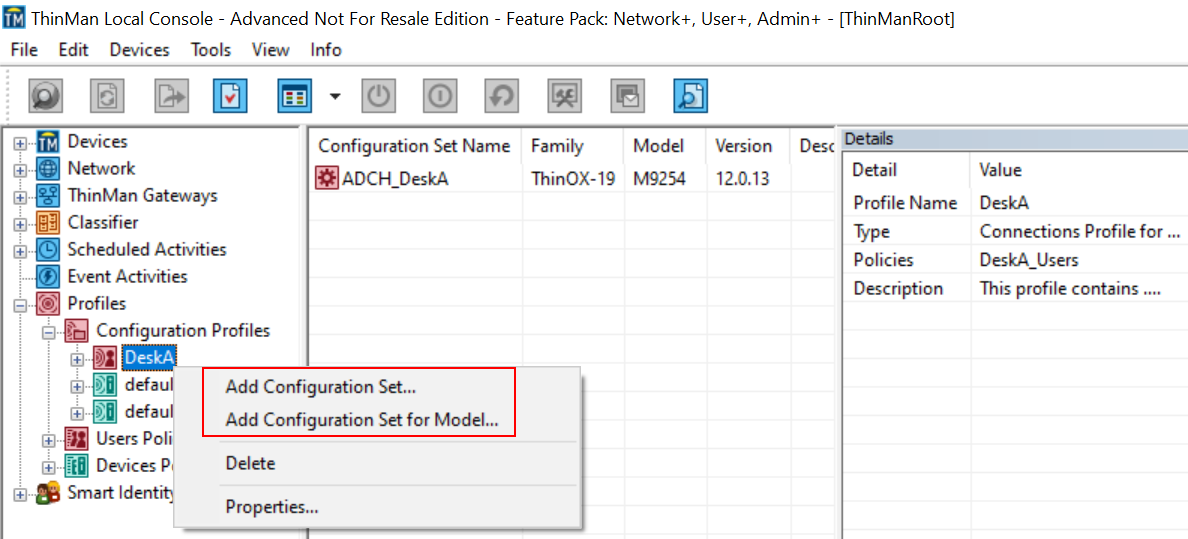
- Configuration Set (for Family): right after you create a Connections profile for Users, it will be asked to add a configuration set. In this case, the configuration set will be applicable to all the devices belonging to the same family. You can also right click on a Connections profile for Users and select the option Add Configuration Set (see image below)
- Configuration Set for Model: right click on a Connections profile for Users and select the option Add Configuration Set for Model. In this case, the configuration set will be applicable to all the devices belonging to the same model.
¶ Connections Profile for Users
The Connections Profile for Users (also called User Profile) is loaded after the user has logged in either through the ThinMan Login or through ThinMan Smart Identity. A User Profile contains all the Connections(resources) configured on a device.
A User Profile is associated to specific LDAP users/groups through a Users Policy.
After the user logs in, ThinMan verifies whether the user is associated to a Users Policy. Provided that is the case, ThinMan will send the user profile associated to the logged user.
Agile Users Profile
A users profile compatible with Agile devices includes all the connections (resources) and almost all User Settings but the date & time.
Tip
A fast way to create a Users Profile together with a Users Policy is to use the One Click Policy Creation.
¶ Creating a Connections Profile for Users
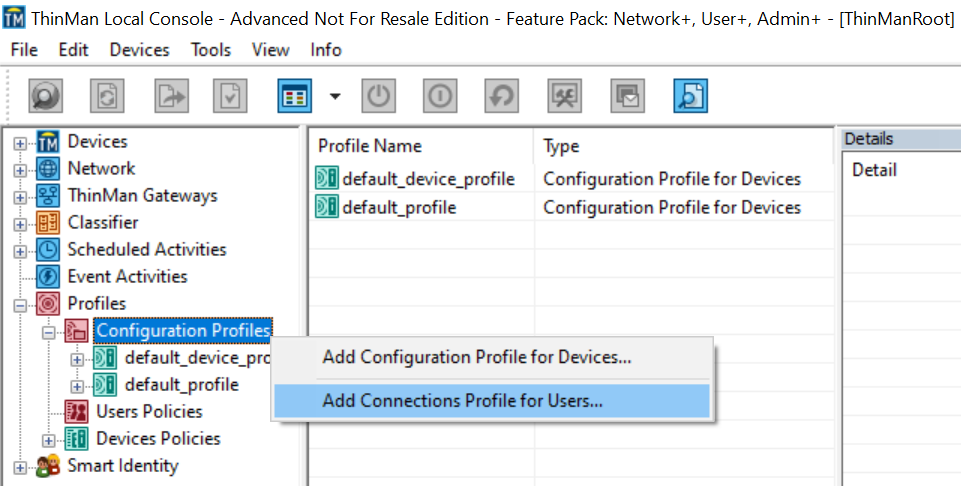
To create a Connections Profile for User right-click on Configuration Profiles in the Profiles tree and select Add Connections Profile for Users....
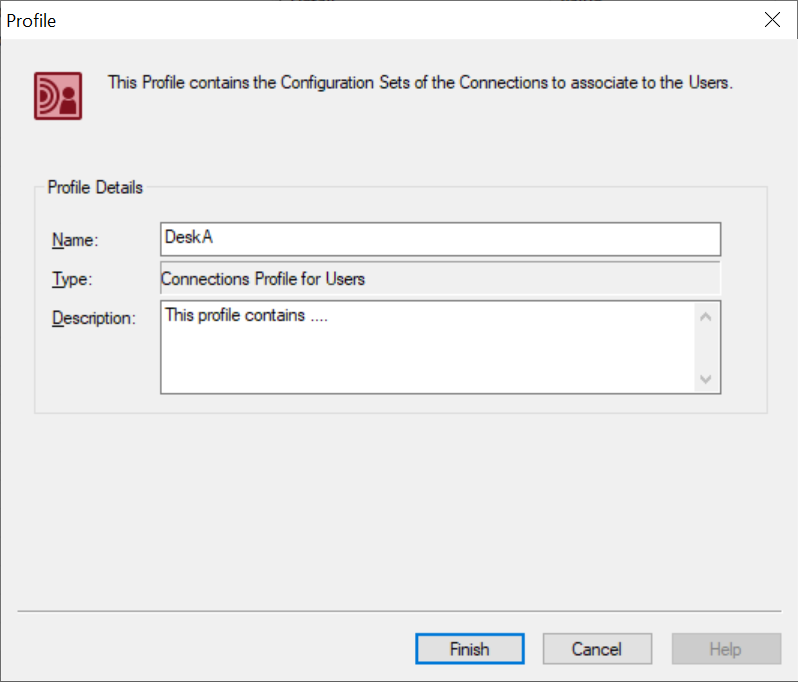
Enter the new profile name and type an optional description to complete the details. Click on Finish to finalize the operation.
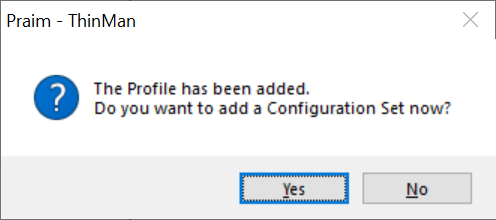
Once the profile is created you will be asked to add a Configuration Set. Click on Yes to confirm.
From the Template Repository select a Template and click on OK. This operation will copy the connections of the Template into the Configuration Set. This is not a link to the template file, so if you modify the Template the Configuration Set will not change. You will have to delete the Configuration Set and re-import the modified Template to the Configuration Set or you can directly edit the Configuration Set (see steps below).
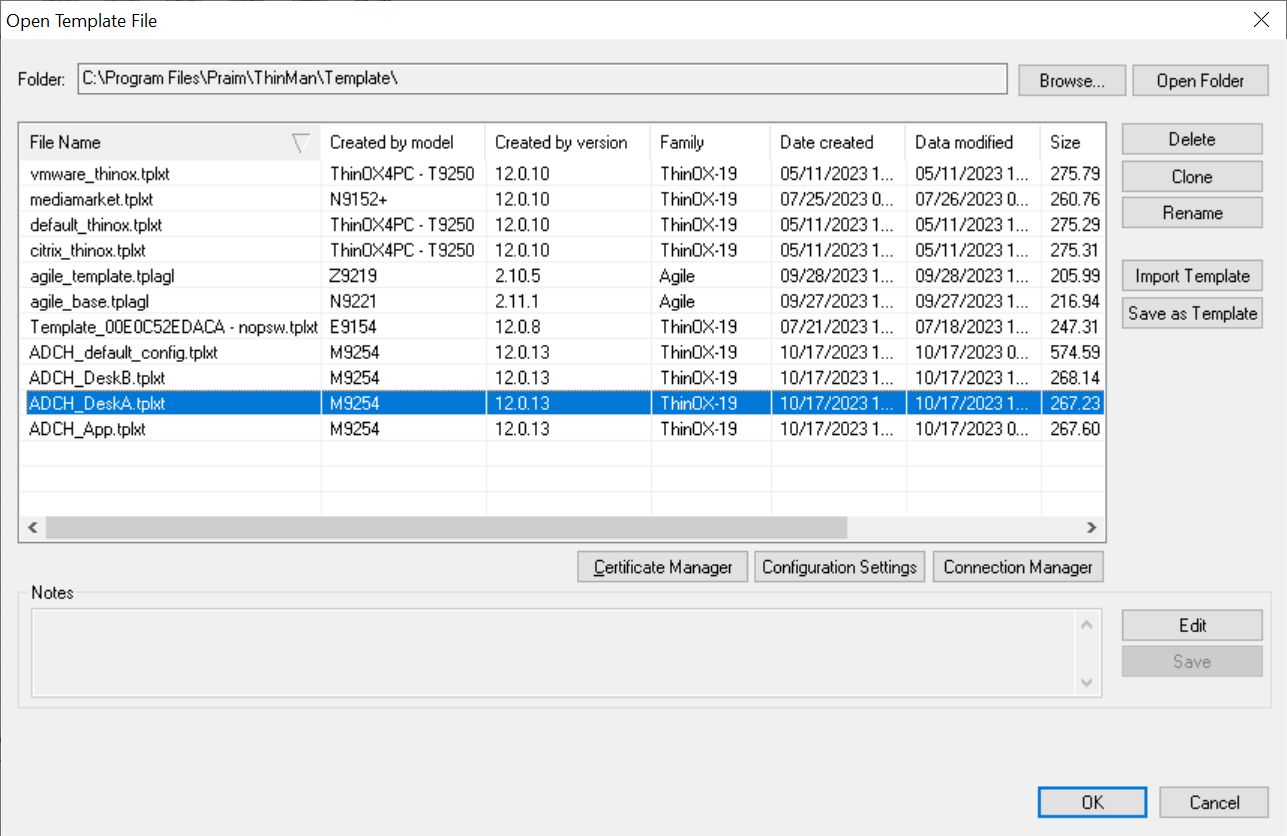
The new window will indicate the name and the description of the imported template. These values can be changed. As said before, they are only a reminder as the template is not linked to the Configuration Set.
Click on Next to continue.

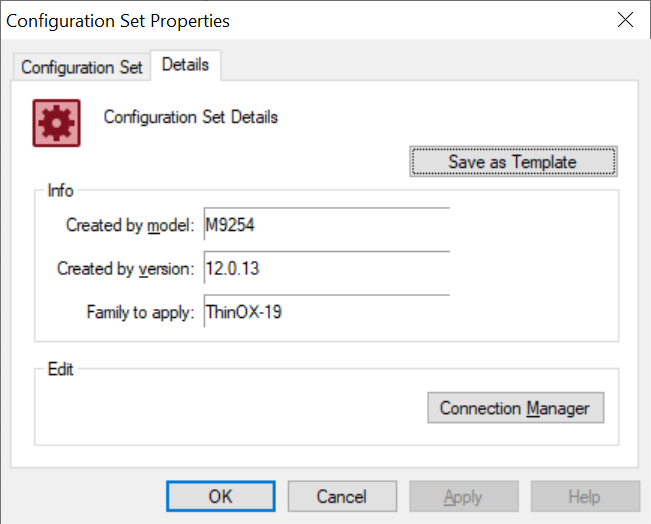
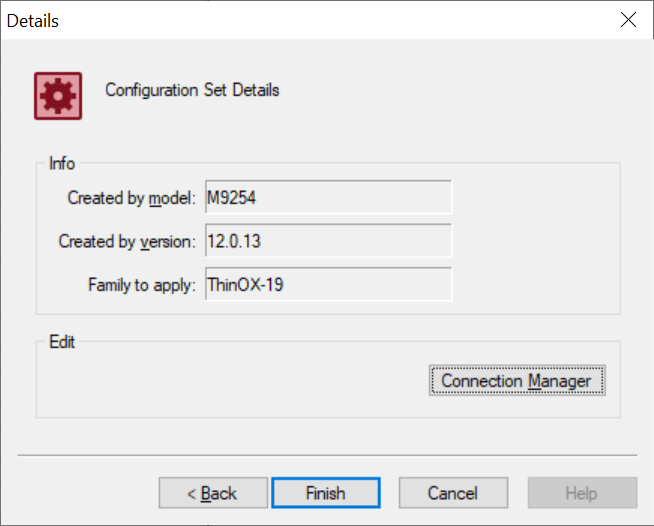
The last window will report the device model, firmware version and family of the imported Template.
From this window it is possible to directly change the Configuration Set by clicking on the button Connection Manager.
Click on Finish to complete and save the Connections Profile for Users.
If the operation is successful a new Connections Profile for Users is created in the tree of Configuration Profiles.
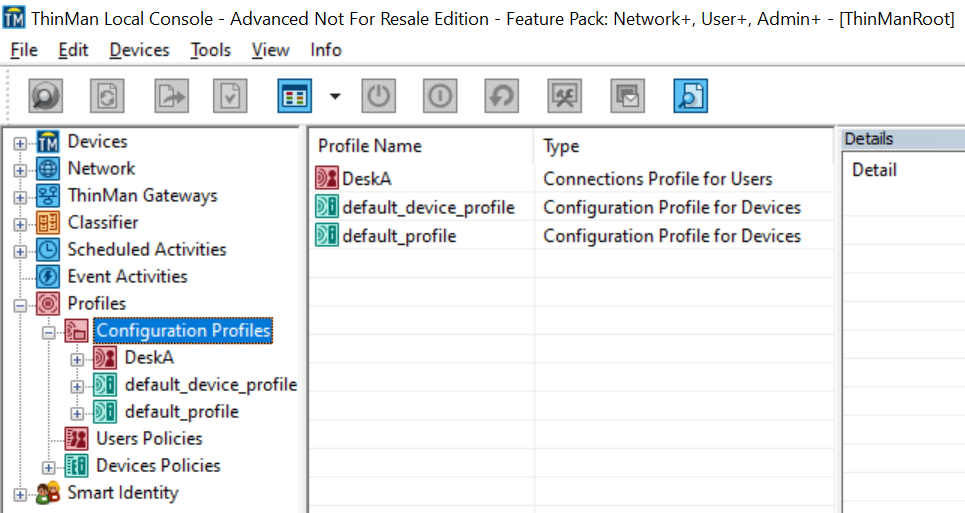
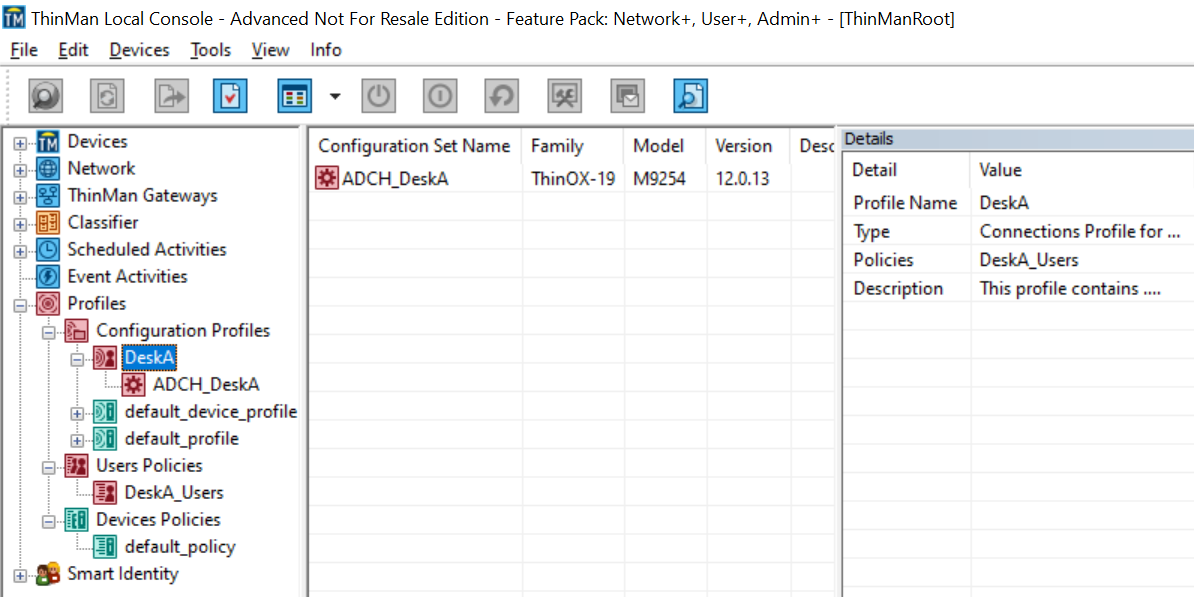
By selecting the created Connections Profile for User and clicking on the + besides the name, you will see the Configuration Set. On the Details area, it is shown the Profile Name, Type, associated Users Policies and Description.
¶ Deleting a Connections Profile for Users
A Connections Profile for Users can be deleted by right-clicking on it and selecting the Delete option from the menu.
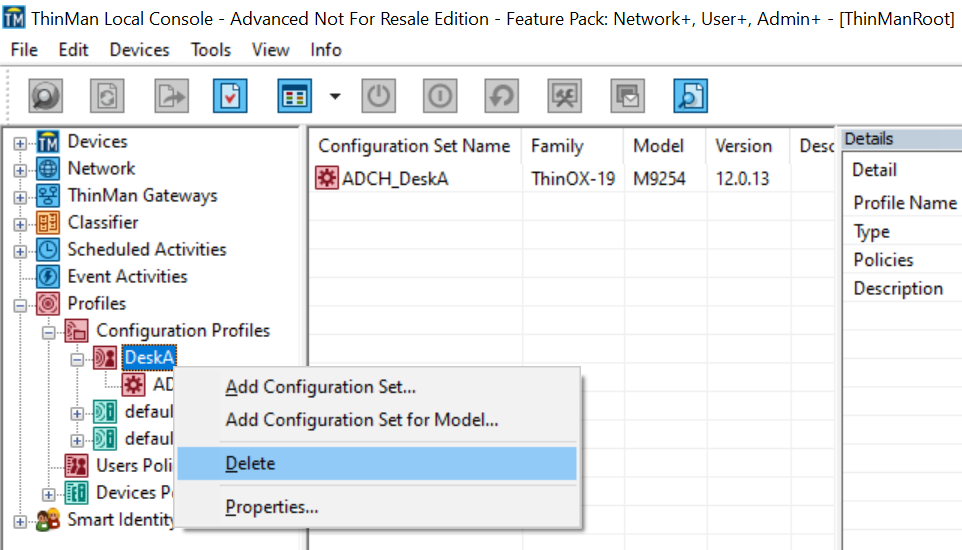
Click on Yes to confirm or No to quit.
¶ Modifying a Connections Profile for Users
A Connections Profile for Users can be modified by right-clicking on it and selecting the Properties... option. It will be shown a window to change Name and Description of the Connections Profile for Users.
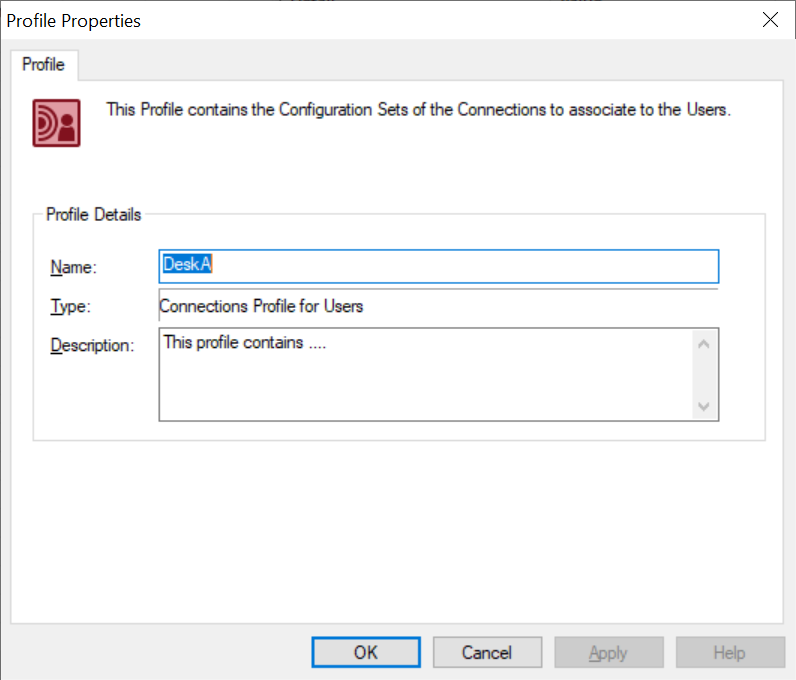
Click OK to save the changed values.
¶ Deleting a Configuration Set
A Configuration Set can be deleted by right-clicking on it and selecting the delete option from the menu.
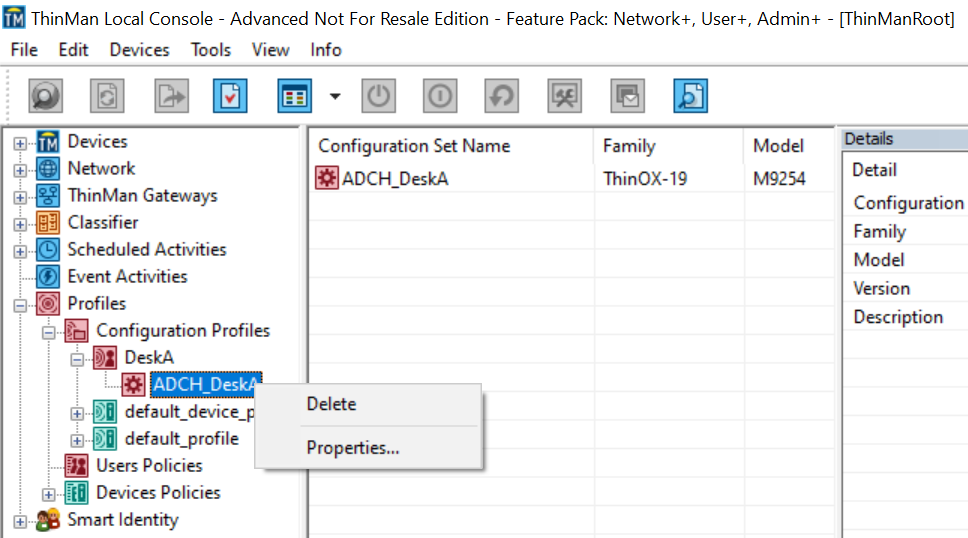
Click on Yes to confirm the operation or No to quit.
¶ Modifying a Configuration Set
A Configuration Set can be modified by right-clicking on it and selecting the Properties....
On the first tab, Configuration Set, it is possible to change the Name and Description of the Configuration Set.
On the Details tab, it is possible to save the Configuration Set as a Template. Also, for Configuration Sets compatible with a ThinOX, it is possible to change the connections through the Connection Manager button.