This procedure will delete the hard disk on your PC
Remind that installing ThinOX4PC - T9050 on a device will totally delete the hard disk on the device.Remind that you can test the ThinOX4PC - T9050 environment without deleting the hard disk of the device by using the ThinOX4PC - T9050 Live version (see Create a ThinOX4PC - T9050 Live USB Key).
There are basically 2 installation methods:
- Using a ThinOX4PC-T9050 Live USB key
- Using the Praim Toolkit
¶ Using a ThinOX4PC-T9050 Live USB Key
Use this method in order to test ThinOX4PC - T9050 hardware compatibility to then proceed with the installation.
- Create a ThinOX4PC - T9050 Live USB Key.
- Boot the device where you want to install ThinOX4PC-T9050.
The device will start with the ThinOX4PC O.S. as shown in the image below.
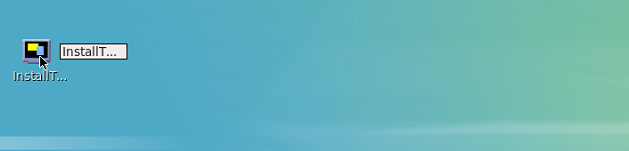
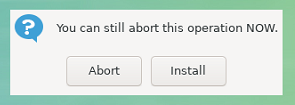
Double click on the desktop icon to proceed with the installation. The message below will be shown. Click on Yes to proceed.

You will need to confirm the operation, click on Install to proceed.
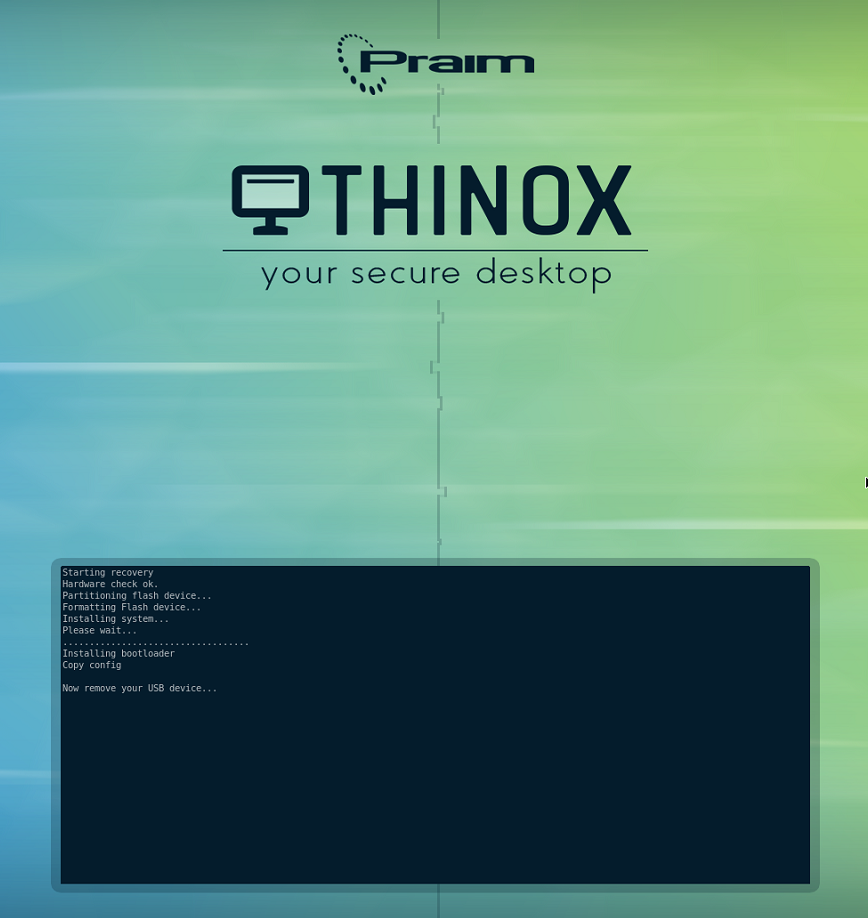
The installing procedure will start. See images below.
The device will restart with the ThinOX4PC(T9050) O.S. installed on it. Proceed with the initial setup (see image below).
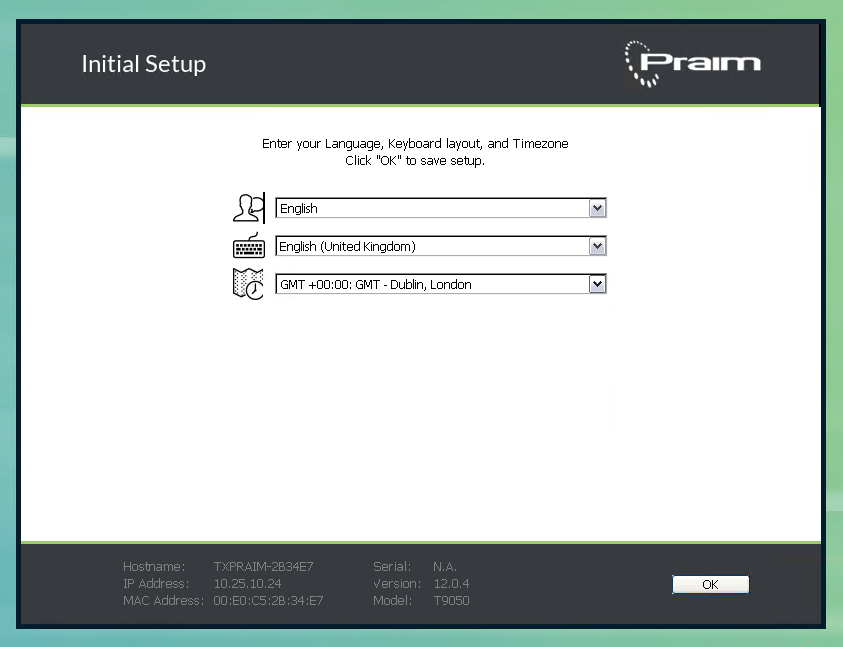
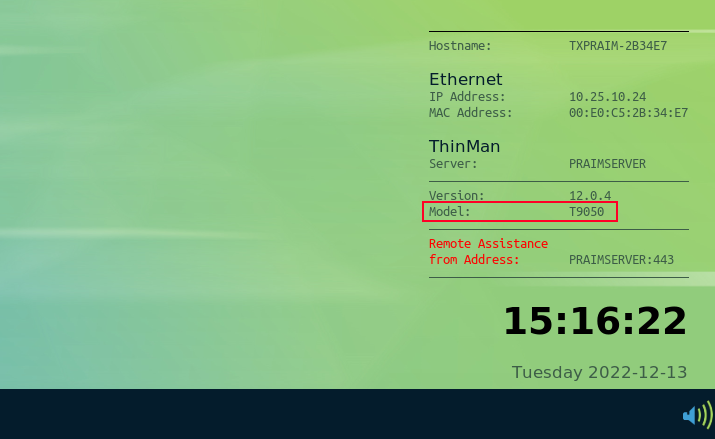
Notice on the Desktop the device model is T9050.
Booting from USB Key For more information about how to boot from USB Key on Praim Thin Clients read:
- Booting from USB Key on Domino models
- Booting from USB Key on Domino Next models
- Booting from USB Key on Flexi (LV15ADA)
- Booting from USB Key on Flexi (SiComputer)
- Booting from USB Key for D9054, U9xx4, A9xx4 and N9xxx thin client model
- Booting from USB Key on U9xxx and A9xxx
- Booting from USB Key on generic Thin Client model
¶ Using the Praim Toolkit
¶ Preliminary Operation
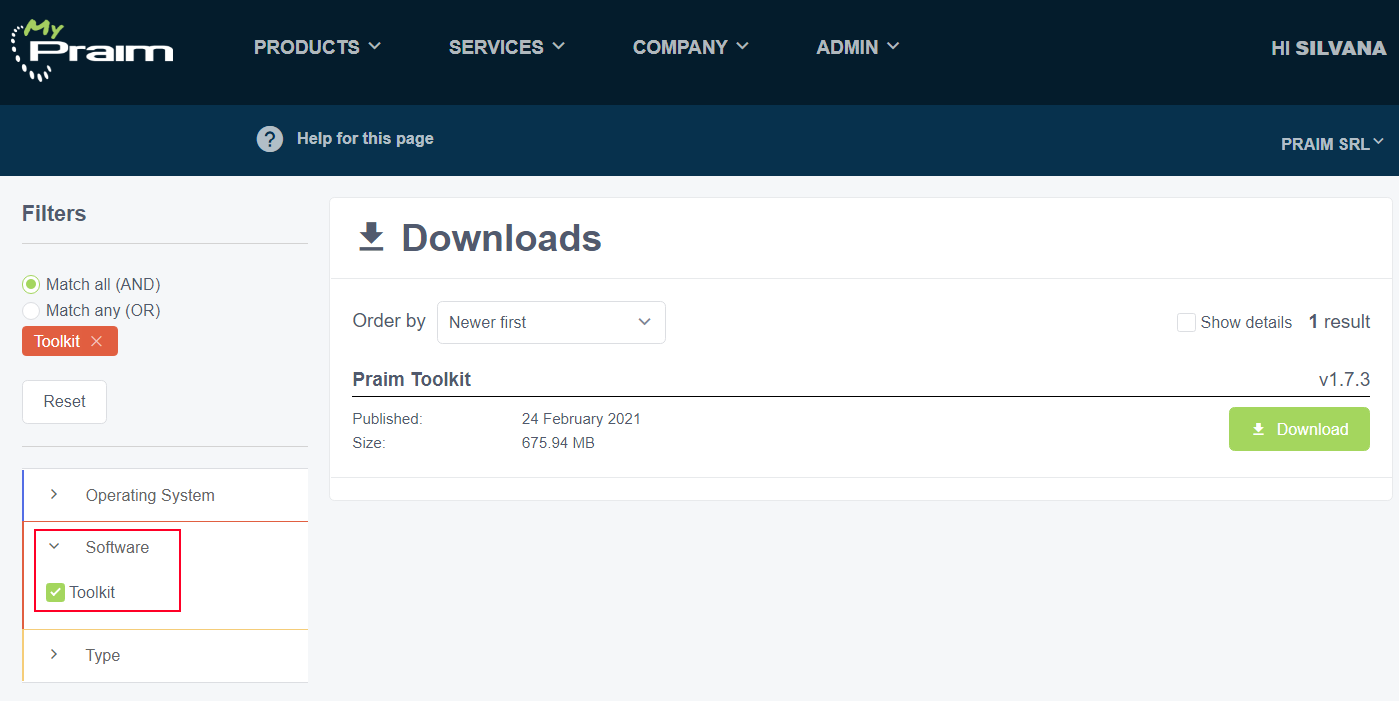
- Download from MyPraim:
- Praim Toolkit: go to the menu Products -> Download, on the Software section at the left side select toolkit (See here)
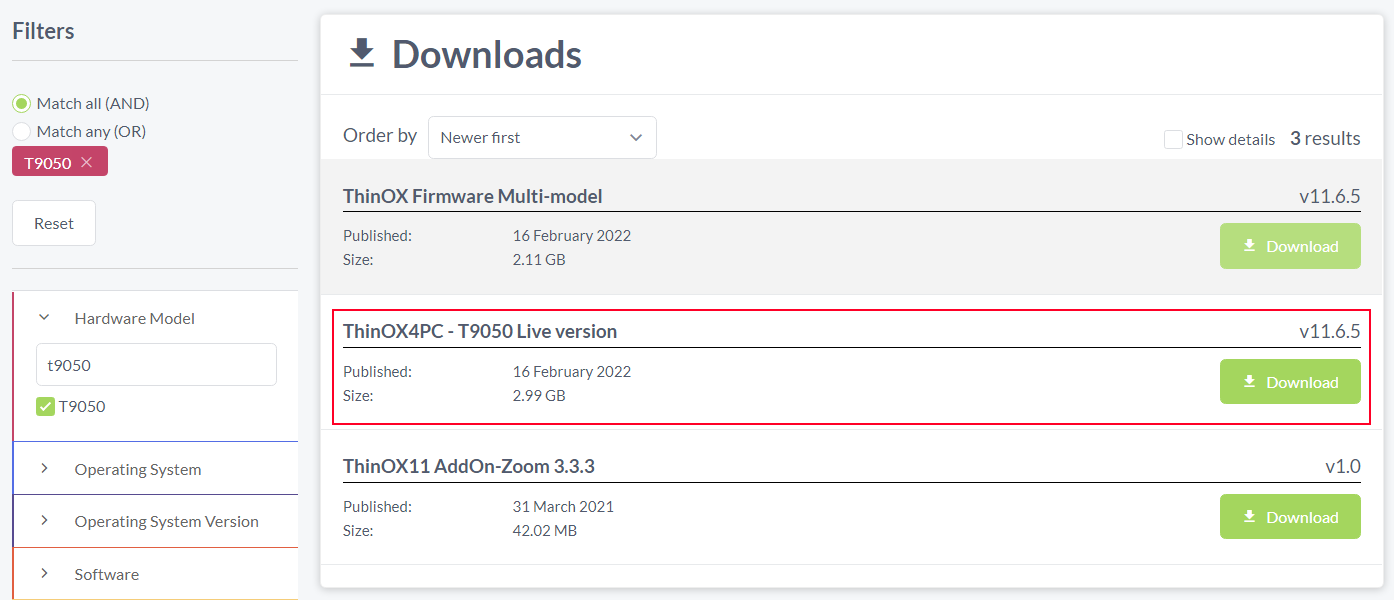
- ThinOX4PC: go to the menu Products -> Download, on the Hardware Model section at the left side select T9050 (See here). Do not download the LIVE version.
- Install Praim Toolkit on a computer as explained in here
¶ Creating the Installation USB Key using Praim Toolkit
USB Key Requirements Use a USB key of at least 4 GB size, supporting USB 2.0 and NOT USB 3.0. Remind that all the data on the USB Key will be lost.
Use USB Pen drive of known manufacturer and of proven quality level to avoid errors during the installation phase.
For more details about usupported USB Pen Drive see the following link Praim Toolkit Compability Matrix - Unsupported USB pen drive list.
Create a USB Key following the procedure that you will find at the chapter How to create Recovery USB Key for ThinOX. When prompted by the software to select the firmware file, select the ThinOX4PC file downloaded on the Preliminary Operation section.
¶ Using the Installation USB Key on a device
The restore procedure will start immediately and the progress status is shown on the monitor.
DO NOT turn off the device during this phase.
At the end of the process, a message will indicate “Now remove your USB device”.
Remove the USB Key from the device and it will reboot with the ThinOX4PC operating system.
Once started, the system has to be licensed following this procedure: Activate and license ThinOX4PC (read accurately the documentation, if the network is configured correctly the license could be obtained automatically from the ThinMan Server).
For more information on ThinOX4PC configuration and use, read the generic ThinOX User Guide.