¶ Initial Setup
After the first boot, it is shown the Initial Setup, a Wizard that allows configuring:
- The language of the user interface.
- The language of the keyboard layout.
- The time-zone.
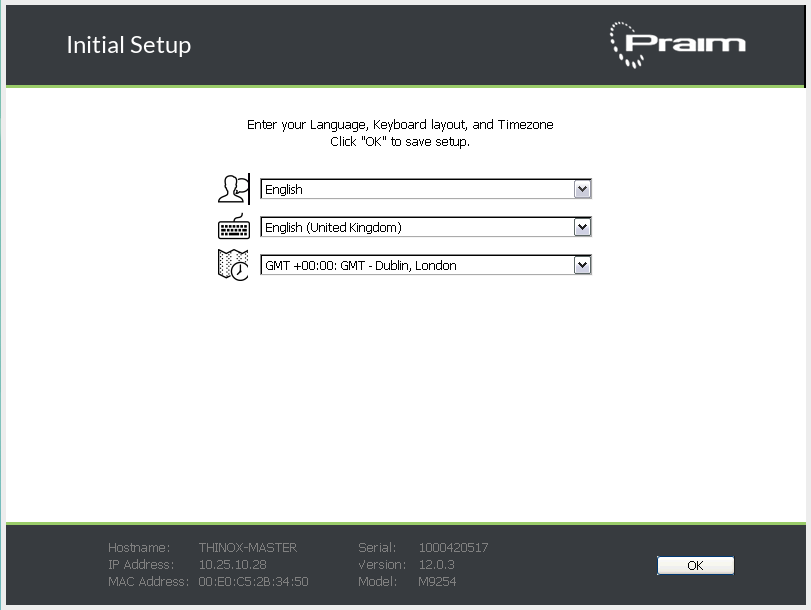
Once the specific parameters are configured you can click on OK to save the configuration.
¶ Running Environment
Once the device is powered on, the device will show the Desktop Mode User Interface.
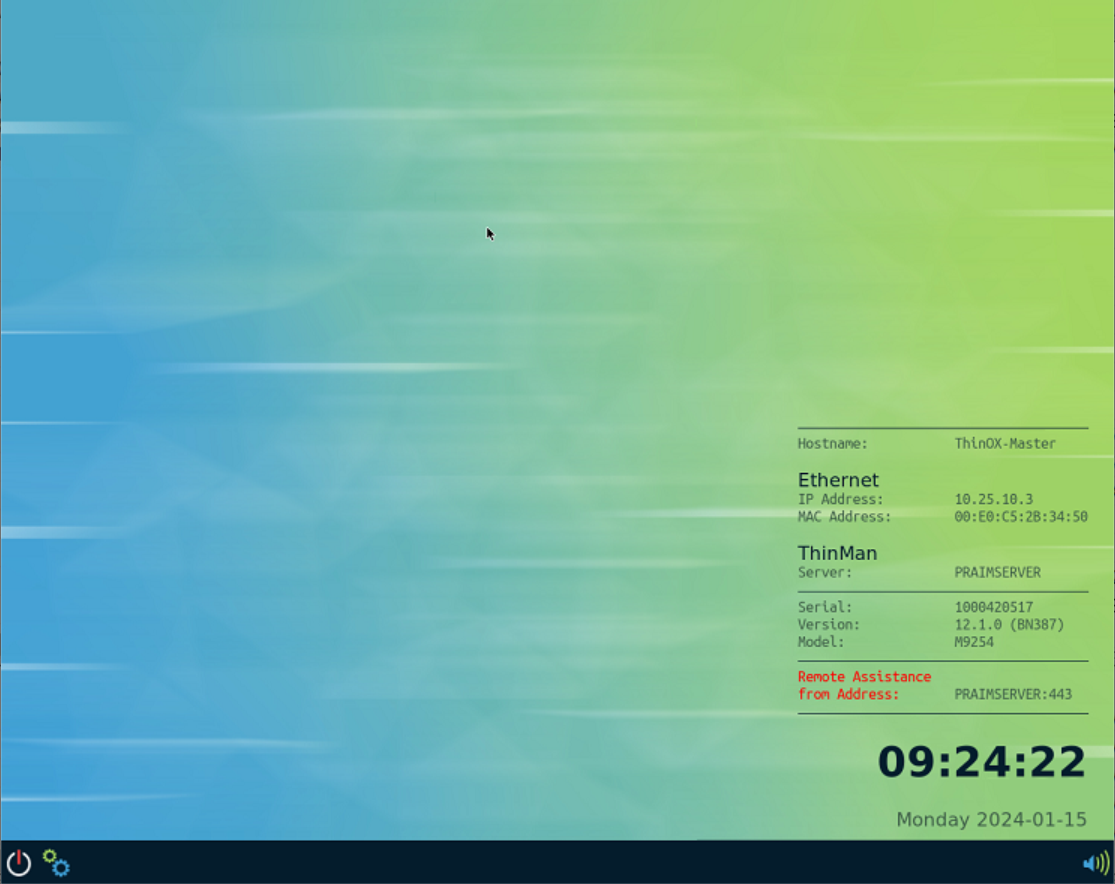
Fore more information, read ThinOX Running Environment.
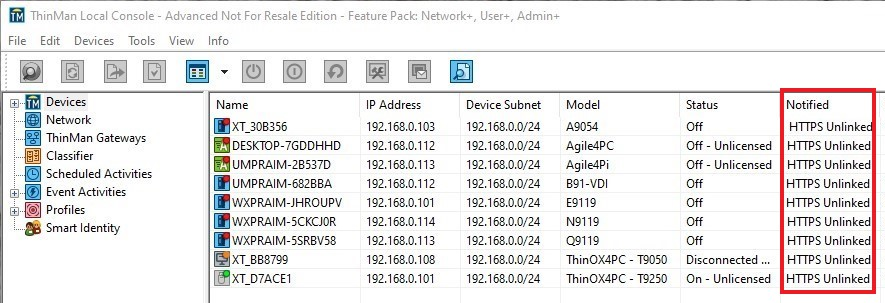
¶ Verify Communication with ThinMan server
ThinMan is the Praim centralized endpoint management console. It interacts with remote devices on a network, directly from the server where it is installed.
Configuring the connection between a device and ThinMan server is required to enable complete client and management functionality. Features like Scheduled and Event Activities, Device Profiles and client licensing can only be realised when a connection is defined.
When starting the ThinMan console, it detects all the devices on the network. On the image below you can find examples of discovered devices. Most of them notified as HTTPS Unlinked. I.e. the device and the ThinMan server do not fully communicate.
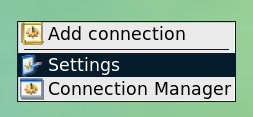
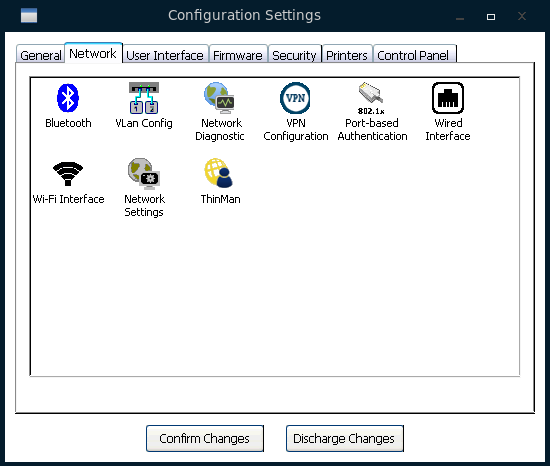
To verify the ThinMan configuration on the ThinOX device, access the Settings either click on the gear wheels on the taskbar area or right-click on the desktop and select.
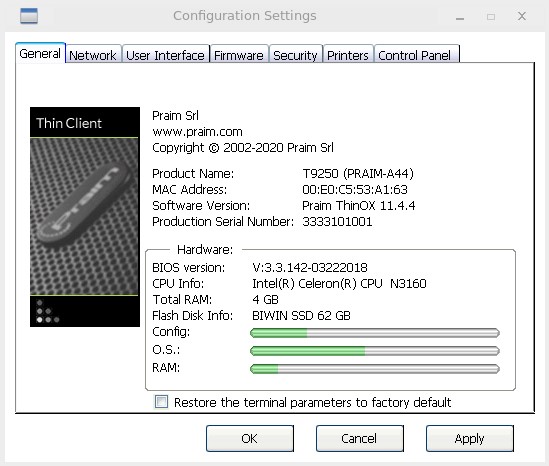
This will open the Settings window.
Select the Network Tab.
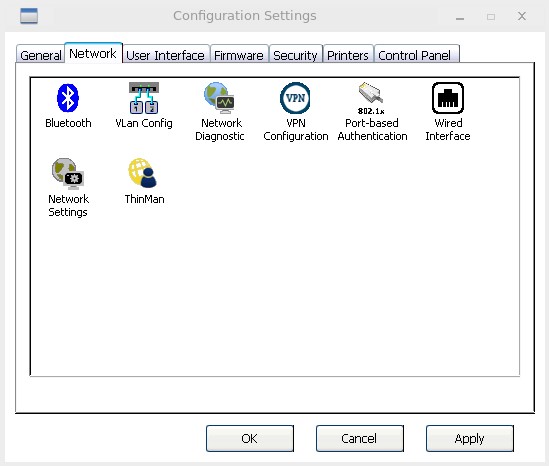
Double-click the ThinMan icon.
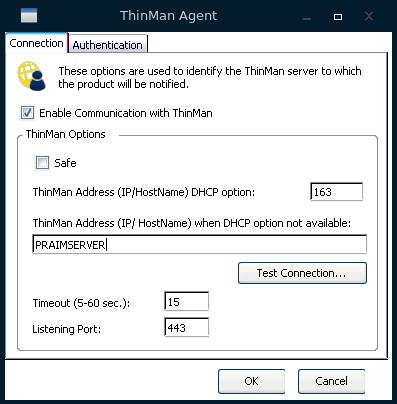
The ThinOX device will use in the following order the options to establish a connection to the ThinMan server:
- ThinMan Address (IP/Hostname) DHCP Option: the default value is 163.
- ThinMan Address (IP/Hostname) when DHCP option not available: the default value is PRAIMSERVER.
Since all Praim devices are pre-configured with these options, if you configure your DHCP server with the 163 option and add the PRAIMSERVER DNS entry to your DNS server, every Praim device will know which is its corresponding ThinMan Server. This is also true for brand out-of-the-box devices that can be connected to the network and could point to the ThinMan Server without any configuration from the IT Manager.
¶ Modify the User Interface
Access the Settings window and select the User Interface panel.
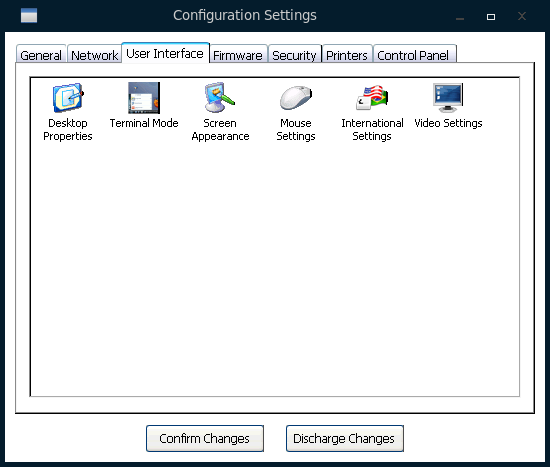
On this panel you can configure:
- Desktop properties: through this option it is possible to deactivate the feature Show USB devices.
- Terminal mode: through this option it is possible to change the default Full Desktop terminal mode on WBT/Kiosk mode.
- Screen appearance: through this option it is possible to change the default wallpaper and logo.
- Mouse settings
- International settings: through this option it is possible to change the system language, the keyboard layout and other options.
- Video settings: through this option it is possible to configure one or more monitors, the position and screen resolution.
¶ Configure the Security Options
Access the Settings window and select the Security panel.

On this panel you can configure all the parameters related with the security of the device, among these:
- Deny connection changes: select this option to avoid the end user changes the connections configuration.
- Password required to modify the terminal configuration: add a password to avoid the end user accesses all the device configuration parameters except the ones indicated when clicking the Available User Settings button.
¶ Configure Virtual Environment Parameters
Access the Settings window and select the Control Panel tab.
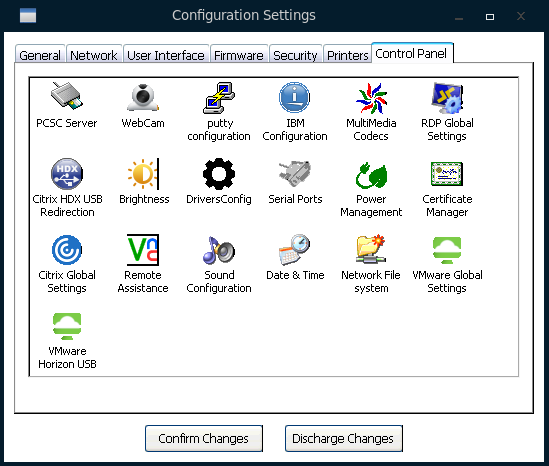
Based on your virtual environment verify:
- RDP Global settings
- Citrix Global Settings and Citrix HDX USB Redirection.
- VMware Global Settings and VMware View USB Redirection.
¶ Create the Resources
Right-click on the ThinOX desktop, select the Add connection option.
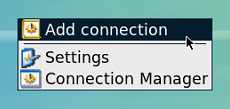
It will open the New Connection window, select the type of connection you want to create and click on OK.
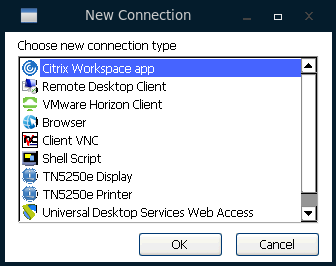
For more information, about each specific type of connection refer to:
- Citrix Workspace App Connection
- RDP Connection
- VMware Horizon Client Connection
- Browser Connection
- Client VNC Connection
- Shell Script Connection
- TN5250e Display and TN5250e Printer
- VT - xterm Terminal Emulator (PuTTY)
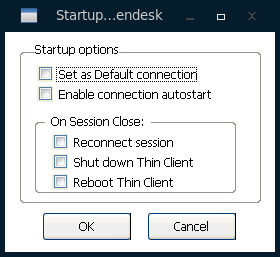
¶ Autostart
To enable the connection in autostart, right-click on the connection and select the Startup Options.
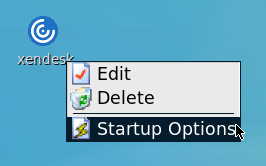
It will open the Startup Options where you can configure certain features.