The ICA Global Settings dialog window is used to configure settings for the Citrix connection.
¶ Preferences Tab
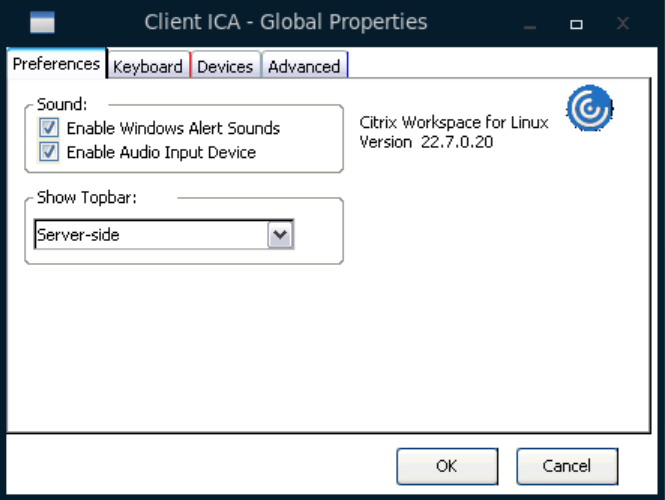
Enable Windows Alert Sounds: it enables Windows Alert sounds in Citrix sessions.
Enable Audio Input Device: it enables audio input (phone jack) from the thin client towards the server.
Show Topbar
This option allows to show the Citrix Connection Bar(see image below):
- Always
- Never
- Server-side: Based on the Server configuration.

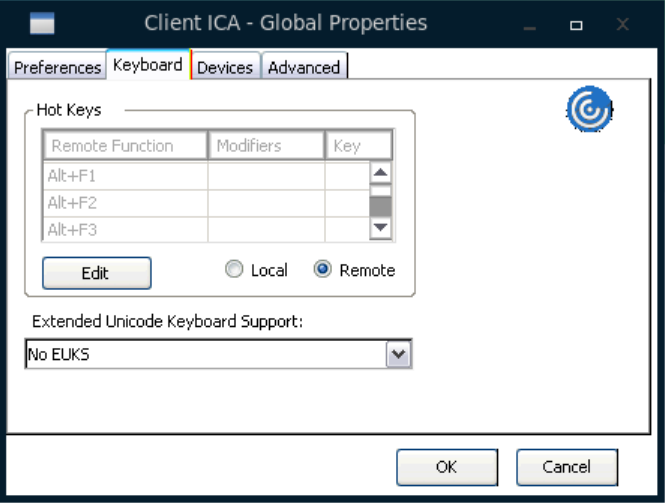
¶ Keyboard Tab
Through this tab users can decide whether Windows Hotkeys (such as CTRL+ALT+Canc) are managed by the device operating system or remotely within the connection.
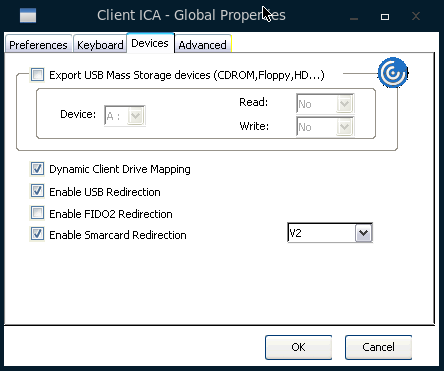
¶ Devices Tab
-
Export USB Mass Storage devices: allows defining whether connected USB Mass Storage will be exported to the virtual desktop.
-
Device defines the local drive name exported to the virtual desktop. The USB mass storage devices will be shared as directories under the same device name. The directory name is the name of the USB mass storage device.
-
Read and Write defines whether the exported device can be read or written in the virtual desktop. Possible values are: Yes (the operation is allowed), No (the operation is NOT allowed), Prompt (on the first access to the device a confirmation is required, the choice is valid for the connection session).
-
-
Dynamic Client Drive Mapping: enables this specific feature (see http://support.citrix.com/article/CTX140066 for more information).
-
Enable USB Redirection: enables the USB Redirection. Read also Citrix HDX USB Redirection.
-
Enable FIDO2 Redirection
-
Enable Smartcard Redirection
In this case, remember NOT to share the mass storage device using the Citrix HDX USB Redirection. You can do this by disabling the Mass storage devices from the category panel or to Never Export the single mass storage device using the exceptions.
¶ Advanced Tab
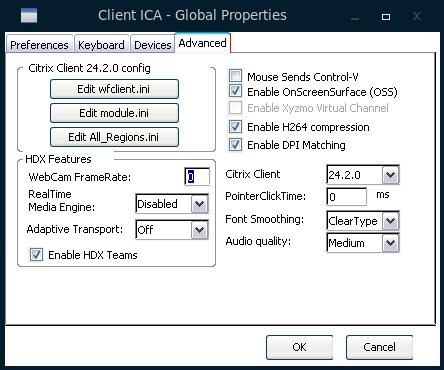
Citrix Client Config: to access and modify Citrix Receiver configuration files (wfclient.ini, module.ini and All_Regions.ini).
HDX Features
-
WebCam FrameRate: it allows to define the frame rate of the connected USB Webcam (see more information on Configuring the Citrix HDX RealTime Webcam Video Compression).
-
RealTime Media Engine: see How to install and configure Citrix HDX RealTime Media Engine Addon.
-
Adaptive Transport: For more information read Citrix Documentation - Adaptive transport.
-
Enable HDX Teams
Mouse Sends Control-V: When enabled, it emulates the CTRL + V shortcut (paste operation) when clicking the middle mouse button. Notice that this behavior can be applied only when working on Linux O.S. Disable this option when you are working on Windows O.S.
Enable OnScreenSurface (OSS): enable or disable the OnScreenSurface parameter in the Citrix ICA Global Settings environment.
Enable Xyzmo Virtual Channel: enable the support for Wacom Signature Tablet. It needs the Xyzmo software installed on the server.
Enable H.264 compression: enables the hardware decompression of the H.264 enhanced SuperCodec provided by the Citrix XenDesktop 7.x farm. In case the Citrix farm is a 6.x, or lesser version disable this parameter (see more on How to set Citrix Environment and Thin Client Properties for H.264 compression).
Enable DPI Matching: DPI scaling is mostly used with large-size and high-resolution monitors. This feature helps to display applications, text, images and other graphical elements in a size that can be viewed comfortably. When selecting this feature, it is necessary to set the Text size to 200%, Citrix Workspace App client does not support another rescaling dimension (e.g. text size to 150% or 175%).
Citrix Client: with this parameter you can select the version of the Citrix Receiver client to use on Citrix Connection. Useful for a legacy environment.
PointerClickTime: allows to enter the value for the "ica.wfclient.pointerclicktime" option of the registry. Leave unchanged if you do not have strong necessities to change it.
Font Smoothing: allows configuring the font smoothing type. To have the best result in visualization quality set it to "Clear Type". More information on Citrix site at this link http://support.citrix.com/proddocs/topic/receiver-linux-blackfoot/linux-config-cleartype-font.html.
Audio Quality: allows choosing the audio quality: High, Medium or Low.
Using Certificates for Citrix Connections
Certificates can be imported using the Certificate Manager applet.Save the certificate (read About Certificates paragraph) on a USB key then use the Certificate Manager applet. Browse the directories until you reach the saved certificate, select it and click on "Import".
All the imported certificated will be available to all Citrix connections.