¶ Introduction
This guide will list the steps required to connect a ThinOX/Agile device to the ThinMan management server.
ThinMan is Praim’s graphical software tool designed to manage and monitor remote devices connected to a network. It communicates directly with those devices from the server on which it is installed.
ThinOX ThinOX is the firmware used on Praim Linux-based thin clients and is also offered as ThinOX4PC, a repurposing solution that transforms existing PCs into thin clients.
Agile Agile is an application designed for Praim Windows-based thin clients. It is also available as a repurposing solution, known as Agile4PC, which transforms existing PCs into thin client–like devices.
¶ Applicable Versions
- ThinOX version 10.x.x, or later
- Agile version 2.2.x or later
¶ Requirements
Requirements for ThinMan can be read in here.
ThinOX is pre-installed on Praim thin clients, but for ThinOX4PC the minimum recommended hardware requirements are:
- 64-Bit x86 based CPU
- 4 GB RAM
- 8 GB storage
Agile is pre-installed on Praim thin clients with Windows 10IoT, but for Agile4PC the minimum recommended software requirements are:
- Windows 10 all versions
- Windows 11 all versions
¶ Purpose
Configuring the connection between a device and ThinMan server is required to enable complete client and management functionality. Features like Scheduled and Event Activities, Device and User Profiles and client licensing can only be realised when a connection is defined.
ThinMan can discover devices by browsing the network, this will list the discovered devices, but will not provide complete functionality. A network browse is also dependant on network access between client and server, a complete list of ports used by ThinMan for inbound and outbound communications are listed here.
Read Praim ThinMan Referring to know more about the mechanism that exists on all Praim endpoint clients.
ThinMan referring uses either a DNS or DHCP definition. If either of these options are not available and network browsing is blocked though port rules on the network, it is possible to connect to a ThinMan server manually from the client. These steps are detailed below.
¶ Configuration Procedure
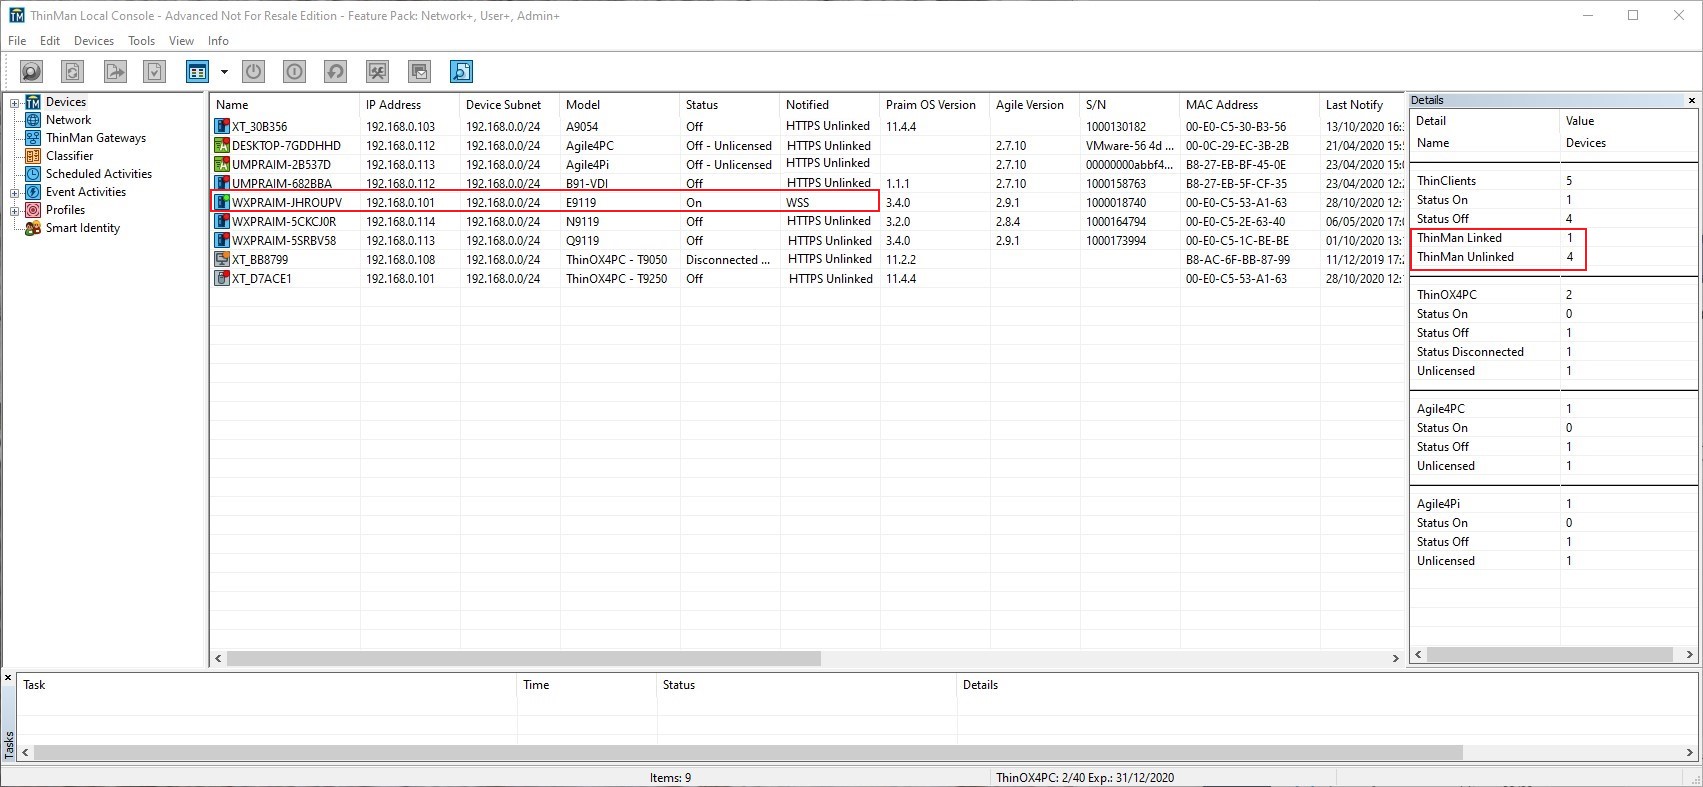
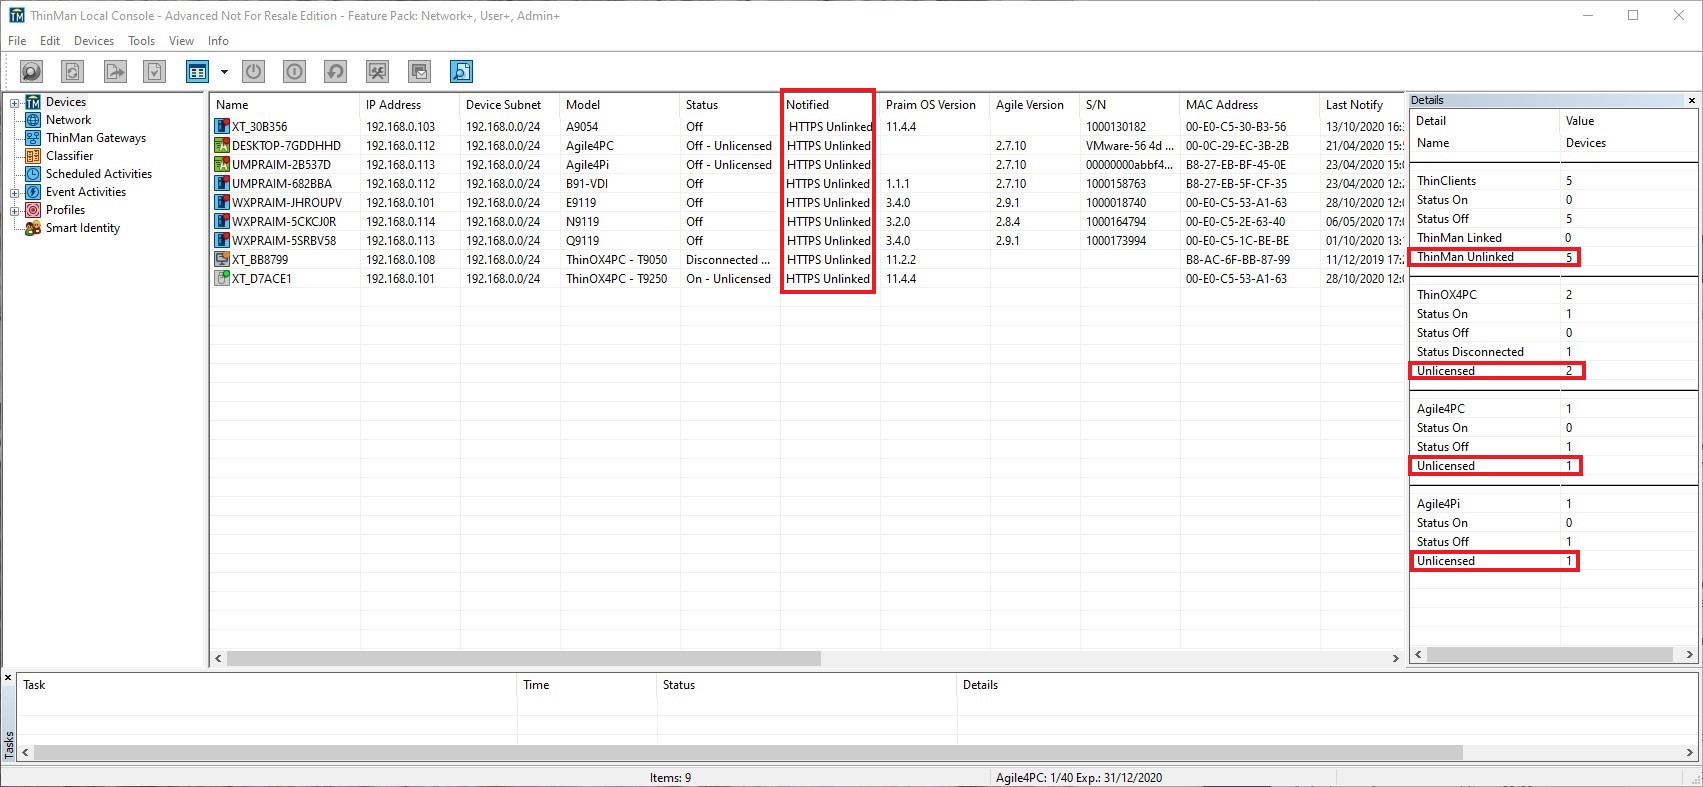
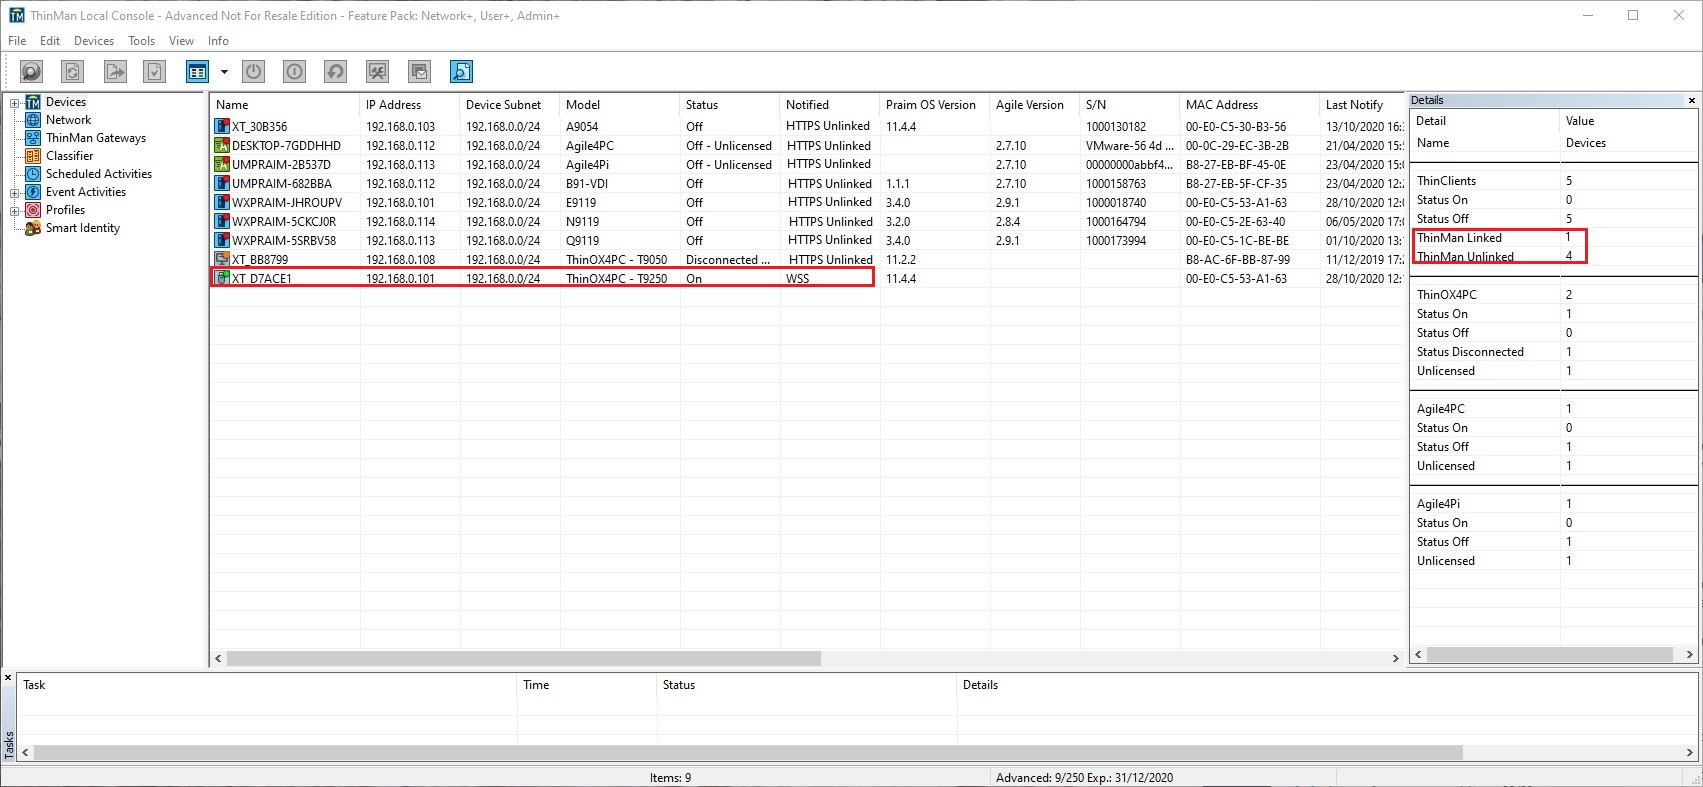
The ThinMan discovery process will build a list of devices.
On the image below you find examples of discovered devices. The highlighted sections show the devices that are not being fully managed.
¶ ThinOX
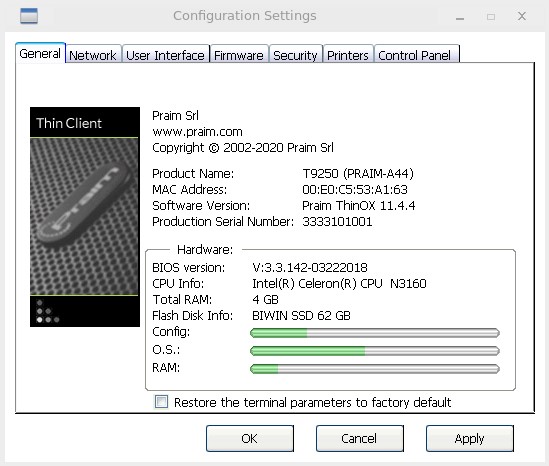
On the thin client desktop, either click on the Gear Wheels on the taskbar area or right-click on the desktop and select Settings. This will open the Configuration Settings:
Select the Network Tab.
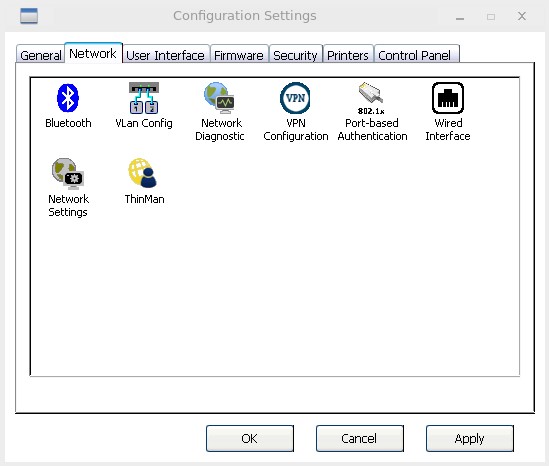
Double-click the ThinMan icon.
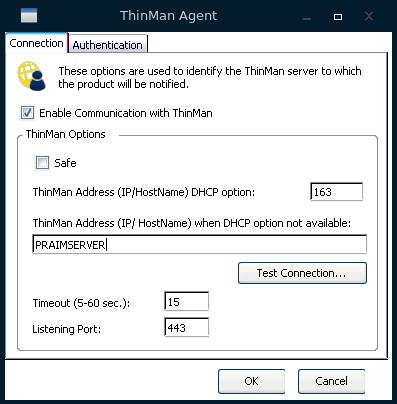
Within the ThinMan options pane, you can configure the ThinMan Address. The client will use in the following order the options to establish a connection to the ThinMan server:
-
DHCP Option 163 on the DHCP Server.
-
DNS to resolve the “PRAIMSERVER” hostname .
Since all Praim devices are pre-configured with these options, if you configure your environment using the network parameters every Praim device will know which is the ThinMan Server in the network and will be able to notify himself. This is also true for brand out-of-the-box devices that can be connected to the network and could point to the ThinMan Server without any configuration from the IT Manager.
Using an IP Address or FQDN Using the FQDN of a published ThinMan server will also work as the Praim ThinMan connection uses Web Socket Secure (WSS) to create a secure point-to-point connection.

Selecting the Test Connection button will check that the connection between the device and the ThinMan Server works. Now the device has been set up to use ThinMan Referring, and this will be seen on the ThinMan server. Devices that are now connecting will show WSS. In the following specific example, the device has also received a software specific license.
¶ Agile
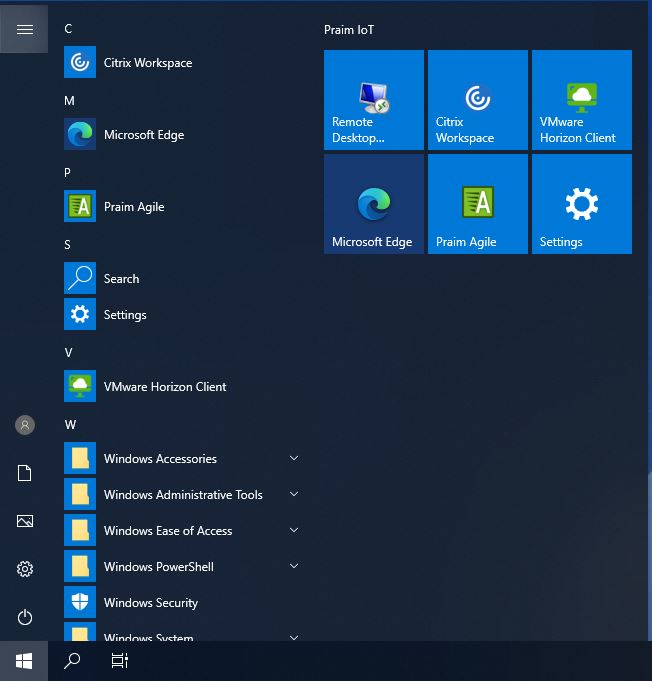
On a Praim Windows 10 IoT thin client, open the Start Menu application list and select the Praim Agile application.
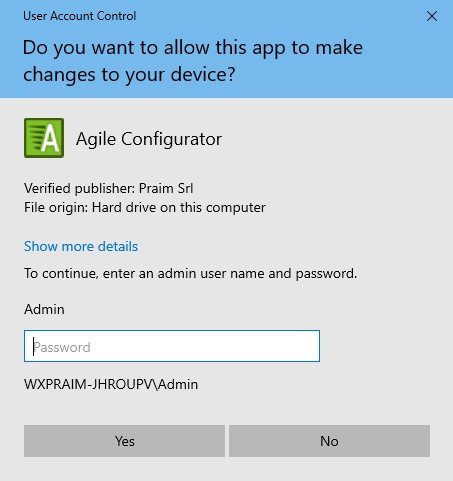
For Praim Windows 10 IoT Embedded devices, the application will require local admin rights to proceed. The default password is Admin.
Select the ThinMan Settings option:
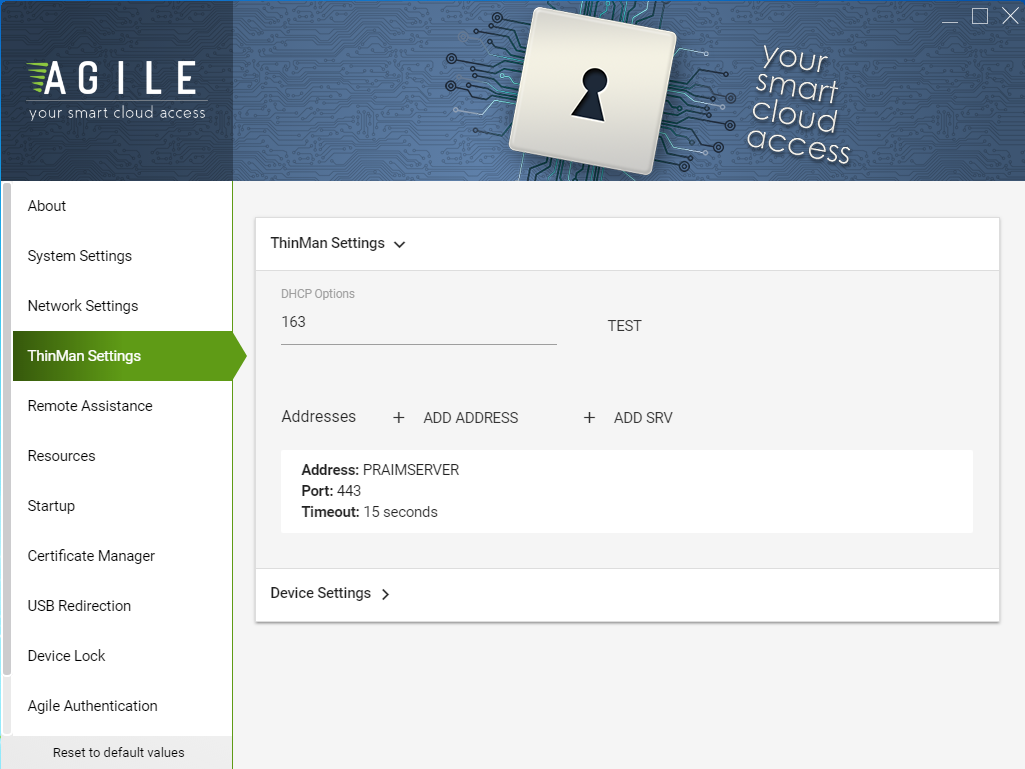
Within the ThinMan options pane, you can configure the ThinMan Address. The client will use in the following order the options to establish a connection to the ThinMan server:
-
DHCP Option 163 on the DHCP Server.
-
DNS to resolve the “PRAIMSERVER” hostname .
Since all Praim devices are pre-configured with these options, if you configure your environment using the network parameters every Praim device will know which is the ThinMan Server in the network and will be able to notify himself. This is also true for brand out-of-the-box devices that can be connected to the network and could point to the ThinMan Server without any configuration from the IT Manager.
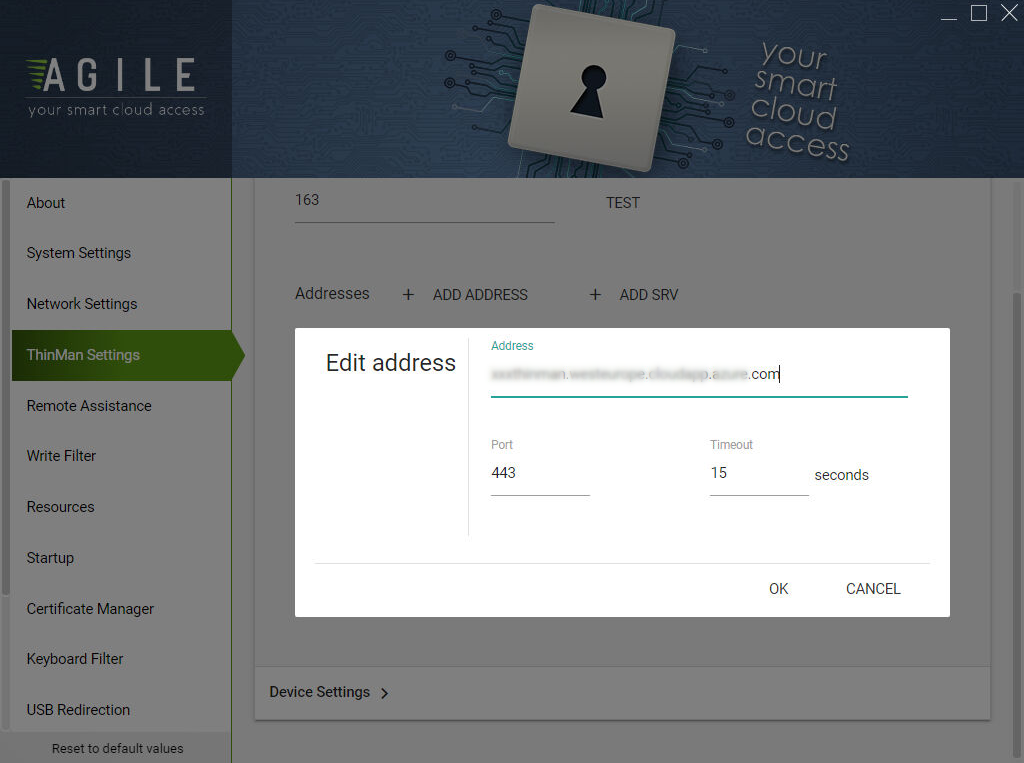
Using an IP Address or FQDN Using the FQDN of a published ThinMan server will also work as the Praim ThinMan connection uses Web Socket Secure (WSS) to create a secure point-to-point connection. To alter the server address name, click anywhere in the Address section, apart from the Test or Trashcan icon. This will open the Edit Address window.
Selecting Test will check that the connection between the device and the ThinMan Server works. Now the device has been set up to use ThinMan Referring, and this will be seen on the ThinMan server. Devices that are now connecting will show either HTTPS Linked or WSS. In the following specific example, the device has also received a software specific license.