¶ WSS
The WebSocketSecure (WSS) is the communication protocol between thinman and a device (Agile/ThinOX) .
When the endpoint notifies to the ThinMan Server, a tcp connection is activated permanently as a channel between the endpoint and ThinMan. All the communications that take place between thinman and the device happen through this channel.
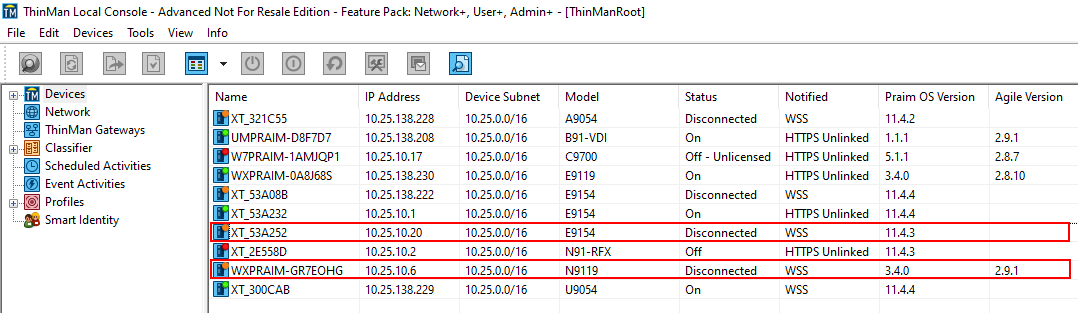
This protocol makes the device status in the ThinMan console precise and reliable. With this protocol there is no need to refresh the device. If the device appears on/off(green/red) in the ThinMan Console, that is actually the status of the device. The "disconnected" status (orange), means the device has lost connection with ThinMan (e.g. unplugged).
¶ Minimum requirements
- ThinMan 7.9.0 or greater
- Agile 2.7.0 or greater
- ThinOX 11.1.0 or greater
In case all the requirements are met, but the device has not been configured to contact a ThinMan Server, the label https unlinked will be displayed under the notified column in the ThinMan Console.
¶ WSS Safe
The WSS Safe communication protocol requires the endpoint to check ThinMan authenticity in order the HTTPS connection between the endpoint and ThinMan be safe.
WSS Safe and ThinMan Certificate
In order to have secure and private connections it is necessary the ThinMan Server's certificate be released from a CA.
¶ WSS Safe Requirements
The table below summarizes all the requirements on the ThinMan Server, the network and the single endpoint where you want to activate the WSS Safe mode.
¶ ThinMan
- ThinMan License must be an Advanced Edition with Admin+ Feature Pack
- Certificate for FQDN issued by a trusted CA.
- Valid certificate (not expired).
¶ Network
- The FQDN must resolve the ThinMan
- The FQDN must be resolved from the endpoint
¶ Endpoint
-
Set the FQDN as reference thinman via DHCP option or DNS record.
-
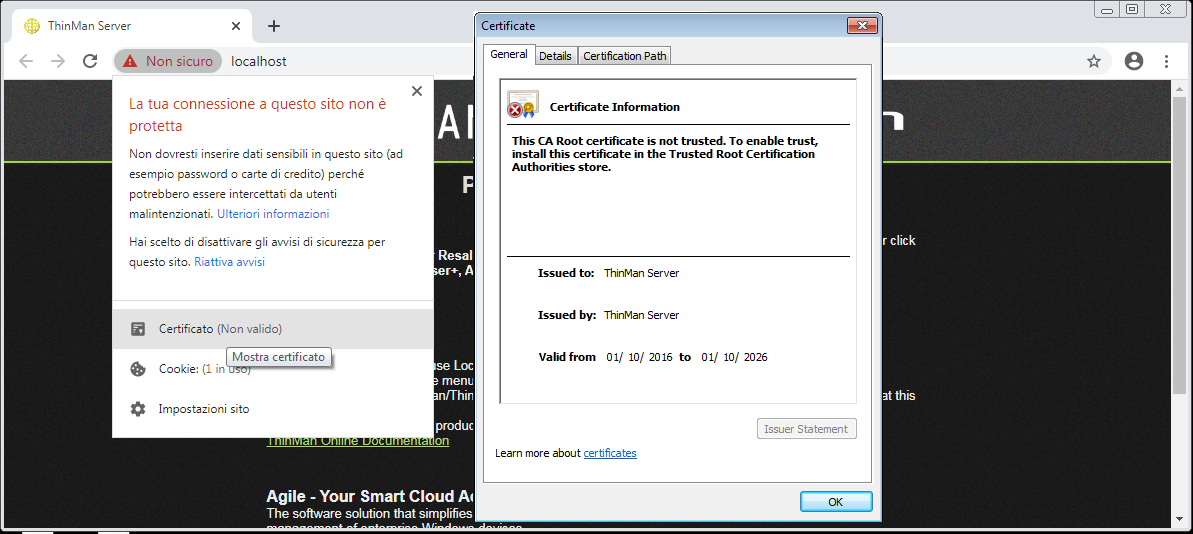
The RootCA certificate must be installed on the device in order to verify the Certificate Chain.See image below
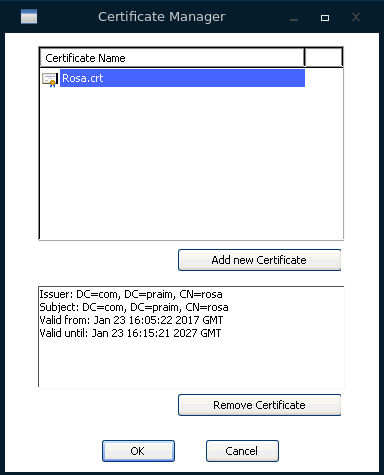
LetsEncrypt certificates should have the DST Root CA X3 certificate. For more information, read ThinOX: Certificate Manager, Agile: Certificate Manager -
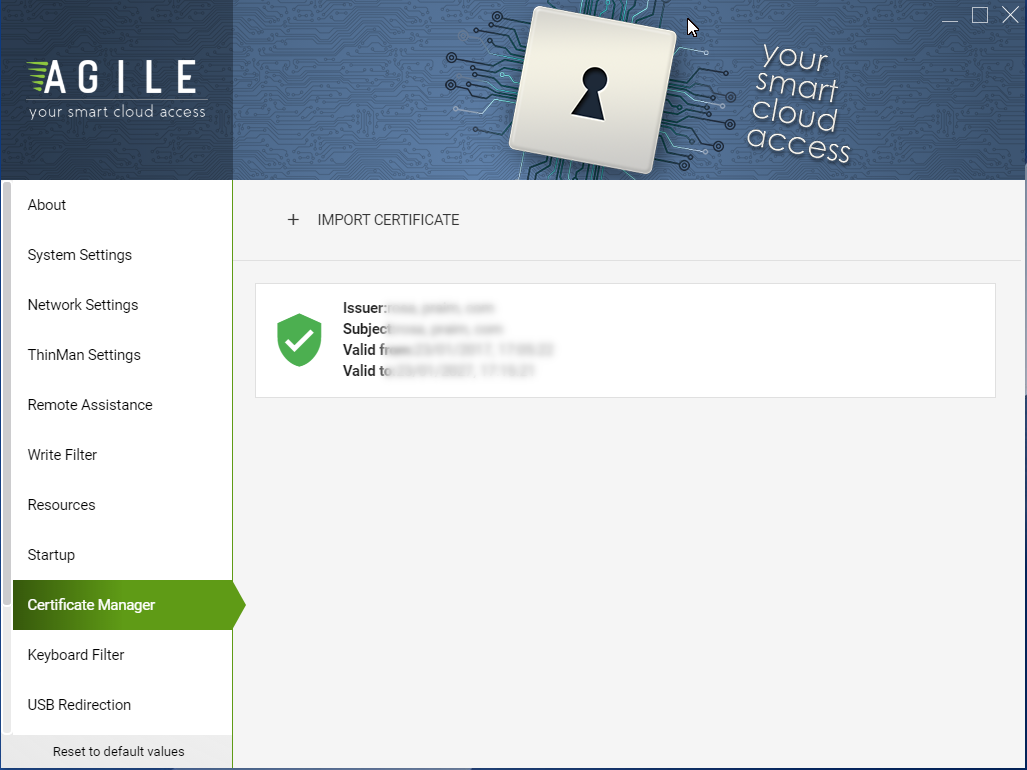
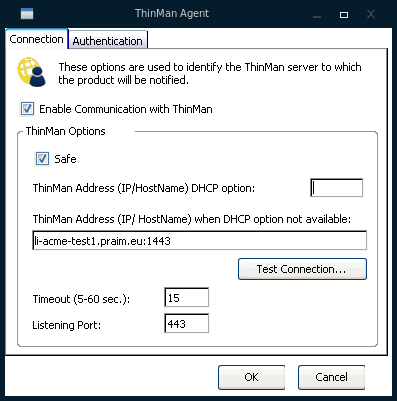
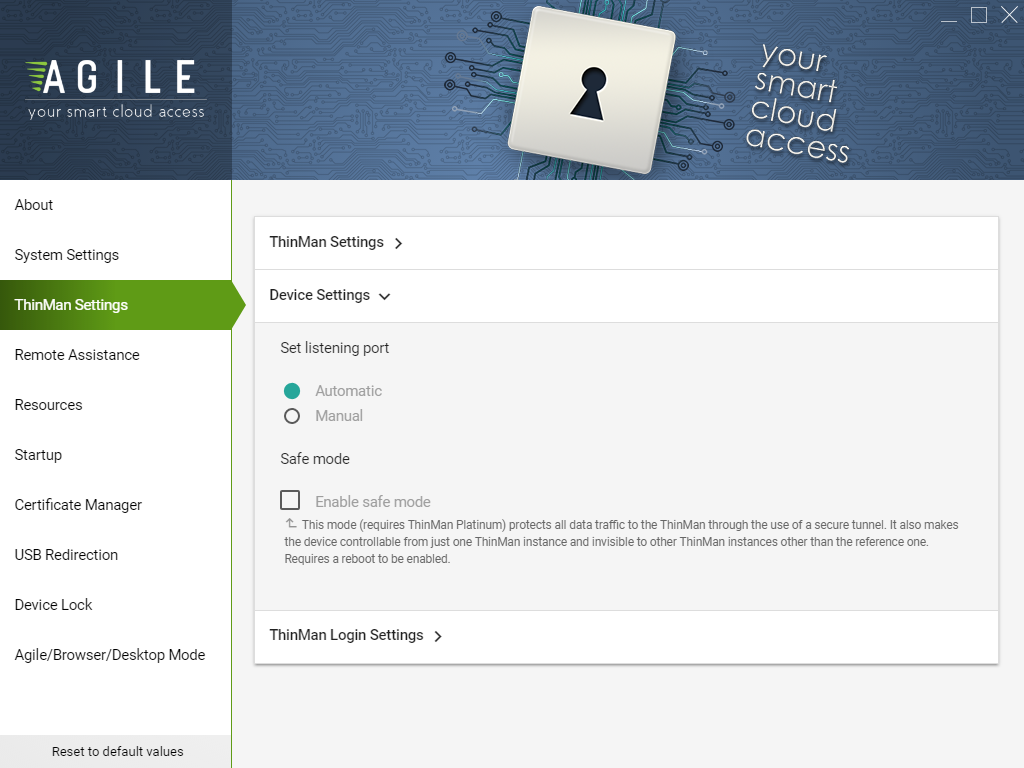
Configure the connection to be safe. On ThinOX devices(from version 11.1.0) through the ThinMan Agent and on Agile devices(from version 2.7.0) through the ThinMan Settings. For more information, read Agile: Configuring ThinMan Settings and ThinOX: Configuring ThinMan Settings.
Devices with WSS Safe connection can be seen on ThinMan as shown below.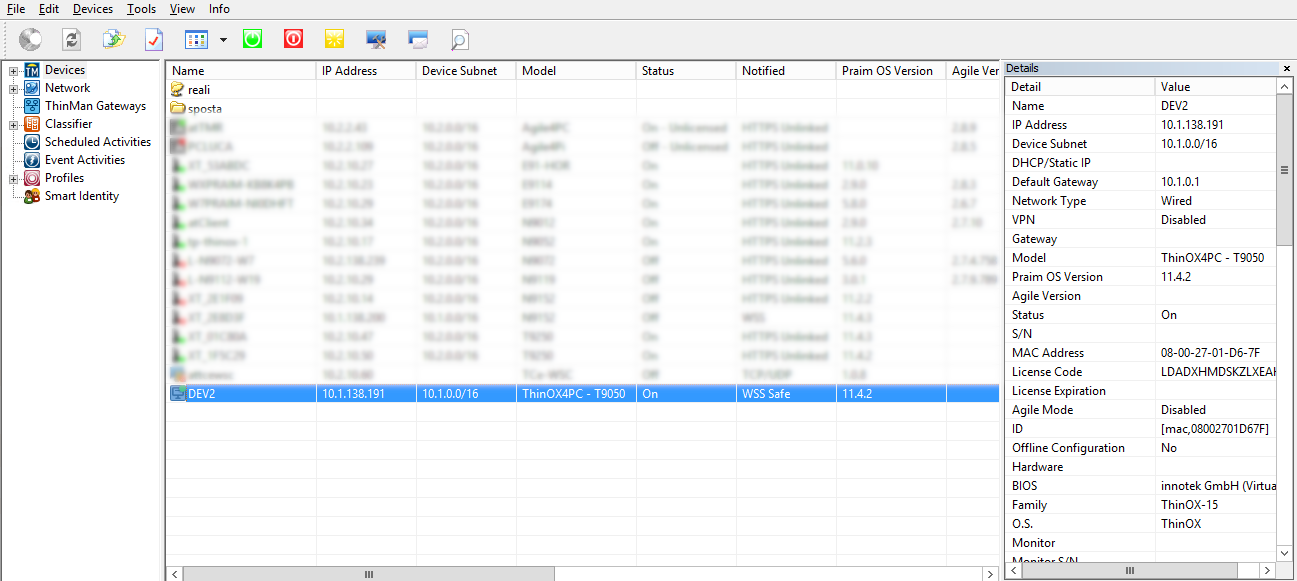
Note
A WSS Safe device will be managed ONLY by the referenced thinman which should have the certificate
¶ Installing a CA certificate on Primary ThinMan Server
By default, ThinMan is installed with a self-signed certificate, as seen below.
In order the HTTPS connection between the endpoint and ThinMan be safe, it is necessary the ThinMan Server's certificate be released from a CA.
From ThinMan 7.9 it is possible to install a CA certificate on the ThinMan Server through the ThinMan Local Console using the ThinManRoot user.
Go to Tools -> Endpoint Security Communication menu.
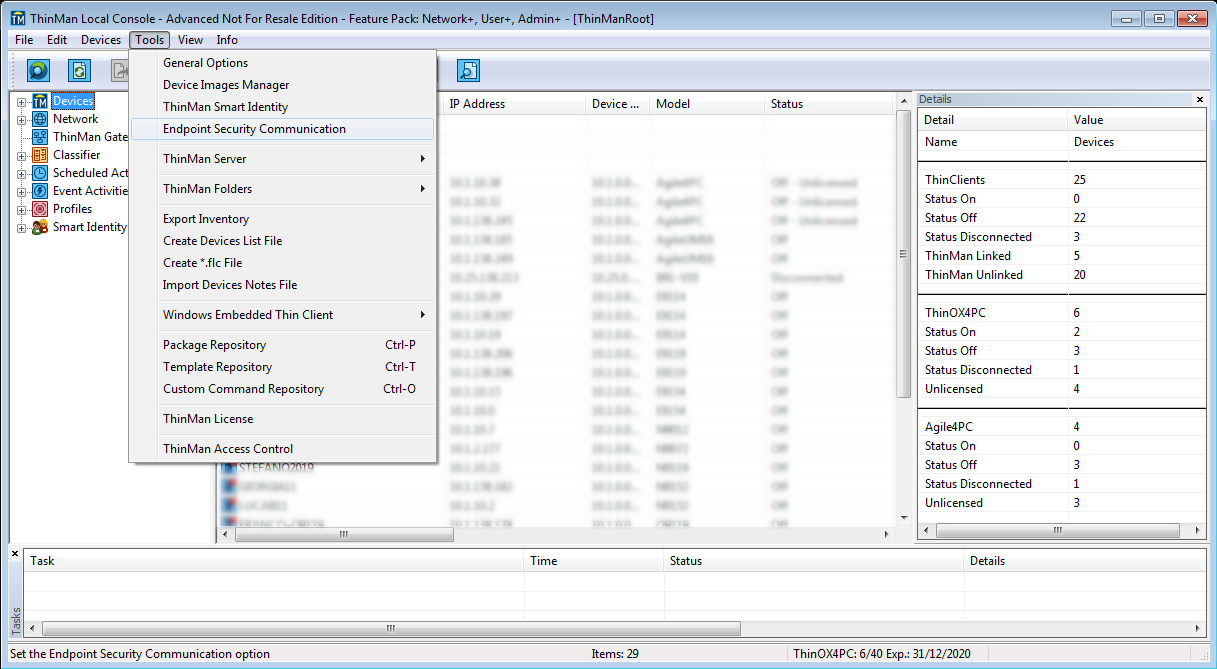
It will open the Endpoint Security Communication window.
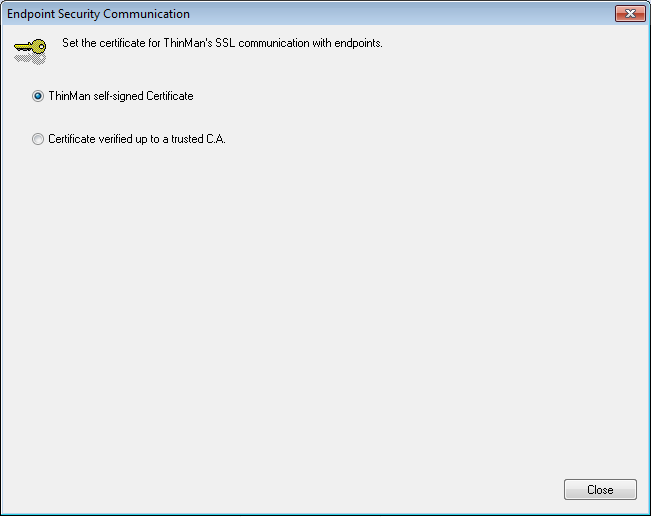
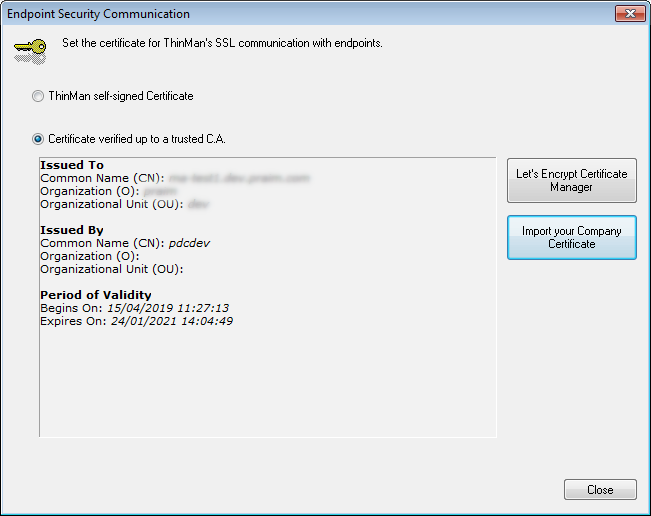
Select the Certificate verified up to a trusted C.A option.
There are 2 types of certificate you can use:
- Company Certificate
- Let's Encrypt Certificate
¶ Company Certificate
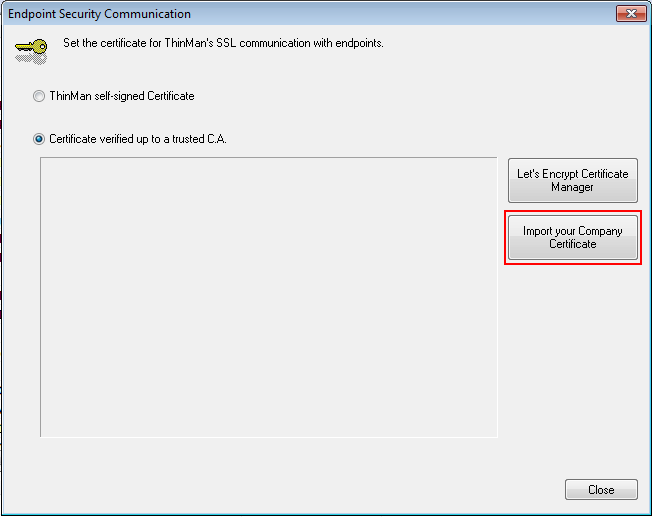
Click on Import Your company Certificate.
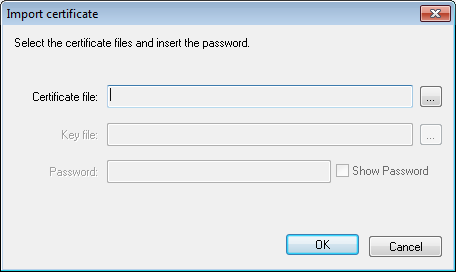
Select the certificate file, the Key file (depending on the format) and insert a password. Click on OK.
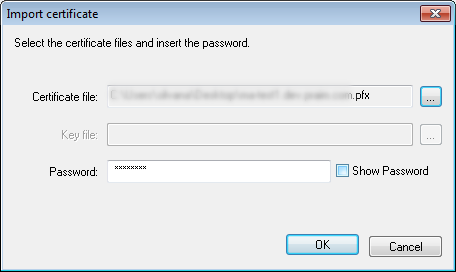
Supported File formats
To configure the TLS part it is necessary to provide a server certificate for the ThinMan DNS name, including the complete chain up to a CA certificate, and the private part of the key pair created for the ThinMan server. In case of a company's certificate, i.e. a server certificate signed with a company procedure, these two components must be loaded. These components are contained in files that record information in multiple formats (see list below).
Extension Type Encoding Content Password .pfx, .p12, .pkcs12 pkcs12 DER server certificate, chain of signature and key certificates Yes .pkcs7, .p7c, .p7m, .p7b, .p7, .pem pkcs7 PEM or DER certificate chain No .cer, .crt X.509 PEM or DER single certificate No .txt, .pem X.509 PEM certificate chain as X.509 file concatenation No .pk8, .pkcs8, .key, .pem pkcs8 PEM key Yes, optional .rsa, .key, .pem RSA key PEM key Yes, optional
It will be shown the information of the certificate.
¶ Let's Encrypt Certificate
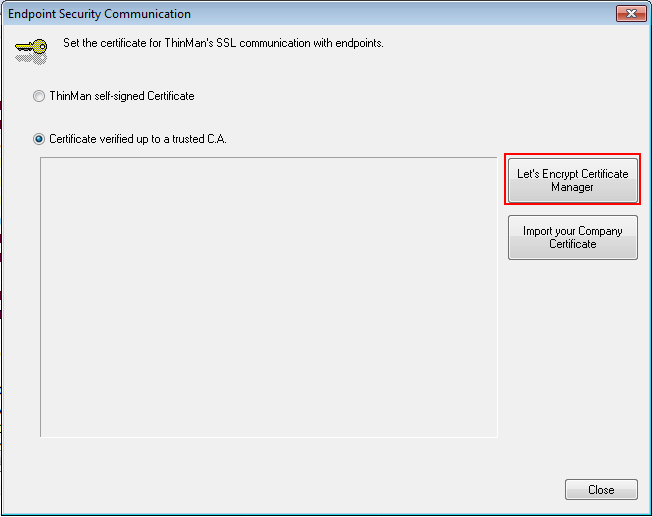
Click on Let's Encrypt Certificate Manager.
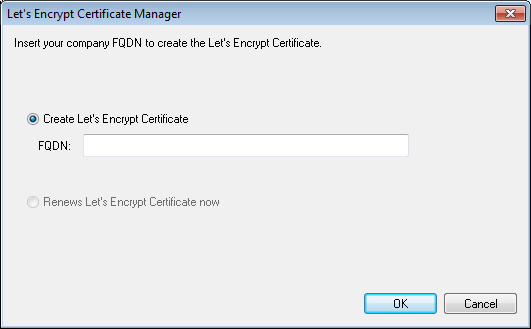
Write the FQDN.
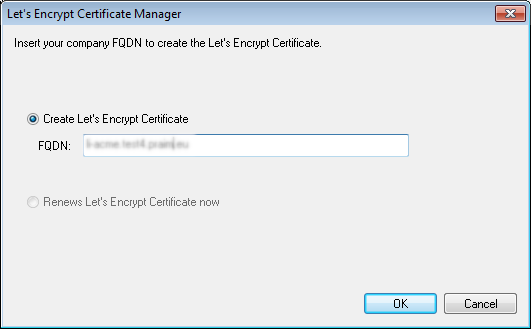
Click on OK.
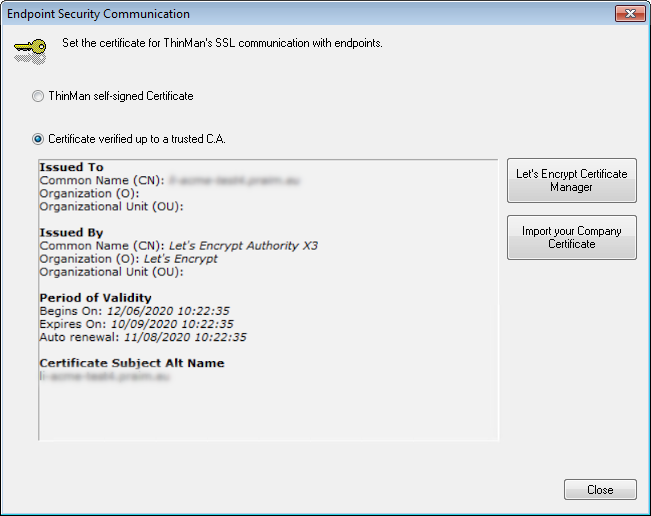
It will be shown the information of the certificate.
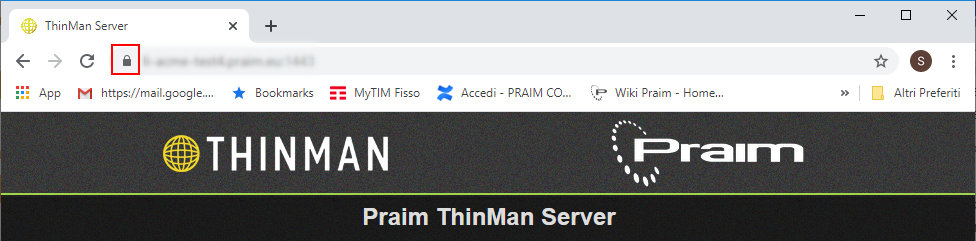
After installing the certificate, it is possible to verify the HTTPS connection by clicking the FQDN used for the certificate.
¶ Installing a Server key and Certificate Chain on a Secondary ThinMan Server
As of version 8.7.1, a command line tool (certmgr.bat) is available for managing certificates on the ThinMan Secondary server.
The certmgr.bat tool simplifies the management of certificates on ThinMan Secondary servers (or gateway), providing flexibility through multiple installation methods and the ability to monitor and update configurations dynamically. For troubleshooting or advanced use cases, refer to the options listed under the -help command.
¶ Overview
The certmgr.bat tool enables the installation of a key pair and certificate chain on the ThinMan Secondary server (or Gateway) from local files. When run from its default location in the Server\tools directory, it automatically uses the Java Virtual Machine (JVM) included in ThinMan.
The secondary server periodically monitors the filesystem (every 15 seconds) and configures the TLS connector accordingly.
¶ Tool Options
Running the tool with the -help option displays the list of available commands.
C:\Program Files\Praim\ThinManSec\Server\tools\certmgr>certmgr.bat -help
Usage: certmgr [options]
  Options:
    -cert   certificate chain file to install
    -help   show command help
    -key    server key file to install (bound to the certificate chain)
    -pass   password to access server key
    -pkcs12 key store file in PKCS12 format to install
    -self   restore self signed default certificate (default: false)
    -show   show current installed certificate (default: false)
<br /
¶ Key Notes
- Password Handling: The -pass option can be left empty; in this case, the password will be requested via the console. This prevents the password from being stored in the command history.
¶ Installation Scenarios
¶ Installing a PKCS12 File
The -pkcs12 option installs a certificate chain and key from a PKCS12 key store file (commonly with .pfx extension). The PKCS12 format requires an encryption password.
C:\Program Files\Praim\ThinManSec\Server\tools\certmgr>certmgr.bat -pkcs12 c:\company\company-keystore.pkcs12 -pass keystore-password
Verifying Installation After installation, use the -show option to display details of the installed certificate:
C:\Program Files\Praim\ThinManSec\Server\tools\certmgr>certmgr.bat -show
TLS connector uses a company certificate
Subject:
    Common Name:         company.example.com
    Organizational Unit:
    Organization:        MaOrg
Issuer:
    Common Name:         ma-root-CA
    Organizational Unit:
    Organization:        MaOrg
Validity:
    NotBefore: 2024-06-11 15:59:16
    NotAfter: 2026-06-11 15:59:16
Subject Alt Names: company.example.com
¶ Installing Separate Certificate and Key Files
To install a certificate chain and key from separated files, use the -cert and -key options. If the key is password-protected, provide the password using the -pass option. Example:
C:\Program Files\Praim\ThinManSec\Server\tools\certmgr>certmgr.bat -key c:\company\company.key -cert c:\company\company.p7f -pass key-password
Verifying Installation Similar to PKCS12 installation, use the -show option.
¶ Restoring the Default Self-Signed Certificate
To restore the default self-signed certificate, use the -self option.
C:\Program Files\Praim\ThinManSec\Server\tools\certmgr>certmgr.bat -self
Verifying Restoration After restoration, the -show option confirms the use of the default certificate.
C:\Program Files\Praim\ThinManSec\Server\tools\certmgr>certmgr.bat -show
TLS connector uses the default self-signed certificate.