The Presentation section of Agile provides a comprehensive set of controls to thoroughly customize how the device will be presented to end-users in terms of:
- Access Privileges: Control the level of access to device resources (applications, connections, etc.) and system controls.
- User Experience and Interaction: Define how users can interact with the device and its applications.
- Graphical Interface: Customize the appearance and organization of the Graphical User Interface (GUI) for end-users.
This section allows you to configure both the type of interaction and desktop locking expected for end-users, as well as tailor the interface to align with your corporate branding.
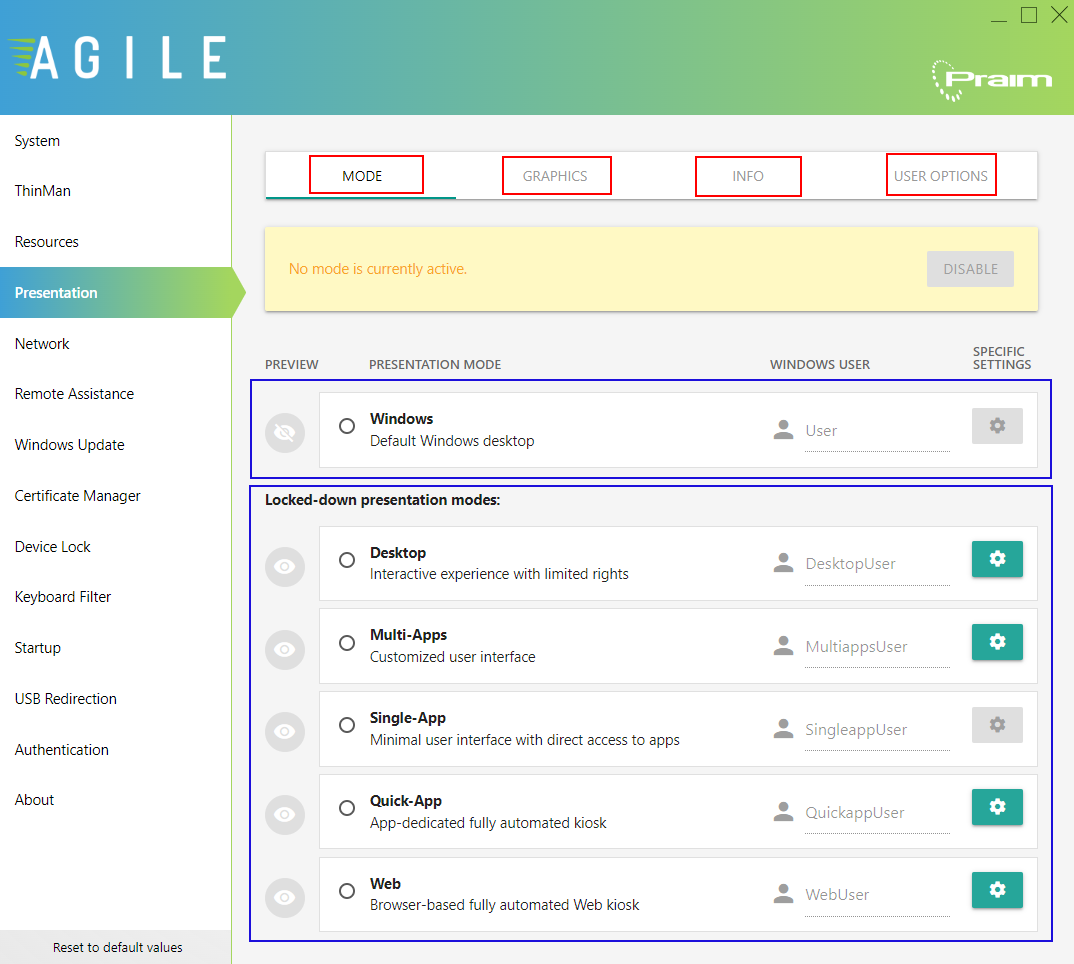
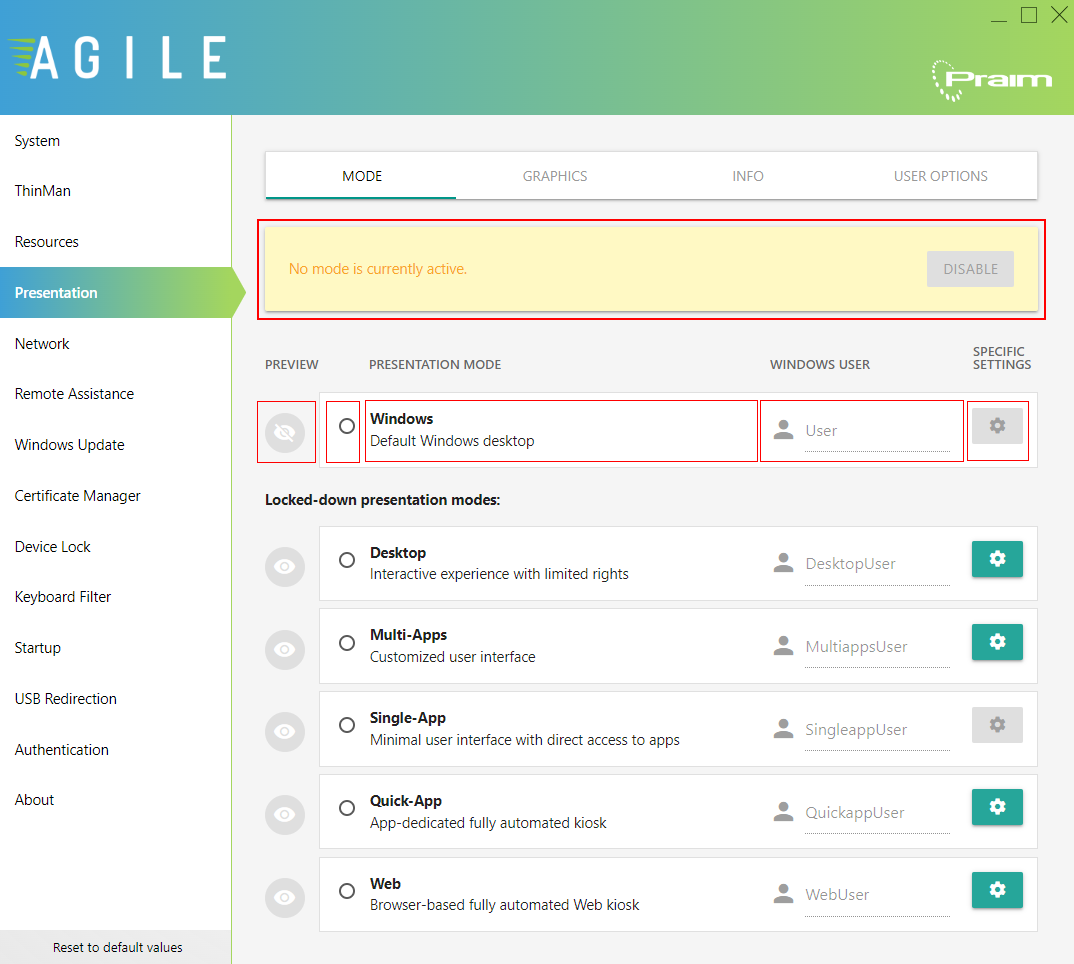
The section is divided into four tabs (see image below, red rectangles), with the most important being the first:
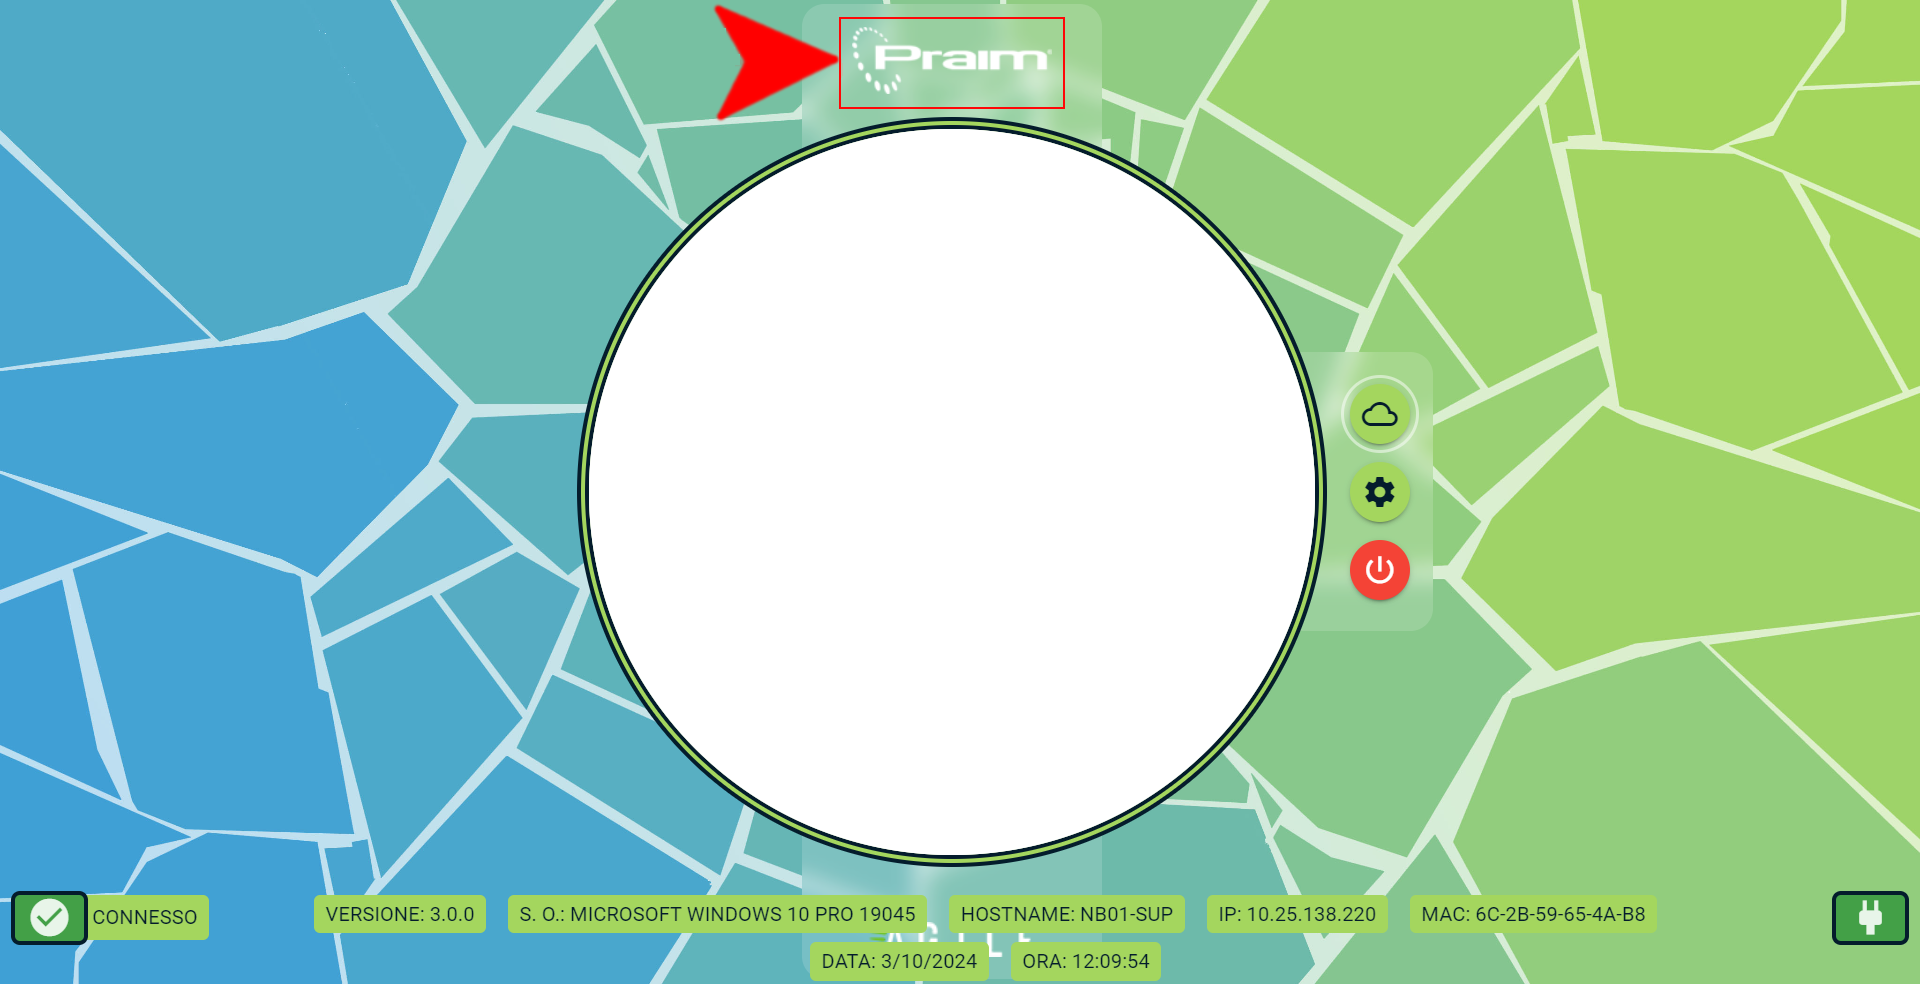
- MODE: It allows you choose and configure in detail how the device will be presented when accessed by end-users. It offers six different presentation modes, ranging from less to more restricted interfaces, designed to meet the most common endpoint use cases.
- GRAPHIC: It provides controls over the visual aspects of the interface, enabling you to tailor the GUI to reach a corporate look and feel.
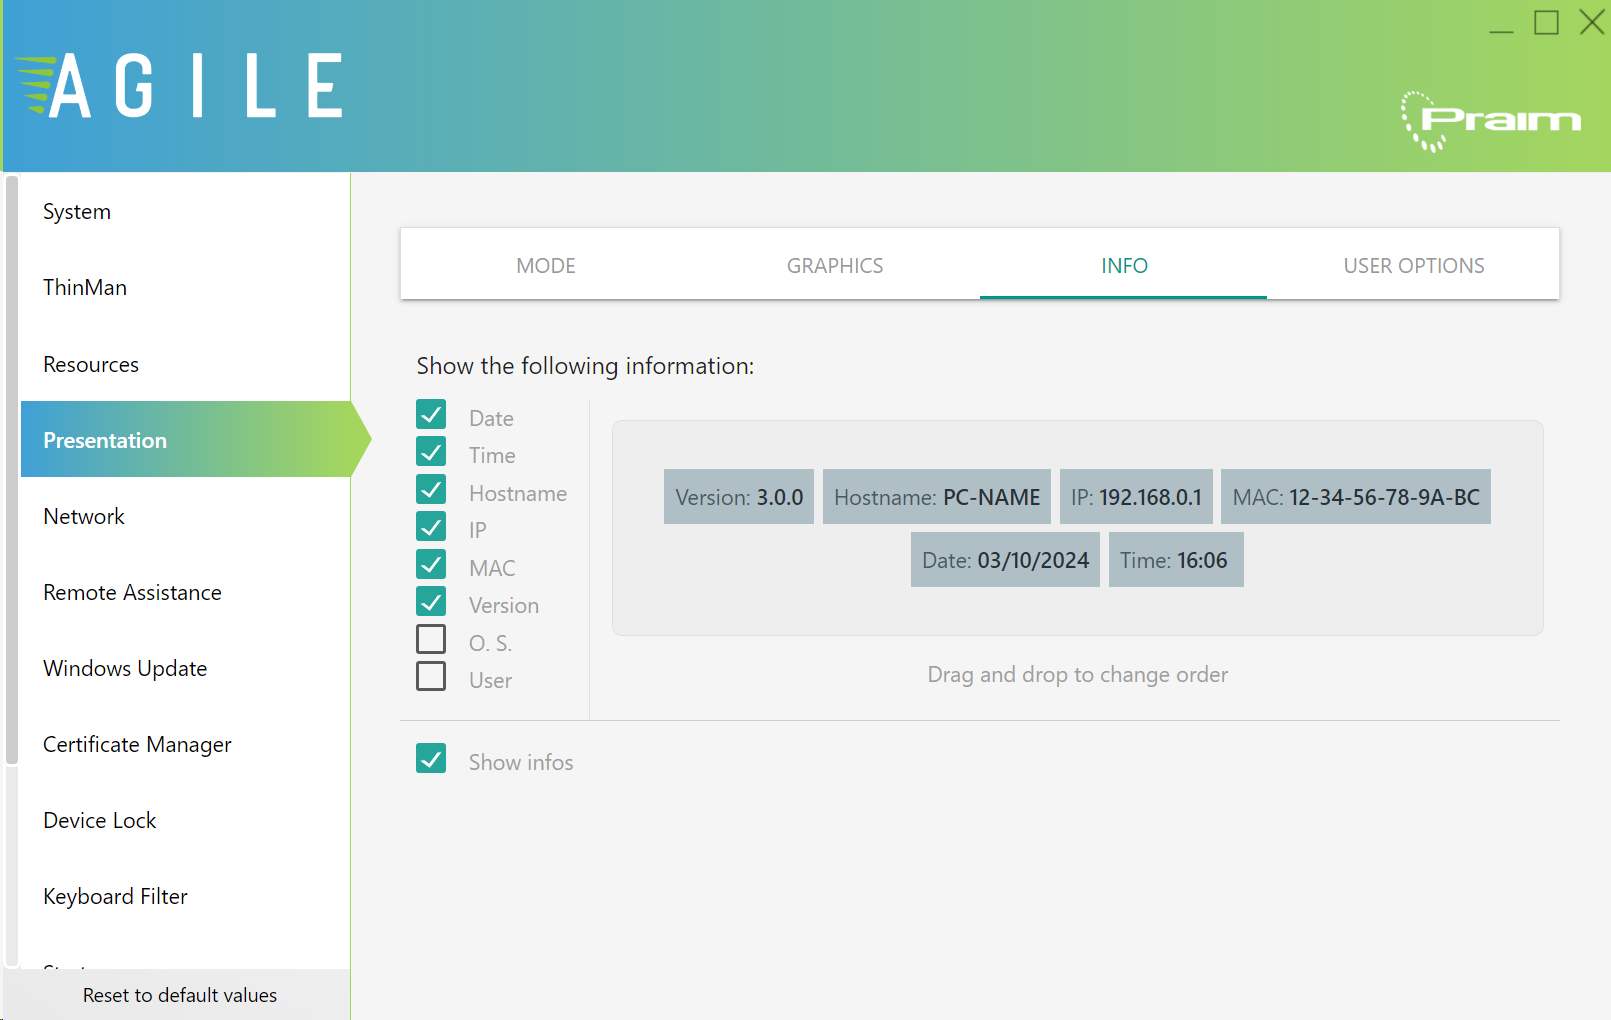
- INFO: It allows to control what type of information will be displayed on the screen for the end-user.
- USER OPTIONS: It allows to manage which device settings (e.g., sound, local Wi-Fi, etc.) will be freely accessible to the end-user.
These settings apply to all presentation modes, although each mode may also have additional, mode-specific configuration options.
¶ Mode
The device can be configured to run in a specific Presentation Mode, that will create a customized experience when the end-user accesses the RESOURCE configured in Agile. Agile offers six different presentation modes, each with increasingly strict lockdown properties. The active presentation mode is associated to a Windows user that will be set up for automatic login. If the specified user does not already exist, Agile automatically creates a new Windows user.
The presentation modes can be divided into two main categories: Free and Locked (see above image, blue rectangles). The Free category includes only the Windows mode, while the Locked modes restrict access to the Windows environment.
| Presentation Mode | Category | Restriction Level | Taskbar | GUI Style | Windows User | Access to Apps | ThinMan Login |
|---|---|---|---|---|---|---|---|
| Windows | Free | Unlocked | Yes | Windows Desktop | User | Any Windows application | Not supported |
| Desktop | Locked | Limited (with Explorer) | Yes | 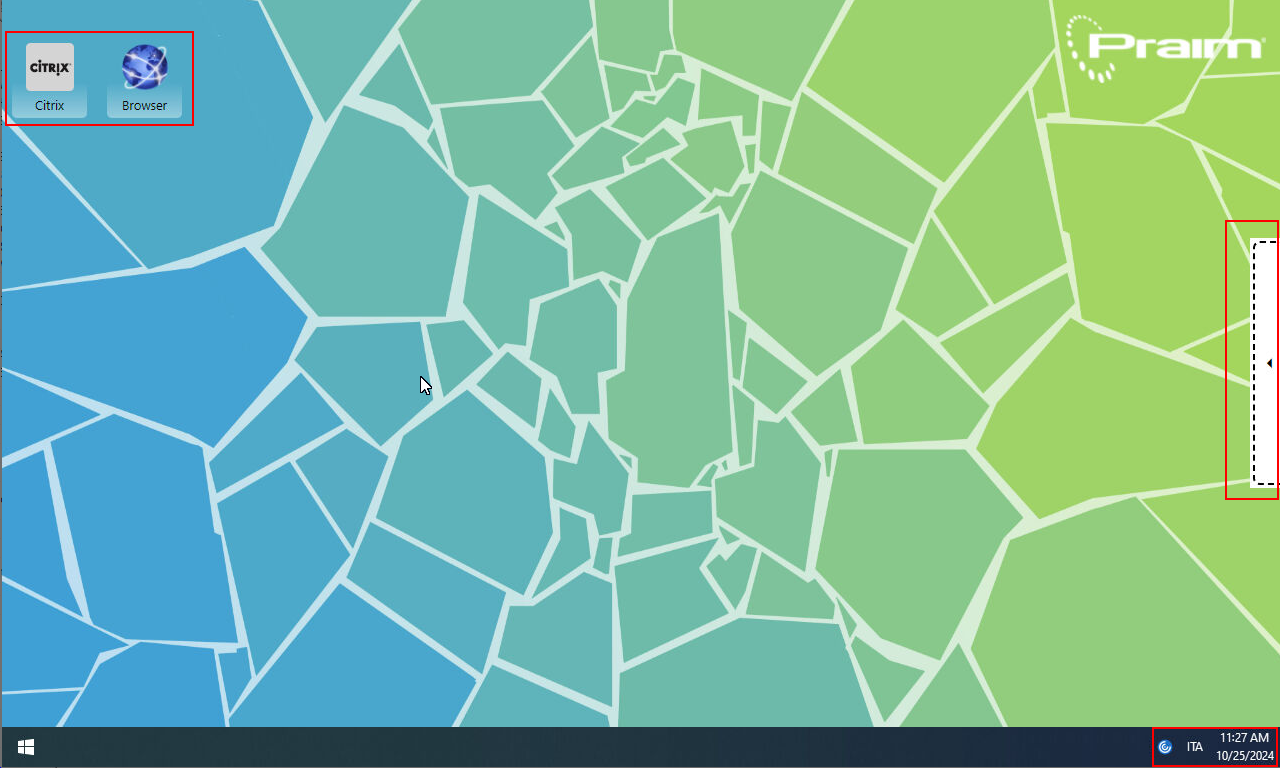 |
DesktopUser | One or more Agile resources | Supported |
| Multi-Apps | Locked | Fully-locked (no explorer) | No |  |
MultiAppsUser Unless you have updated to version 3.*.* from a version earlier than 3.0.0, in which case it will be Agile |
One or more Agile resources | Supported |
| Single-App | Locked | Fully-locked (no explorer) | No |  |
SingleAppUser | One or more Agile resources | Supported |
| Quick-App | Locked | Fully-locked (no explorer) | No | 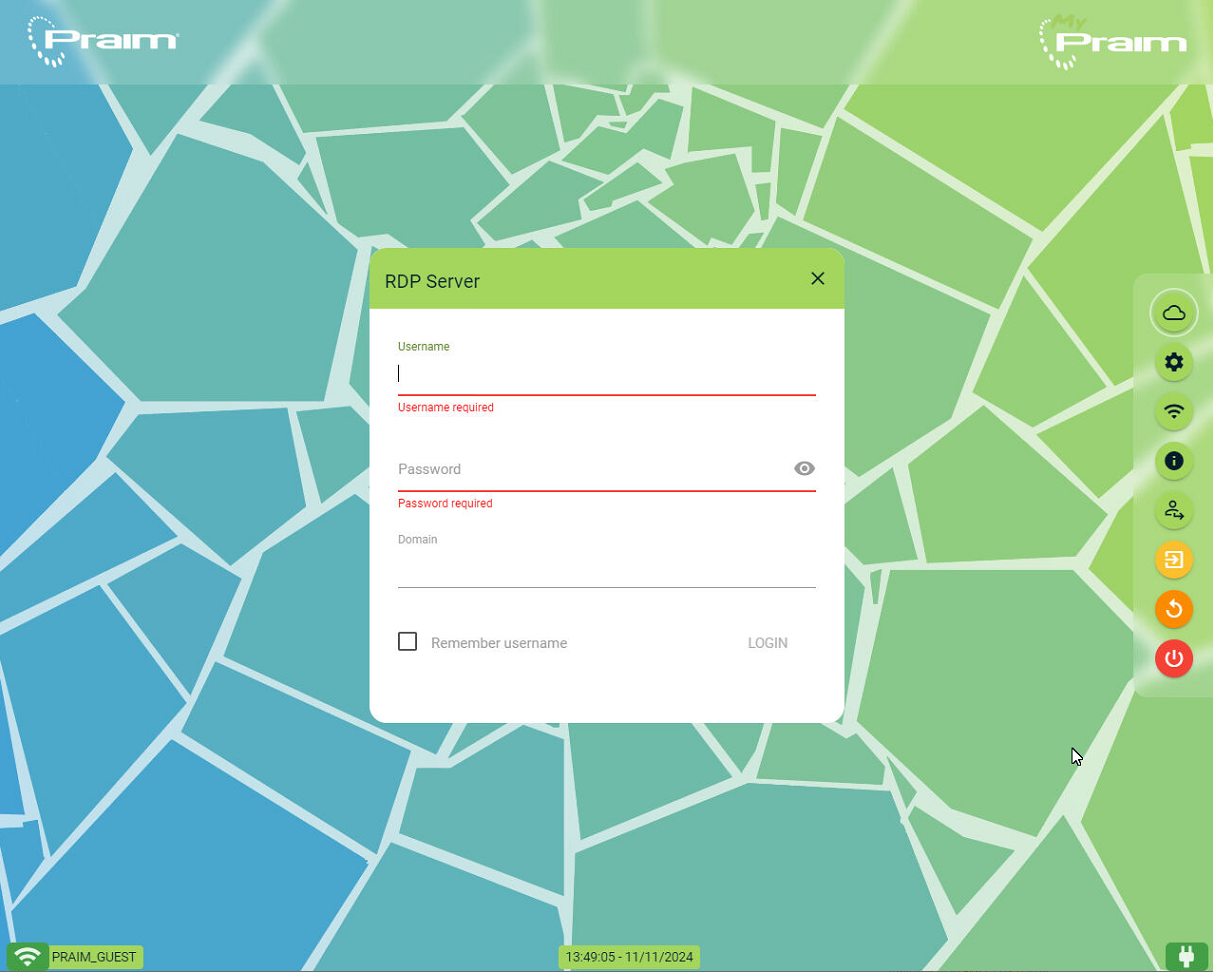 |
QuickAppUser | One of the Agile resources | Supported |
| Web | Locked | Fully-locked (no explorer) | No |  |
WebUser Unless you have updated to version 3.*.* from a version earlier than 3.0.0, in which case it will be Browser |
Restricted to the browser with the configured URL | Not supported |
Before diving into the details of each Presentation Mode, it is important to understand how Agile organizes the mode configuration. The six modes are displayed in rows, ranging from the least restrictive (Windows mode, at the top) to the most restrictive (Web mode, at the bottom). At the top of the MODE tab, an information box shows the currently active Presentation Mode and the associated Windows user account.
On each presentation row, the following controls are available from left to right (see image below):
- Preview: A quick preview of the presentation mode's appearance (represented by a round eye icon).
- Presentation Mode Selector: Allows you to switch between modes and activate the current presentation mode with a single click.
- Presentation Mode Name and Description: Displays the name and a brief description of the mode.
- Windows User Configurator: Lets you change the Windows account assigned to this mode and optionally set its password.
As a best practice, Praim recommends not joining thin clients to a domain. However, if the device is joined to a domain, the password must comply with the domain’s password policy.
- Specific-Settings Configuration: Access additional settings specific to each mode via the squared gear icon.
¶ Presentation Modes
To select the presentation mode that best fits your needs, click on the Presentation Mode Selector. Once a mode is activated, a Windows user will be created, with the username depending on the chosen presentation mode. To disable the presentation mode, simply click the Disable button located at the top of the MODE tab.
For more information about each presentation mode and the specify additional settings select one of the links below:
No Presentation Mode is selected
If no presentation mode is selected—because it has been disabled, reset, or follows a fresh installation of Agile4PC—the device will continue to operate as it did previously, typically using the default administrator account. In this case, the Agile service is still running, but no active presentation mode is available to the end user.By contrast, Praim thin clients with Agile come preconfigured with Windows presentation mode enabled by default. In this scenario, the default local account “User” is configured for automatic sign-in after the device boots.
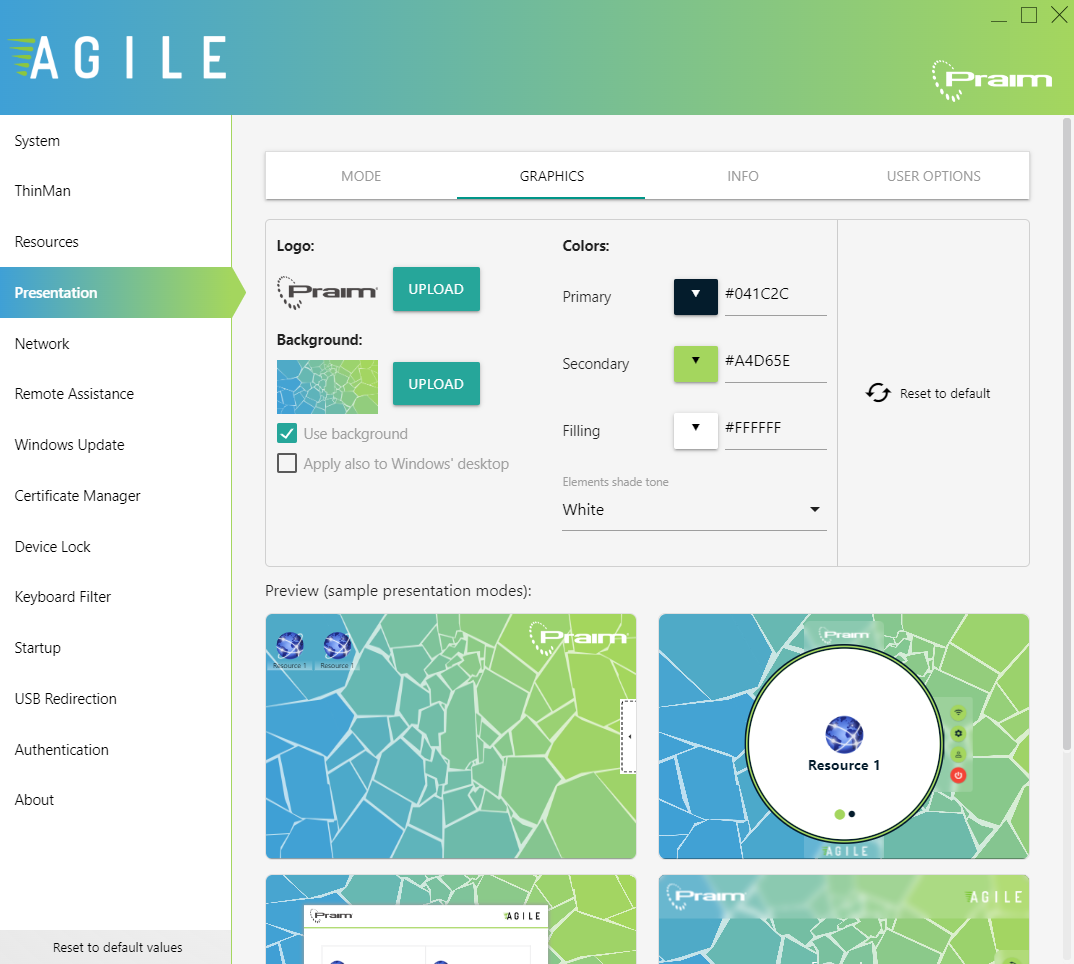
¶ Graphics
On this tab, you can change the graphics customization that will be shown to the user.
-
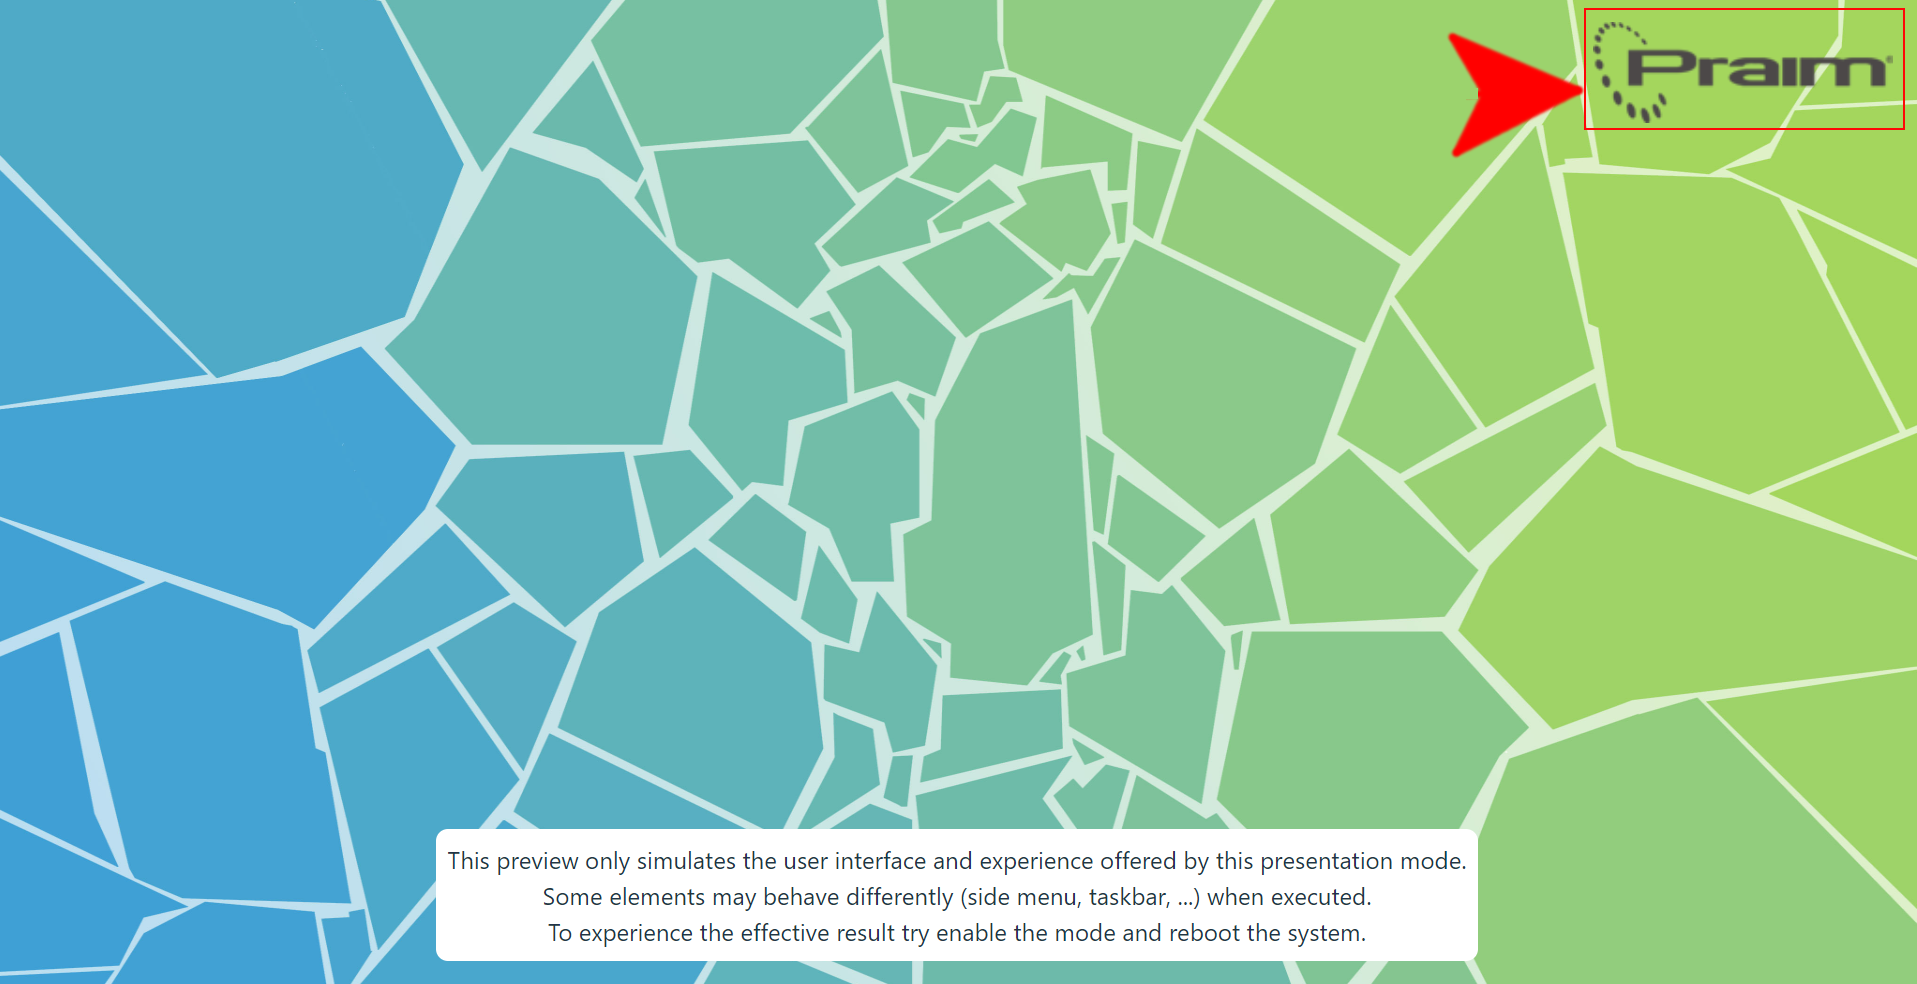
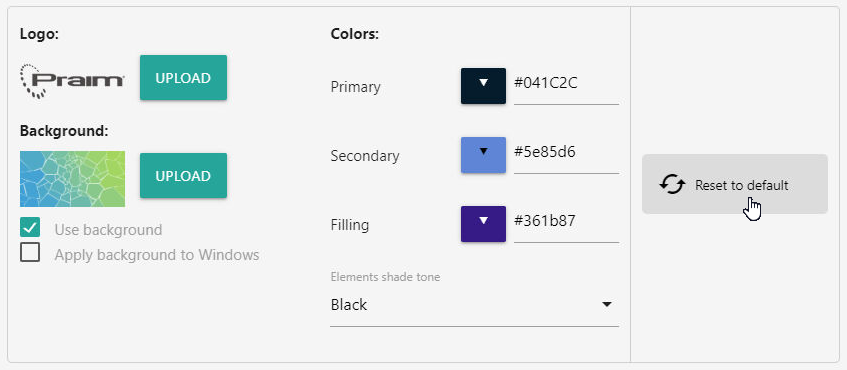
Logo: This button allows you to substitute the default logo (Praim). The size of the file should not be greater than 1MB.
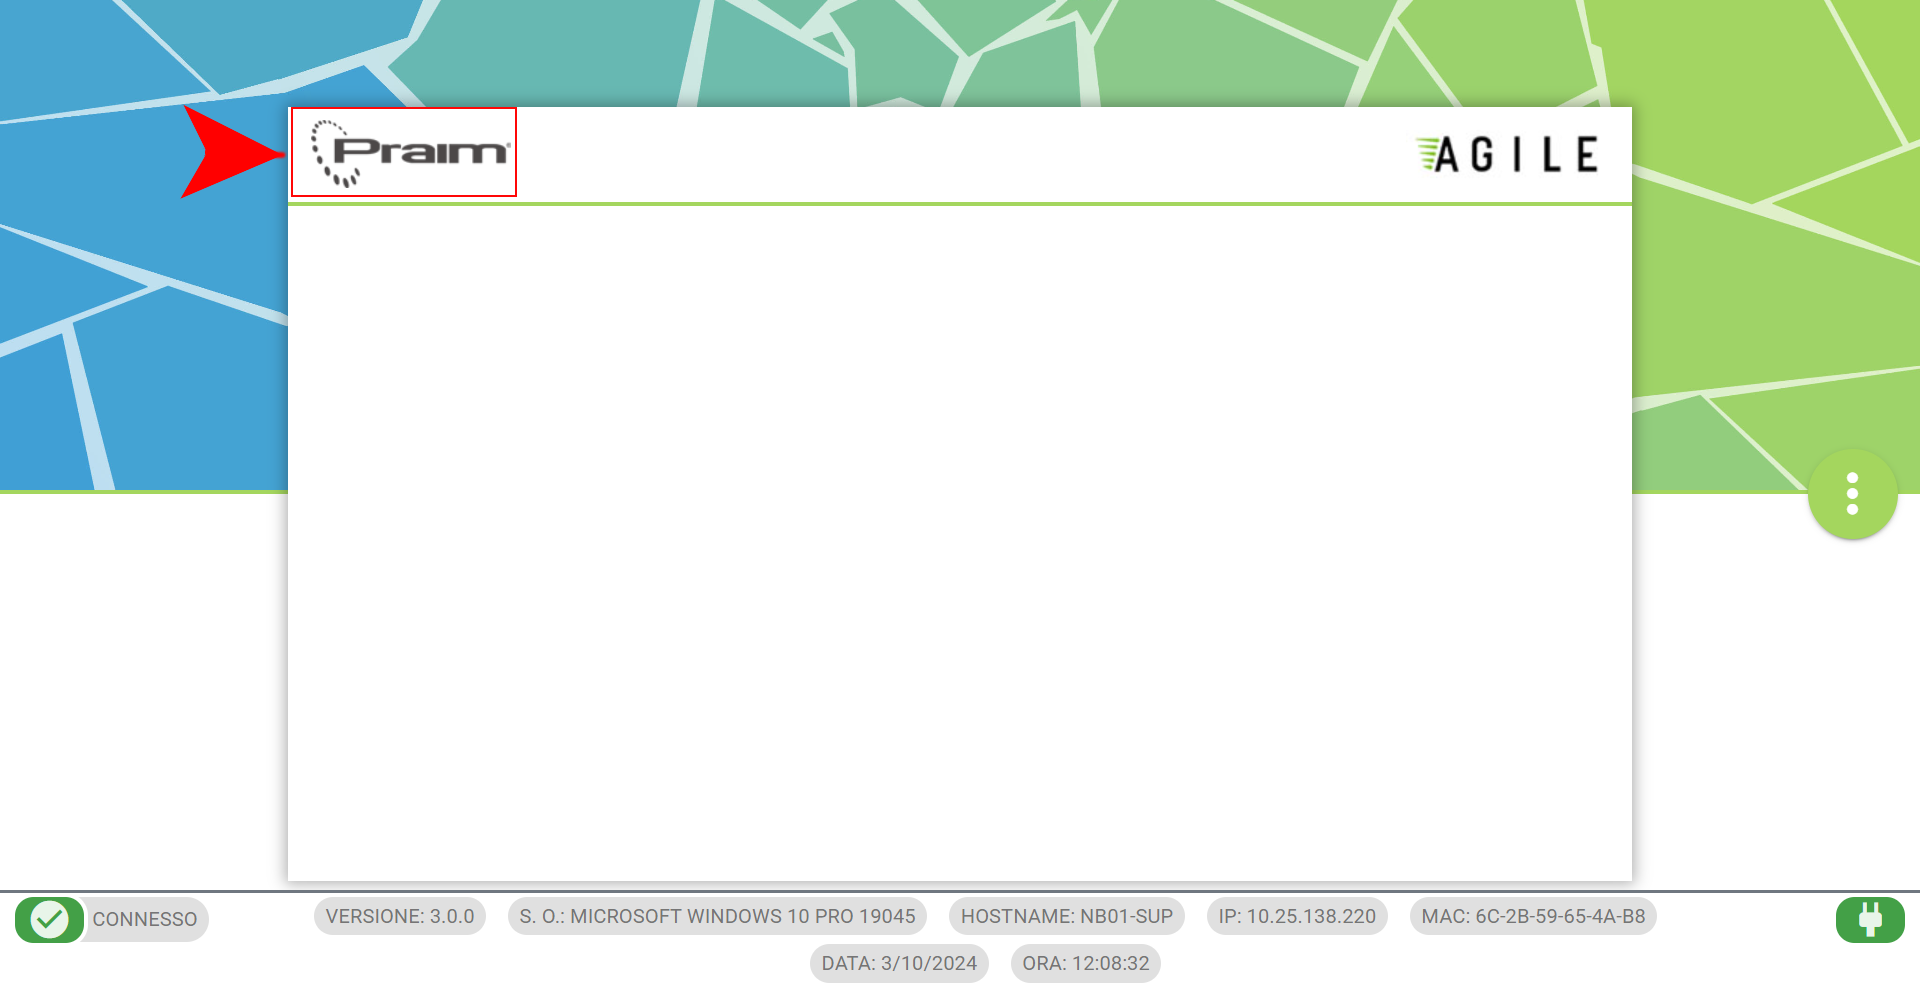
On the Desktop mode, the logo appears, by default, at the top right corner of the window. But this can be modified through the Specific Settings.
On the Multi-Apps, the logo appears at the left corner of the kiosk window.
On the Single-App, the logo appears at the top of the resource window.
Quick-App: the logo appears at the left corner of the window.
- Background: Use this button to substitute the default background by uploading their own image. The size of the image should not exceed 1MB.
- Use background: When this option is selected, the uploaded background image is used. Otherwise, the background defaults to the primary color.
- Apply background to Windows: This option is applicable only in Desktop and Windows presentation modes. When enabled, the selected background will be applied to Windows; otherwise, the primary color will be used as the background. Please note that changing this setting may require the Windows user to be recreated. Additionally, modifying this parameter requires the write filter to be disabled. If you are using other presentation modes (multi-apps, single-app, quick-app, web) in a multimonitor setup, the background will only be applied to the primary monitor.
- Colors
- Primary: it will change the color of some graphical elements of the window (e.g. name of the resources).
- Secondary: it will change the color of some graphical elements of the window (e.g. color of the menu buttons).
- Filling: on the Multi-Apps presentation mode, it will change the color of the lower half of the window; in order to be visible, be sure the Full size background option is disabled.
- Elements shade tone: on the Single-App presentation mode, it will change the color of some graphical elements of the window. You can select either white, black, primary, secondary or transparent.
- Reset to default
To restore all the Graphics parameters to default, click on the button Reset to default.
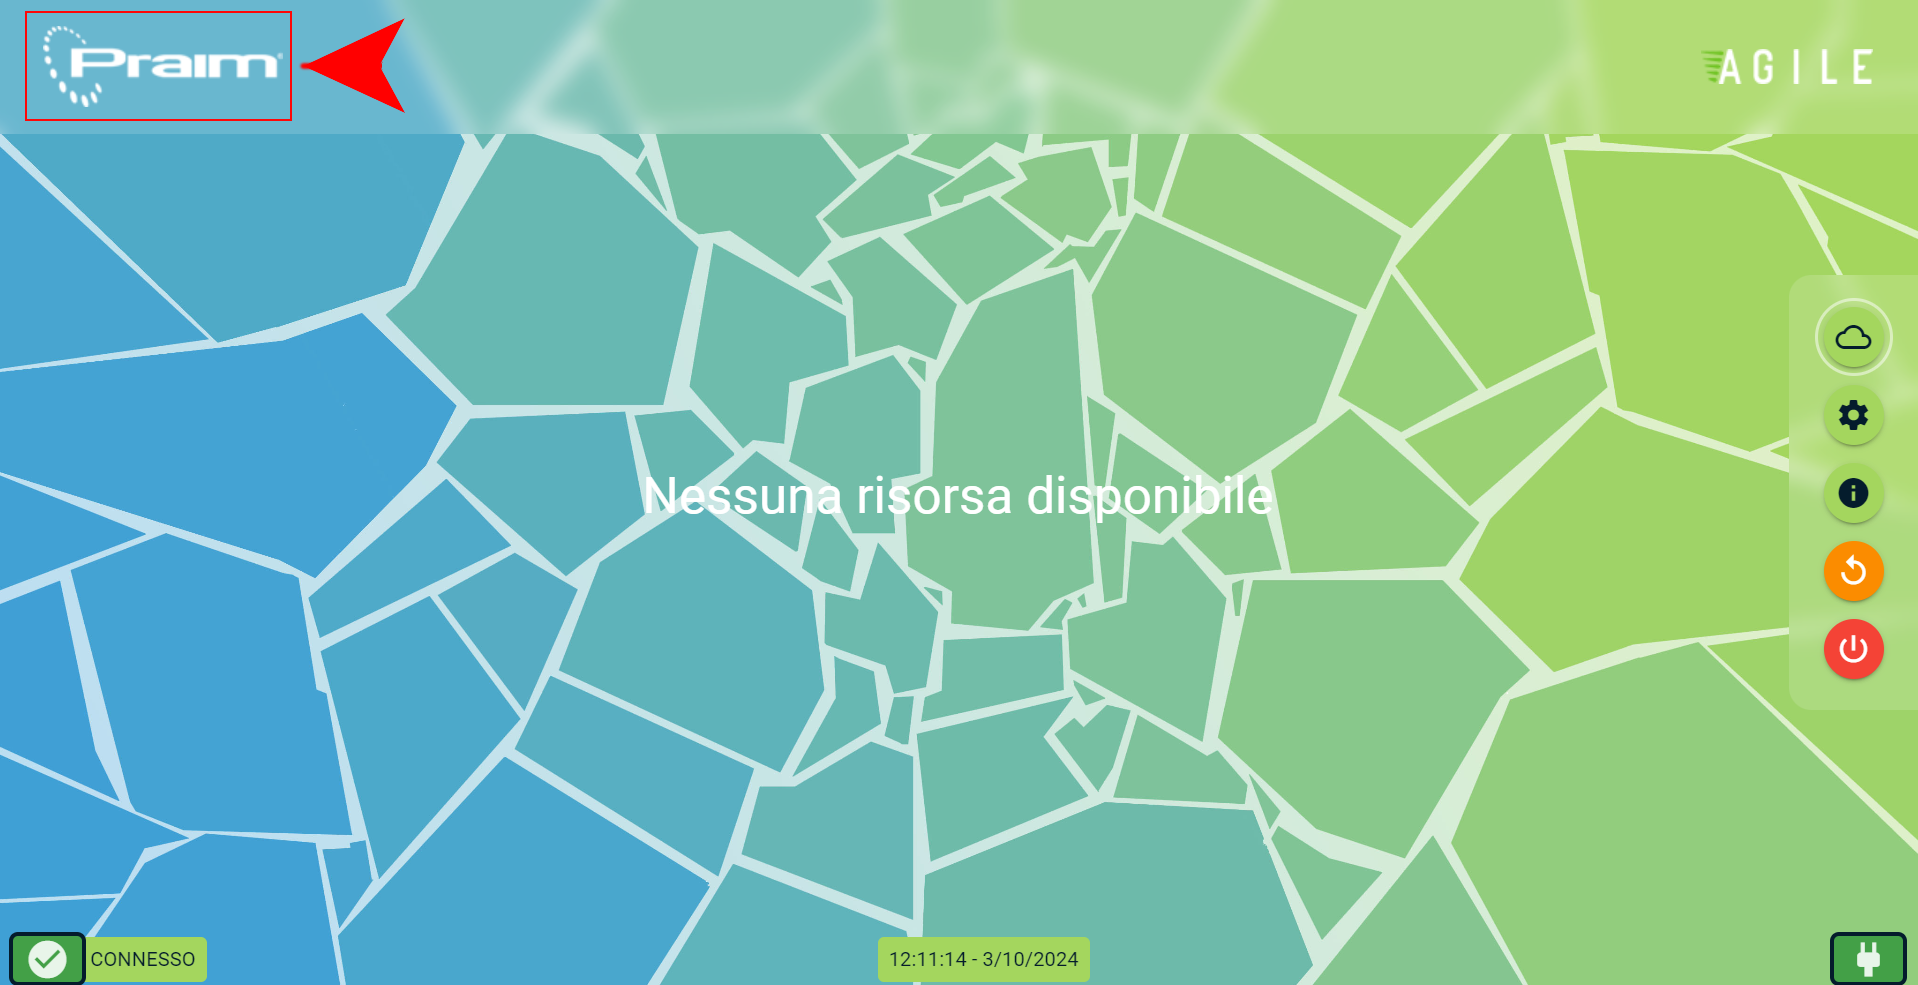
¶ Info
Here, you can select the data to be displayed at the bottom of the window in the locked down presentation modes.
¶ User Options
Here, you can select the settings that will be available to the user in the locked down presentation modes.
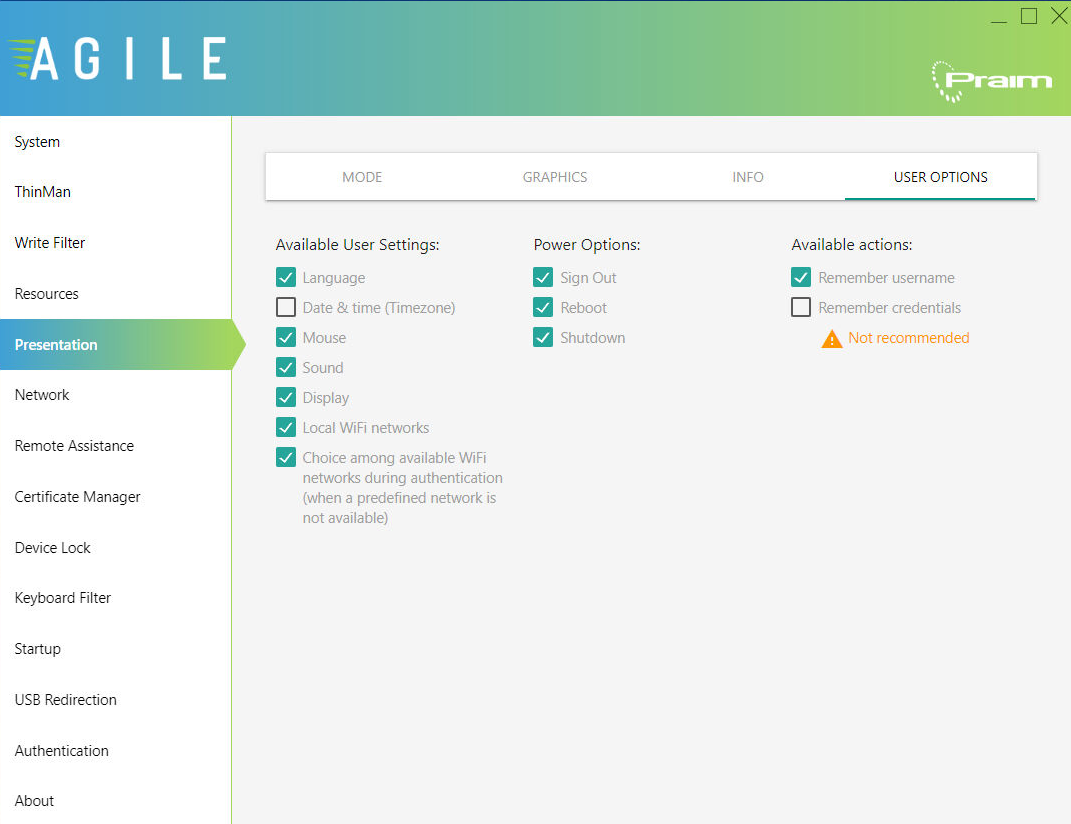
¶ Available User Settings
- Language: when enabled, the user can change the language settings (language and keyboard layout).
- Date & Time: when enabled, the user can change the timezone.
- Mouse: when enabled, the user can change the mouse settings.
- Sound: when enabled, the user can change the sound settings (input and output volumes).
- Display: when enabled, the user can change the Video settings.
- Local WiFi networks: when enabled, the user will be able to configure and choose a local WiFi Network. If the device is connected exclusively to a wifi network and the user has already configured at least one wifi connection, the device will automatically try to connect to one of them.
- Choice among available WiFi networks during authentication (when a predefined network is not available): available only when the previous option is enabled, a device exclusively connected to a wifi network will get disconnected from the wifi when logging out from Agile. The first interface shown to the user will be a list of all possible wifi connections.
¶ Power Options
Here, you can decide which options make available to the end-user on the Locked-down presentation modes:
- Sign Out: when enable, the user will be able to close the corresponding Windows User Session, returning to the O.S. Login interface.
- Reboot: when enable, the user will be able to reboot the device.
- Shutdown: when enable, the user will be able to power off the device.
Logout
For the presentation modes Desktop, Multi-Apps, Single-App and Quick-App you will also see a Logout button that allows the end-user to close all the resources sessions and the ThinMan Login session.
¶ Available Actions
- Remember username: when enabled, the user will be able to select Remember Username on a resource or on the ThinMan Login.
- Remember credentials: when enabled, the user will be able to select Remember Credentials on a resource or on the ThinMan Login.
