The "Network" tree allows to define the IP Ranges that can be associated to Groups (you can also do that using the Group Properties).
If a device notify itself to ThinMan and if the device IP Address belongs to an IP Range and the IP Range is associated to a Group then the device is assigned to the Group. See Options - Network Tab to define the automatic assignment mode. If the IP Address of a device does not belongs to an IP Range or the IP Range is not associated to a Group then the device is assigned to the root of the "Devices" tree.
Moreover the IP Ranges are used by Thinman to browse the network and search for new devices (see Network Browsing and Device Refreshing for more information). Remind that only associated IP Ranges will be browsed by ThinMan. Be sure that all the IP Ranges are associated to a Group (e.g. you can associate an IP Range to the root of the "Devices" tree).
Browsing the network using the IP Ranges
The creation of IP Ranges is mandatory to browse network trunk where the network devices are not allowed to propagate broadcast UDP packets and where the ThinMan Server is not on the same subnet with the devices. In this case create all the necessary IP Ranges and associate them with Groups. Remind that you can associate the "Devices" tree root.IP Ranges that are not associated to Groups are not browsed by the ThinMan Server. See Group Properties for more information on how to associate IP Ranges to Groups.
Remind also that the best way to manage devices is that the devices are "pointing" to the ThinMan Server. See How to Setup ThinMan Address on Thin Client and Network Browsing and Device Refreshing for more information.
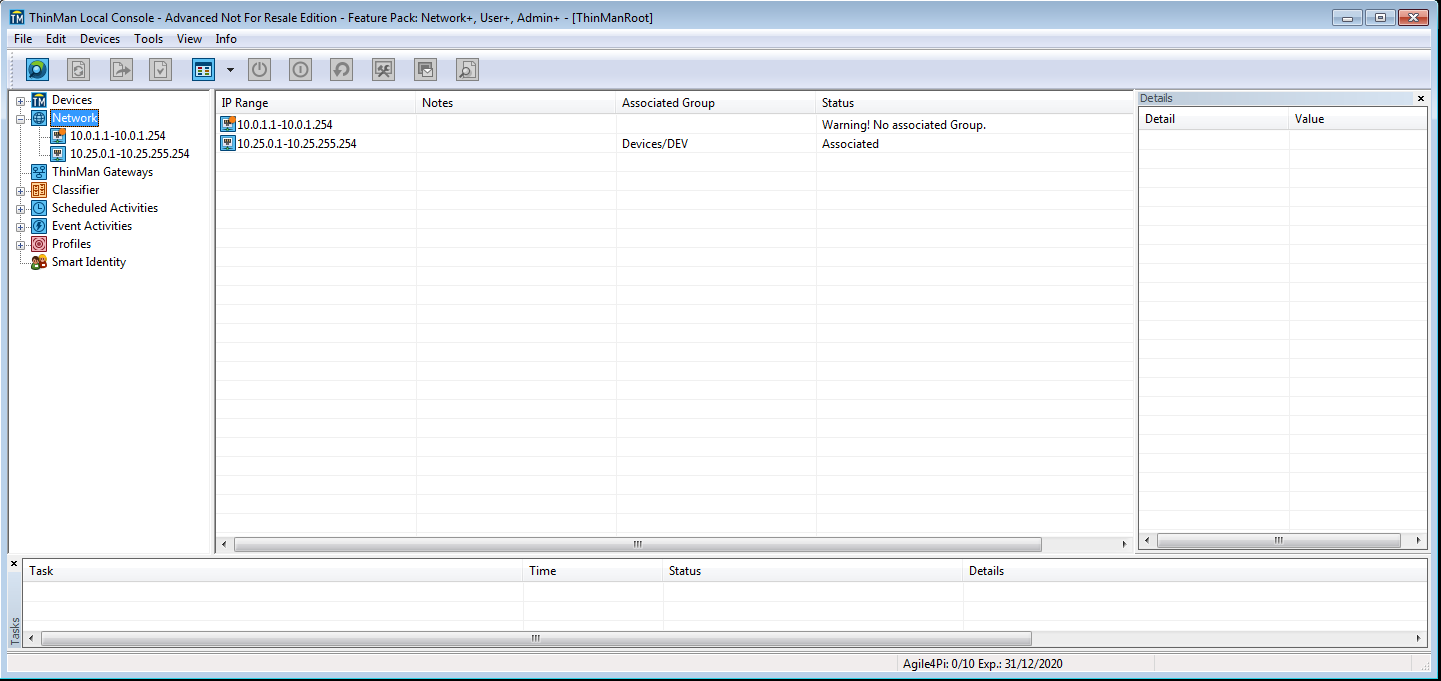
In the tree and in the central part of the interface you will see the defined IP Ranges. Every IP Range reports a Status and its Associated Group (if the IP Range is associated to a Group). The Status could eventually report a warning or an error.
Typical actions that you can perform here are:
- Add a new IP Range (or import a file with many definition of IP Ranges) and/or edit its Properties;
- Associate an IP Range to a Group or delete this association;
- Delete an IP Range;
- Browse an IP Range;
- Reorganize an IP Range.
See below for the information related to these points.
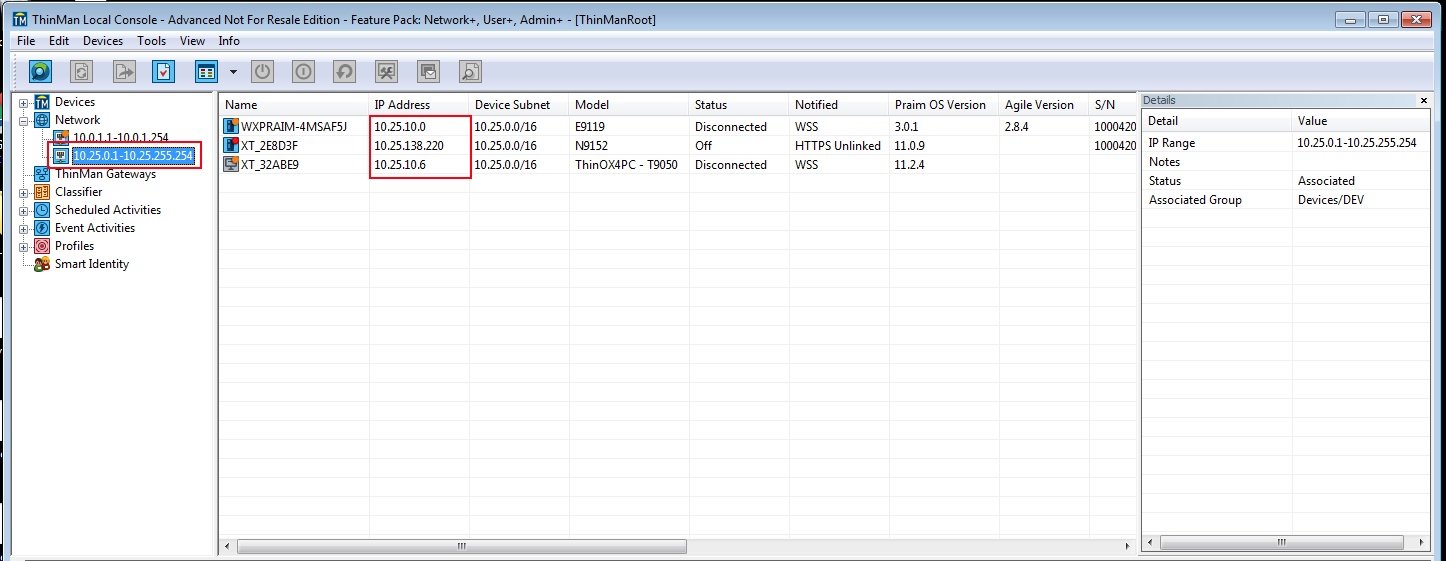
Selecting an IP Range in the "Network" tree will show all the thin client whose IP Address belong to the IP Range.
¶ Add an IP Range and Properties of an IP Range
To add a new IP Range right click the "Network" tree.
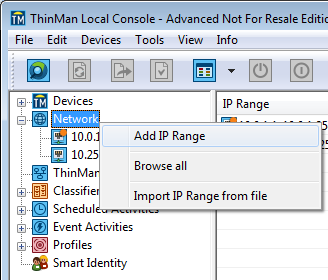
Select "Add IP Range".
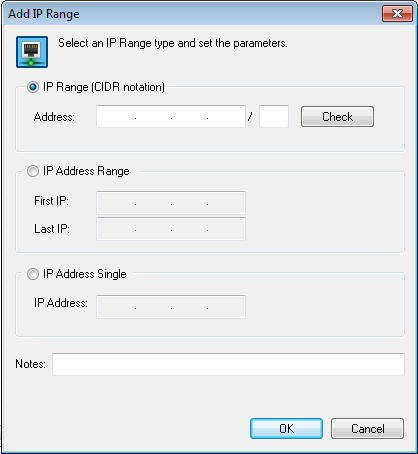
It will open a window where you can insert the definition of an IP Range. An IP Range can be defined using three different mode:
- using the Slash notation (or CIDR, see https://en.wikipedia.org/wiki/Classless_Inter-Domain_Routing)(e.g. 192.168.2.0/24)
- entering the IP Range of the subnet defining the first and the last IP Address of the IP Range (e.g. 192.168.2.0 - 192.168.2.255)
- entering a single IP Address (e.g. 192.168.2.5 )
You can also add a Note to an IP Range (this Note will be visible as a column in the central part of the interface or in the Details Window placed on the right side).
Clik on "OK" to save the new IP Range.
You can edit the IP Range configuration right clicking on it and selecting "Properties". The same window above will open and you can change the properties of an IP Range. Click on "OK" to save the configuration.
¶ Import IP Ranges definition from a file
If you owns many IP Ranges you can also prepare a text file (save it with ".txt" extension) where you can define the IP Ranges (one for every line of the file).
Every lines of the file has to be in the form:
<Start IP Address> <TAB> <End IP Address>
NOTE The <TAB> is the character obtained pressing the tabulator key on the keyboard. Don't leave blank lines into the file. The file do not support CIDR notation (Slash notation).
E.g.
| 192.168.1.0 | 192.168.1.255 |
| 10.10.1.0 | 10.10.1.20 |
Right-click the "Network" tree and select "Import IP Range".
Click on "Yes" button.
Select the file from the file explorer window and click on "Open".
At the end of the operation all the IP Ranges are created in the "Network" tree.
¶ Associate an IP Range to a Group and delete the association
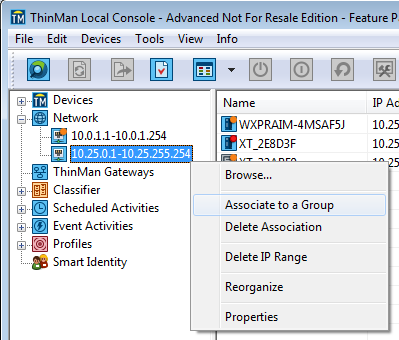
Right click an IP Range and select "Associate to a Group".
Remind that an IP Range can be associated to a Group only.
Remind that you can do that also by using the Group Properties.
Remind that only associated IP Ranges will be browsed by ThinMan to search new devices. In this case associate all IP Ranges to the "Devices" root tree.
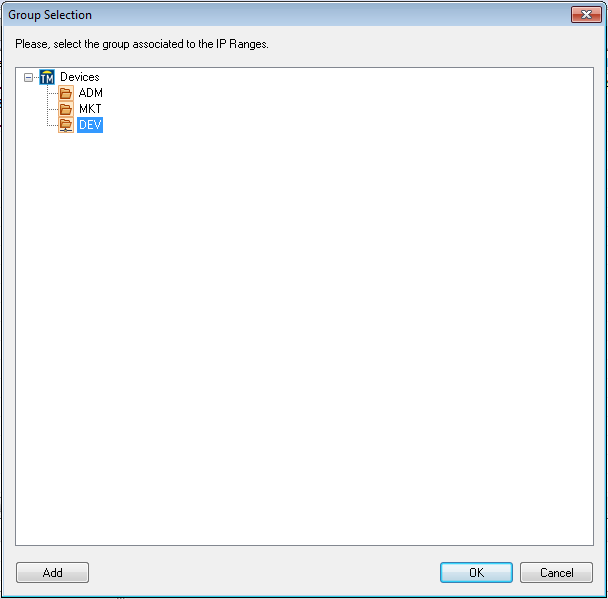
A new window is open. Click on the Group that you want to associate to the IP Range and click "OK".
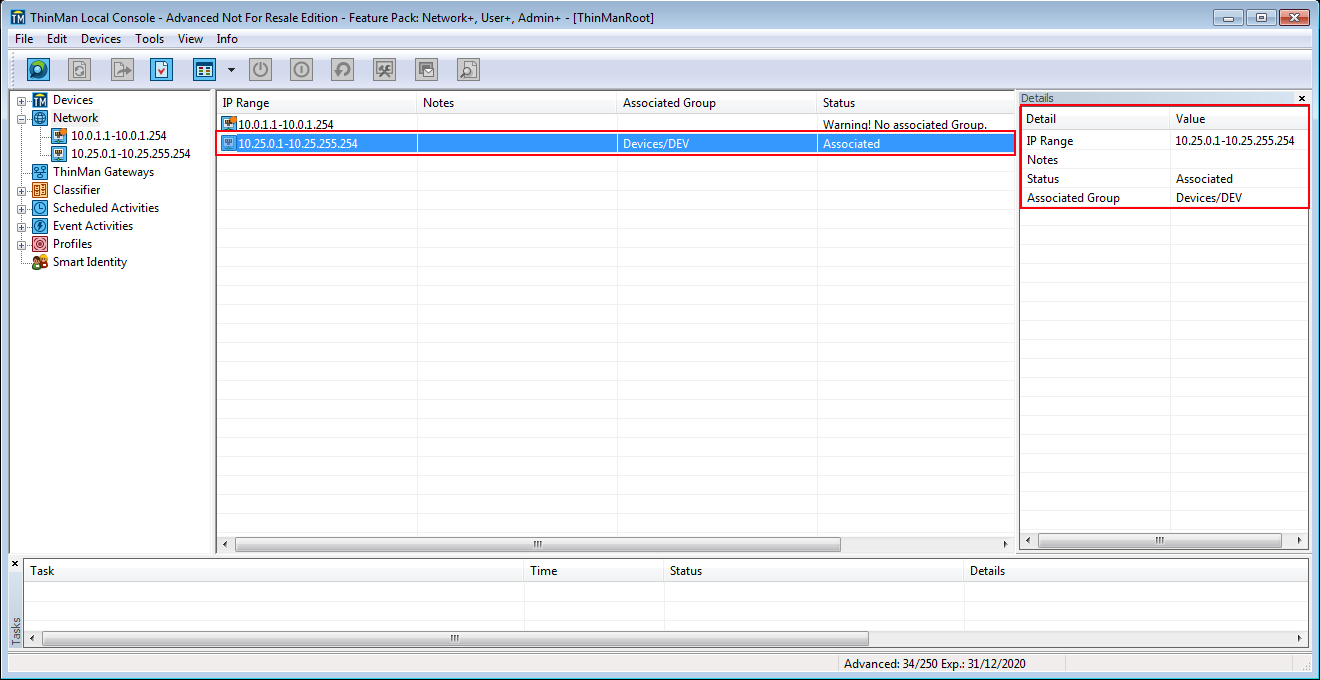
You could see that now the IP Range "Status" is "Associated" and you can see the name of the associated Group.
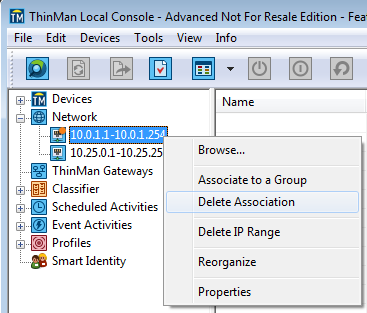
¶ Delete Association
You can delete the association of an IP Range to a Group using the menu "Delete Association" on the right click menu of an IP Range.
This will delete only the association between the Group and the IP Range. The IP range will still remain in the "Network" tree. Remind that an IP Range without association is not browsed by ThinMan.
¶ Delete an IP Range
An IP Range can be deleted from the Network tree.
Right click the IP Range and select "Delete IP range".
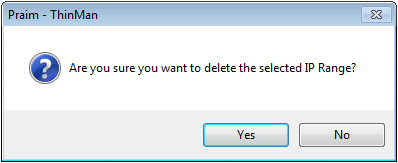
Confirm the operation clicking on "Yes".
The IP Range is deleted from the Network tree.
The devices that are assigned to a Group using the IP Range asssociation will remain in that Group.
¶ Mistakes or Warning on IP Ranges
After the upgrade of a ThinMan installation version 7.6 or earlier, all the IP range created in the previously versions will be converted to new IP Ranges and are placed into the "Network" tree.
This can conduct to some errors or warnings that will be notified when you enter the local console (if you are using ThinMan Access Control you have to enter the local console as ThinManRoot user).

Click on "Yes" to open the "Network" tree.
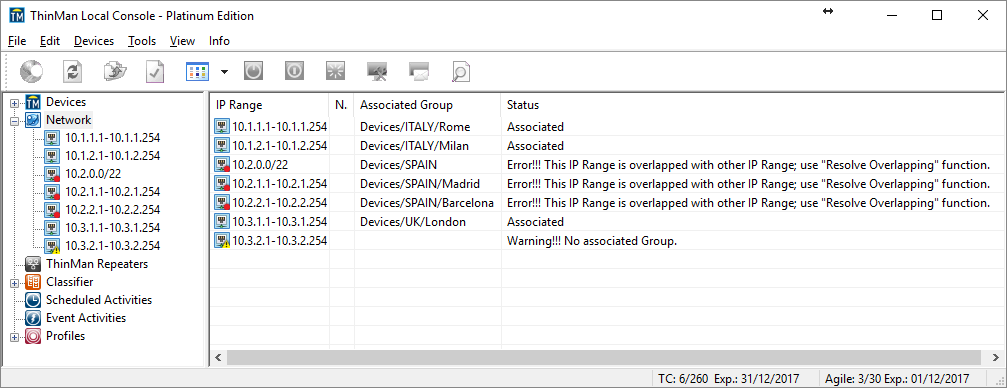
The red dot on an IP Range means that the IP range has error. To continue to use the IP Range you have to solve errors.
The orange triangle on an IP Range means that the IP Range has some minor issues.
In both cases read in the Status column which is the error and try to resolve them.
The typical error (red dot) is when two (or more) IP Ranges are overlapped. In this case change the wrong IP Ranges and maintain the correct ones.
You can do this by right clicking the wrong IP Ranges and use "Properties" menu to change them.
An alternative way to do that is to right click the correct IP Ranges and use "Resolve Overlapping" function. This will open a window that shows the overlapped IP Ranges; from there you can easily edit the overlapped IP Ranges.
The typical warning (orange triangle) succeed when an IP Range is not associated to a Group. Use the "Associate to a Group" command on it. Remind that IP Ranges that are not associated to a Group are not browsed by ThinMan.