The command Tools → Device Images Manager allows managing the boot images used for the image capture or image apply operations on Windows devices (for more information see Contextual Menu - Device Update (Windows Devices only). If you are using ThinMan Access Control, this feature is available only for the ThinManRoot user.
To be able to use the Contextual Menu - Device Update (Windows Devices only) commands you have to open the Device Image Manager menu Tools → Device Images Manager.
Specific Information
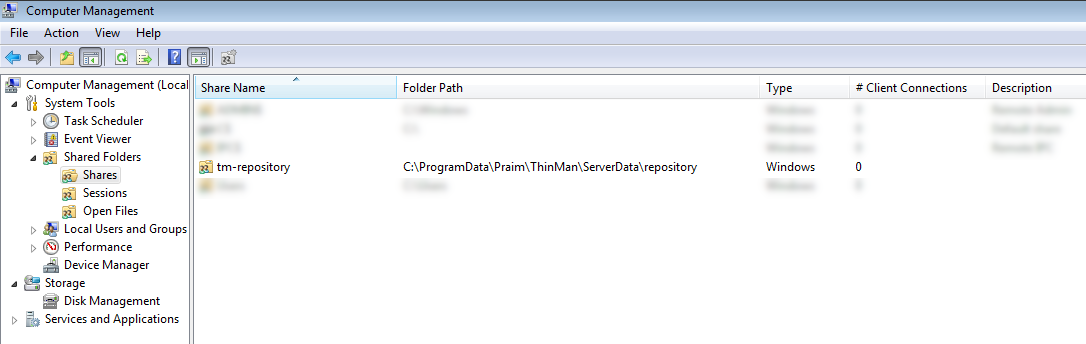
This operation will create a user on the local machine that shares in the read-only mode the Package Repository directory. The user is created with a strong password that could be changed. The shared directory is used to permit the capture of the image or the application of the image operations on Windows devices. Moreover, this operation allows managing (download automatically or upload manually) the boot images that allows performing the capture of the image or the application of the imageDevice Images Manager Menu operations
¶ Standard Workflow
Use the steps in this paragraph if the server can access the internet and the "Package Repository" is installed in your local machine.
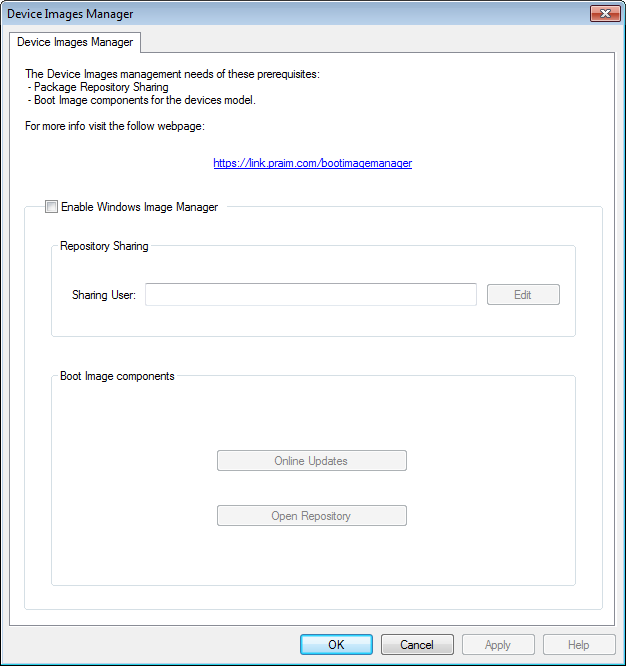
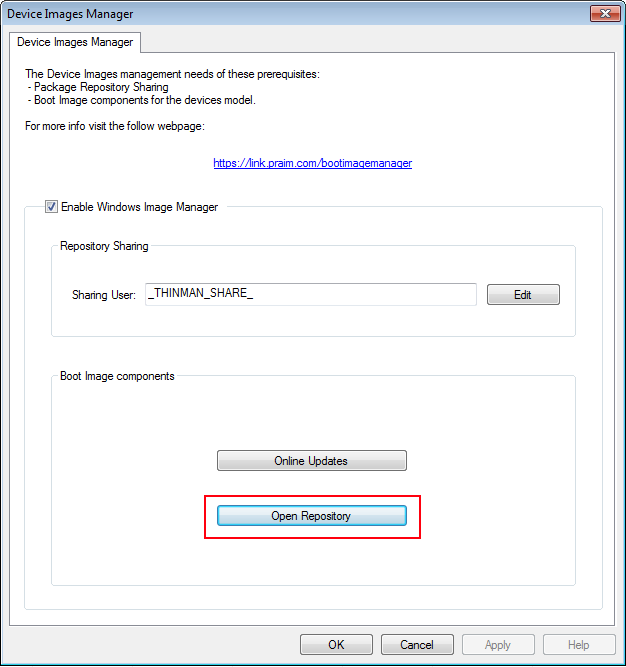
Flag the Enable Windows Image Manager checkbox.
This operation will propose "_THINMAN_SHARE_" on the Sharing User field and generate a strong password for that user.
By clicking on Edit you can change the proposed User or Password or view the generated password.
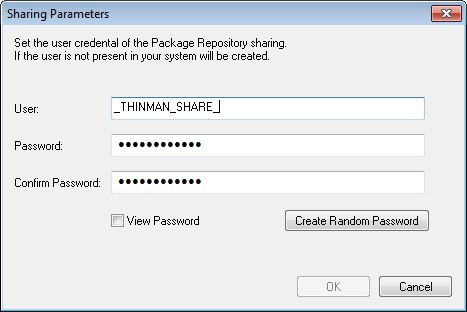
From the Edit panel you can change the proposed User and Password that will share the Package Repository directory. This directory and its shared content are used when the Contextual Menu - Device Update (Windows Devices only) is used. Change it if you have a User already installed on the server that could be used to share the Package repository directory; in this case, enter the User and its Password in the fields and click on OK. Click on Cancel if you want to create a new User with _THINMAN_SHARE_ name and with a generated Password (you can also change only the Password, in this case, press OK to save the newly entered Password).
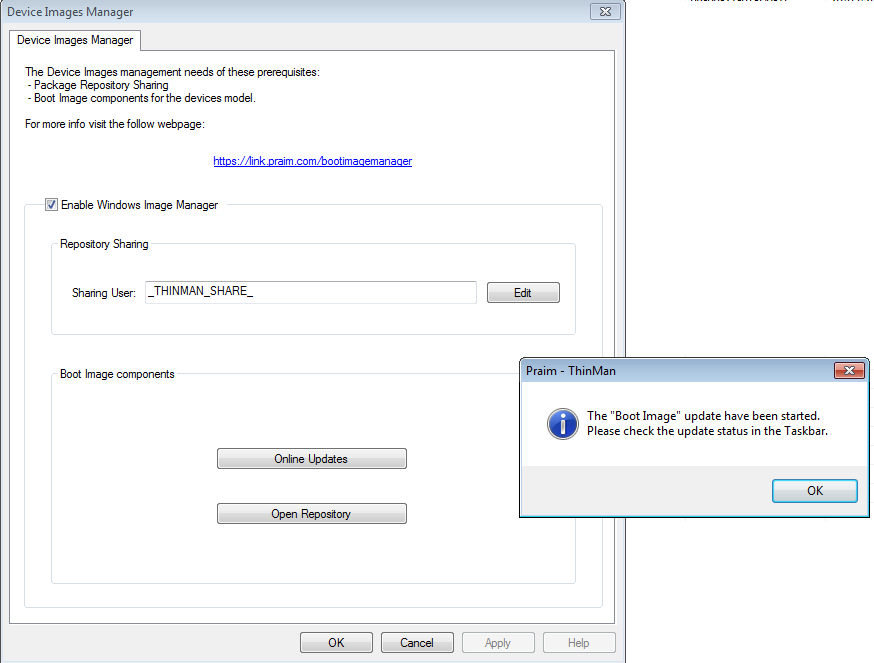
Returning on the main panel you have to download the boot images needed for the Contextual Menu - Device Update (Windows Devices only) commands. This operation can be easily done by clicking the Online Updates button. You can also click the Online Update to verify if there are updates for the boot images files. You will be eventually alerted if there is a new update to download.
The system alerts that the download has been started. Click OK.
If at this stage there are some errors (e.g., the server could not access the Internet) use the "Manual Installation of Image Boot files" explained below.

On the Task Window of the Console, you can see the progress of the files downloading. Once the status is Ready, you can use the Contextual Menu - Device Update (Windows Devices only) feature.
Once the downloading phase has terminated, you can see the downloaded files clicking on the Open Repository button.
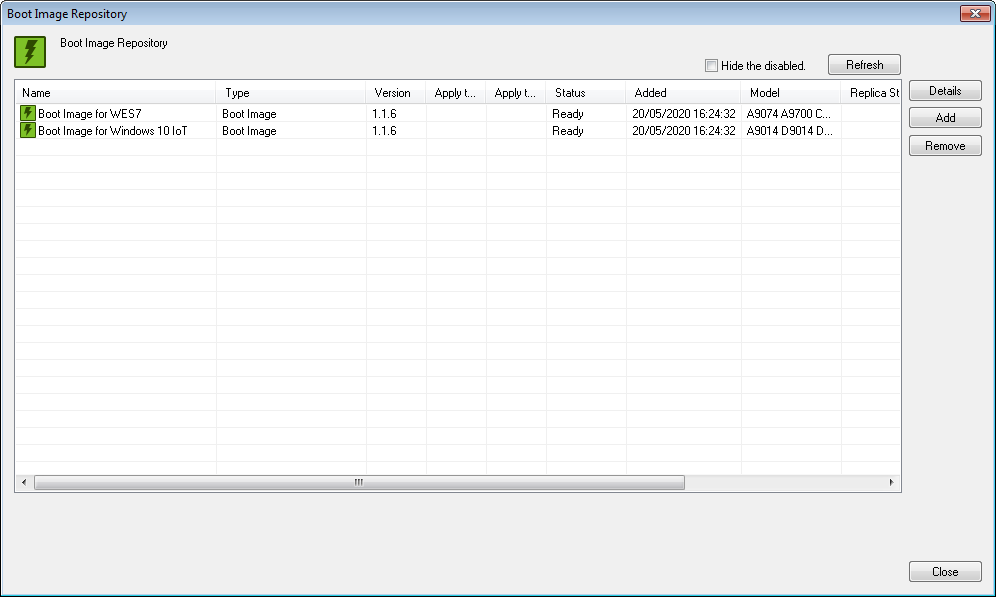
From the Boot Image Repository window you can Remove or manually add the Image Boot files. It is very similar to the Package Repository Menu, but it only manages the Boot Image files. Click on Close to close the Boot Image Repository window.
From the principal window, you can now close the Device Images Manager window clicking on OK.
When the OK button is clicked, the User inserted in the Sharing User field is created with the generated (or subsequently edited) Password (if the User is already available it is not created).
Using the Computer Management Windows software you can check that the shared folder is created correctly.
¶ Disabling the feature
If you are not using anymore the sharing folder for the Contextual Menu - Device Update (Windows Devices only) feature you can unflag the Enable Windows Image Manager properties and click OK. It will automatically remove the shared folder.
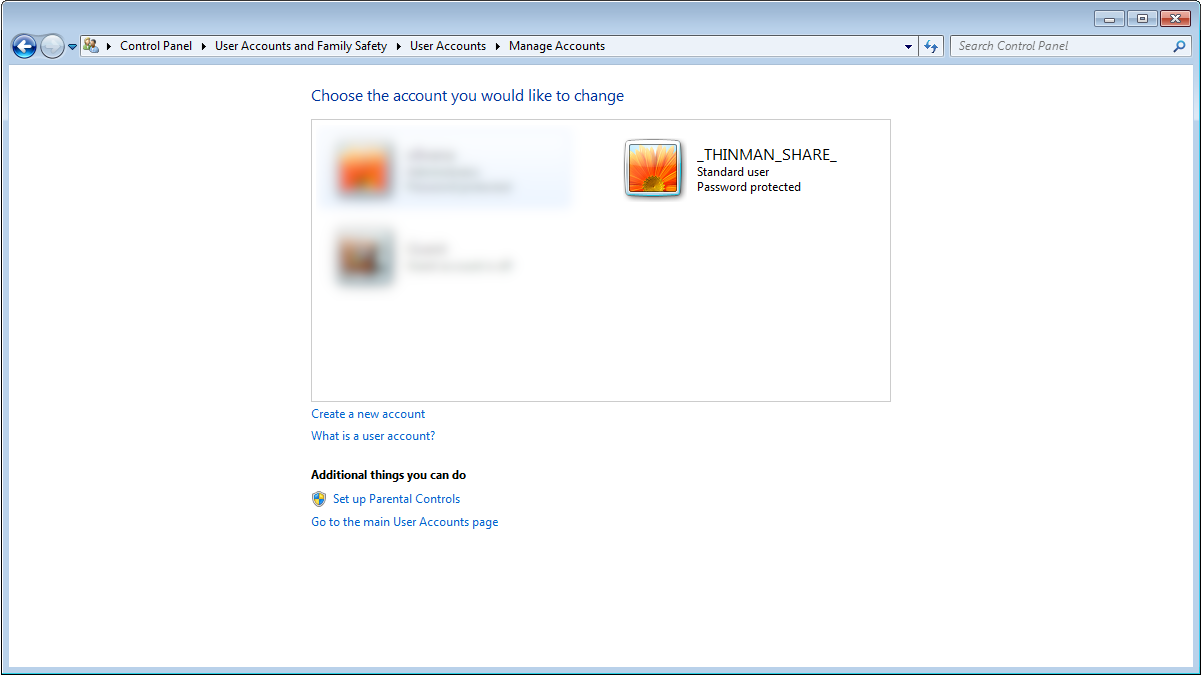
The User is not automatically deleted
The User that has been created on the first phase (could be _THINMAN_SHARE_ or the one you entered previously) has to be removed manually using the Control Panel -> User Accounts -> Manage Accounts feature of the standard Windows OS.
¶ Manual Installation of Image Boot files
In case of errors during the automatic download of the Image Boot files, you can import them manually.
Use this table to download the file needed. It will probably depend on the thin clients' models that you are using for the Contextual Menu - Device Update (Windows Devices only) feature.
| Label | FileName | Version | Models | URL for download |
|---|---|---|---|---|
| Boot Image for Windows 10 IoT | PraimBootImage_Windows-10-11-IoT_1.2.9 | 1.2.9 | D9219 D9221 D9321 D9311 M9219 M9221 M9321 M9311 N9119+ N9219 N9221 N9211 Z9219 Z9221 Z9321 Z9311 | https://packages.praim.com/Release/BootImage/PraimBootImage_Windows-10-11-IoT_1.2.9 |
| Boot Image for Windows 10 IoT | PraimBootImage_Windows-10-IoT_1.1.9.par | 1.1.9 | A9014 D9014 D9119 E9114 E9119 H9114 H9119 N9012 N9112 N9119 N9119+ Q9119 U9014 Z9219 | https://packages.praim.com/Release/BootImage/PraimBootImage_Windows-10-IoT_1.1.9.par |
| Boot Image for WES7 | PraimBootImage_WES7_1.1.6.par | 1.1.6 | A9700 A9074 C9700 D9074 E9174 N9072 N9172 U9700 U9074 | https://packages.praim.com/Release/BootImage/PraimBootImage_WES7_1.1.6.par |
Once you download the file (or files) put them in a USB stick or let them be available on the server and then use the Tools -> Device Images Manager menu to open the Device Images Manager window.
Click on Open Repository button, then click on Add button.
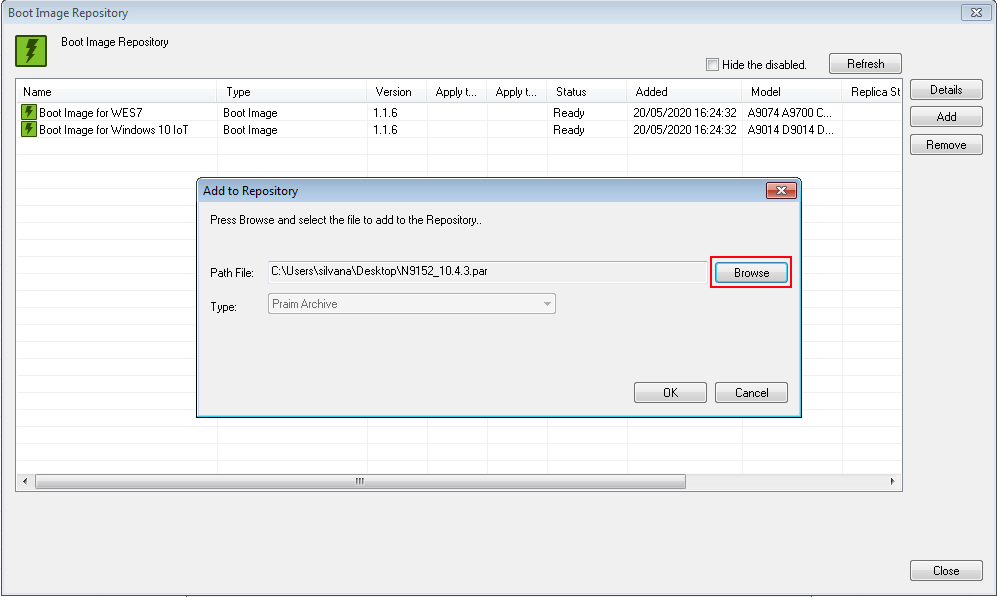
Click on Browse to select the "Image Boot" file that you downloaded previously and click "OK".
Wait until it is loaded in the Boot Image Repository and click on "Close".
Pay attention to the Image Boot files
Remind to install the file that depends on the model of Windows devices placed in your network. If you are not sure, download all the files available in the table above.