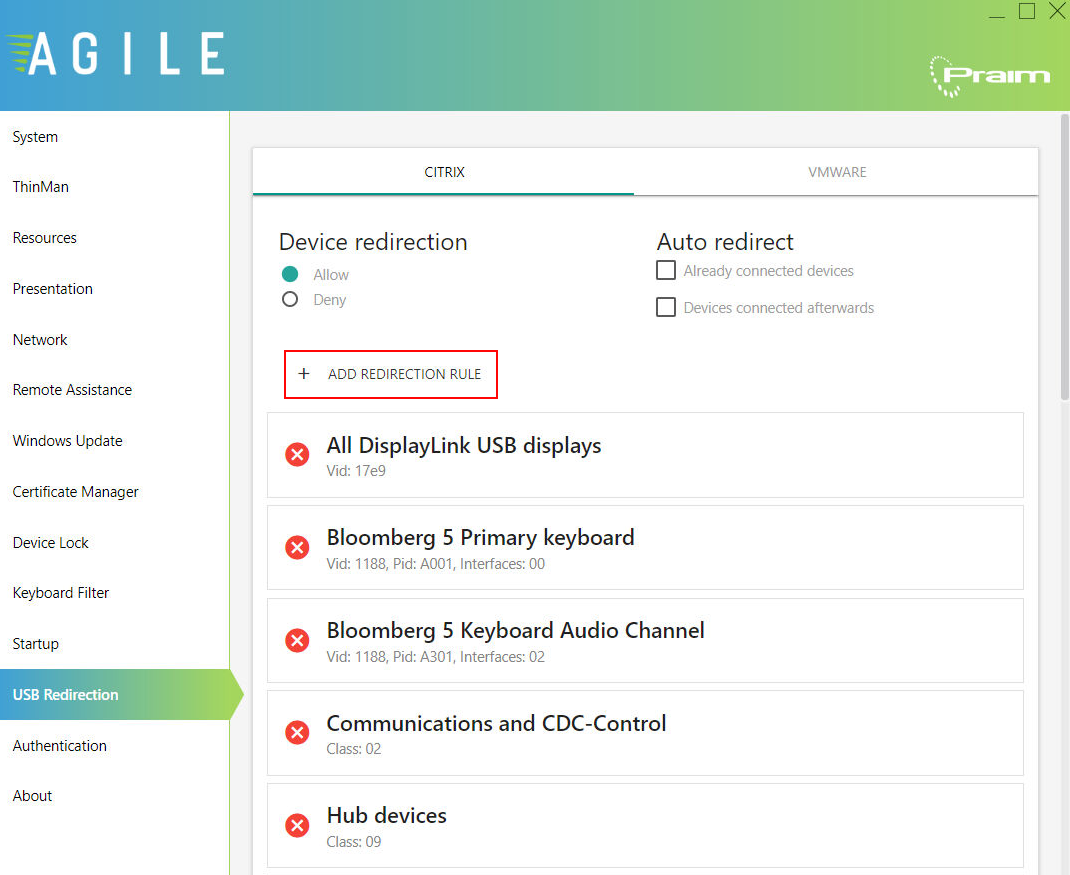
The Citrix USB Redirection panel is divided into two sections: the Options section (highlighted in red in the image below) and the Rules section (highlighted in blue in the image below).
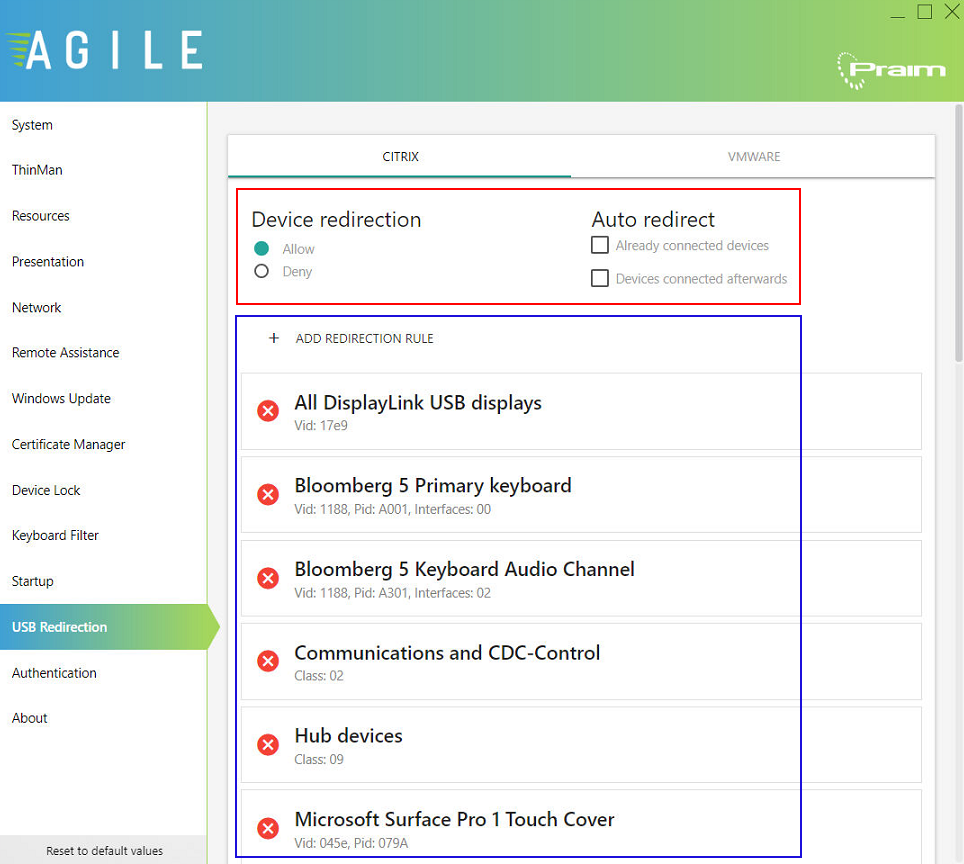
The Options section contains two groups of settings that define global behaviours of Citrix USB Redirection.
The Rules section, located lower down, lists the USB device redirection rules, specifying the redirection actions for specific devices or device classes.
¶ USB Redirection Options
Two options are available in the Citrix USB device redirection panel: Device redirection and Auto redirect.
These options control the USB device redirection behavior and the associated security requirements.
USB Redirection Option's effectiveness
After modifying the USB Device Redirection or Auto Redirect options, the endpoint device must be rebooted for the settings to take effect
¶ Device Redirection
This option defines the USB redirection behavior. If no rule in the rules list matches the USB devices connected to the endpoint, it defaults to the fallback option.
The available settings for Device Redirection options are Allow or Deny:
-
Allow: All devices not explicitly denied will be allowed for USB redirection (a more open behavior). A rule must be written for every device you want to deny.
-
Deny: All devices not explicitly allowed will be denied for USB redirection (a more restrictive behavior). A rule must be written for each device you want to redirect.
Device Redirection Option Fallback Action Outcome Be aware of the fallback implications when setting the Device Redirection Option to Allow or Deny:
Choosing Allow as the fallback action for Device Redirection means that any unlisted device in the rules list will be redirected; providing more reliability but less control.
Choosing Deny as the Device Redirection Option fallback action means that any unlisted device in the rules list will not be redirected; offering more control but less reliability.
Device Redirection Option default
By default, the Device Redirection Option is set to Allow.
¶ Auto Redirect
Auto Redirect is a feature in the Citrix Workspace App that automatically handles the USB redirection for devices connected to an endpoint, eliminating the need for users to manually execute the redirection for each device.
Auto Redirect feature
If the Auto Redirect is enabled, manual USB redirection can still be defined as needed.
The Auto Redirect options are:
- Already connected devices: Only USB devices already connected to the endpoint before establishing connection with the VDI will be automatically redirected. USB devices connected afterwards must be redirected manually by the user.
- Devices connected afterwards: By selecting this option, each USB device inserted after establishing connection with the VDI will be automatically redirected.
Citrix Auto Redirect vs. Device redirection option
Auto Redirect option solely defines the operation mode for USB redirection. Whether a USB device is allowed or denied for redirection depends entirely on the redirection rules and the fallback redirection option
¶ USB Redirection Rules
USB Redirection is managed through a list of redirection rules, which can be found in the lower section of the Citrix USB Redirection tab.
Citrix Predefined USB Redirection rules
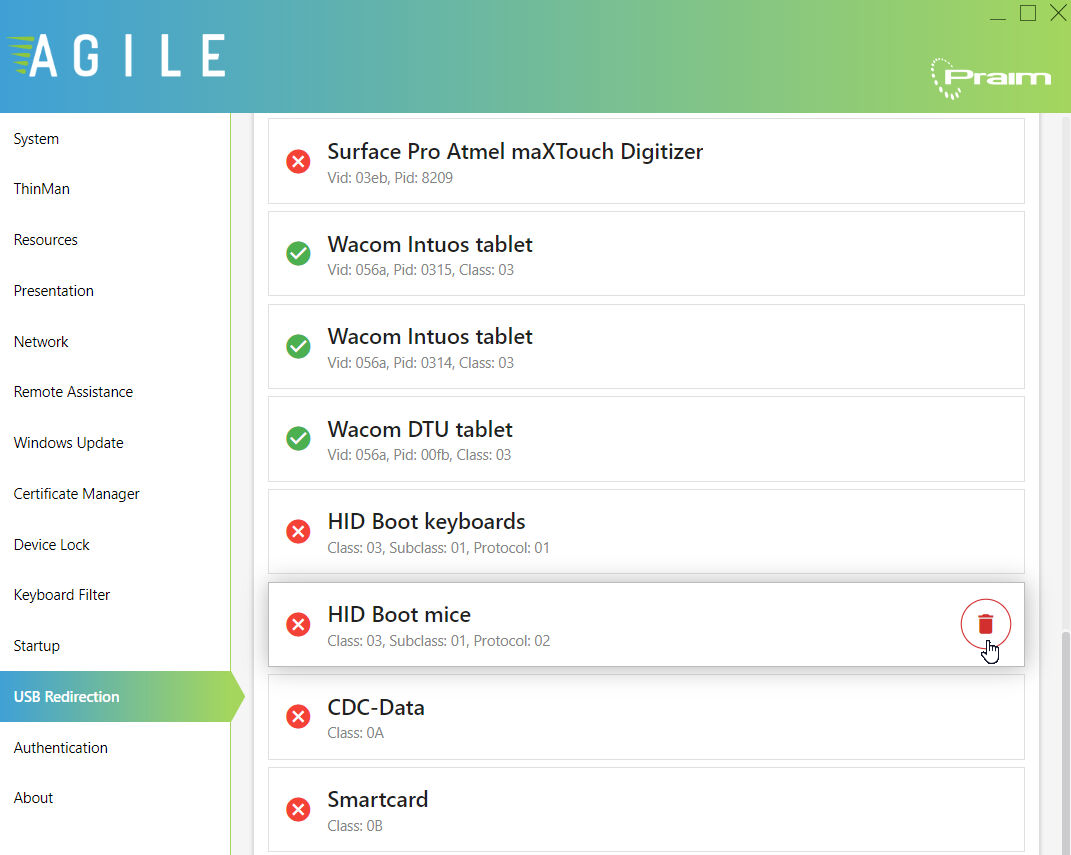
Initial opening of the Citrix USB redirection TAB lists predefined redirection rules. These have been created automatically by the Citrix Workspace App client installation. Unused rules can be deleted.
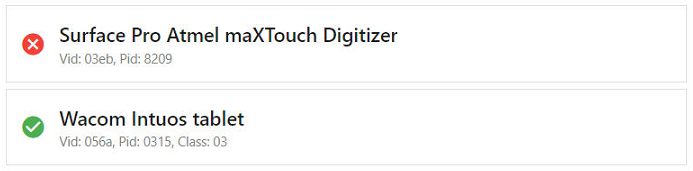
There are two types of rules: Allow or Deny. The type of rule is graphically defined by an icon marking out each USB redirection rule:
- Allow rules are represented by a green circle with a white check mark.
- Deny rules are represented by a red circle with a white cross.
Another essential characteristic of a rule is its position in the rules list. To determine whether a USB device redirection should be allowed or denied, the rule list is parsed from top to bottom. The first rule that matches the device's parameters is considered valid, and the redirection will be applied. Once a match is found, the rule parsing stops.
A new USB redirection rule is always added always to the top of the list. You can also drag and drop rules to reorder them.
Citrix USB Redirection Rules Position
Since the rule parsing occurs from top to bottom, the most restrictive rule should be placed at the top, with less restrictive rues positioned toward the bottom of the list.
¶ USB Redirection Rule Parameters
A USB Redirection rule consists of parameters which are specified in order to define it. These parameters are either:
- Rule Actions.
- Parameters characterising the object of a rule.
- Split interface option.
¶ Rule Actions
The first step in defining a USB Redirection rule is to set the rule action, which can either be Allow or Deny.

Citrix Default rule action
Caution: the default value for the rule action is Allow.
¶ Parameters characterising the object of a rule
Parameters characterising the object of a USB redirection rule are:
- VID (Vendor ID): The unique identifier assigned to the manufacturer of the USB device.
- PID (Product ID): The unique identifier assigned to a specific model or product made by the manufacturer.
- Class: Defines the type or category of the USB device (e.g. storage, audio, etc.)
- Subclass: A more specific category within a class, providing additional granularity.
- Protocol: Specifies the communication protocol used by the device (e.g., USB 2.0, USB 3.0, HID)
Use the scroll bar to access all parameters. For more information on these parameters refer to the following link USB device ID (VID and PID) and USB Class.
Class Term Meaning in Citrix Implementation
The meaning of Class term is defined by the USB-IF (USB Implementers Forum) (see https://www.usb.org) and the definitions can be found at https://www.usb.org/defined-class-codes.
Citrix Device Identification Parameters Constraints
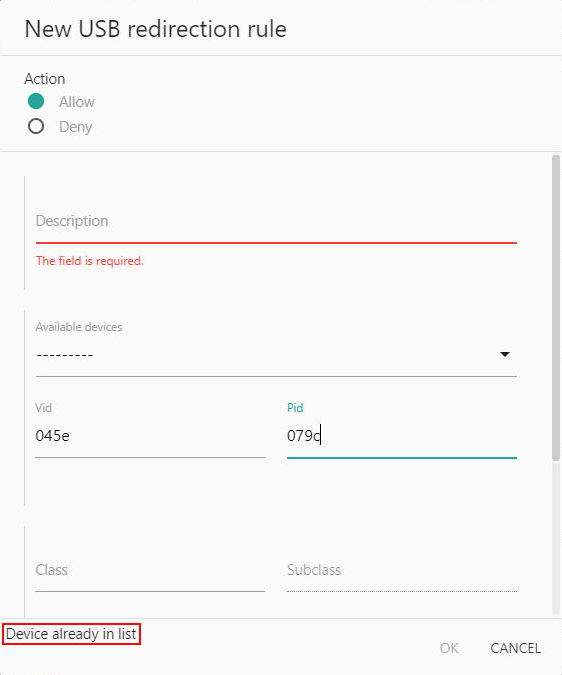
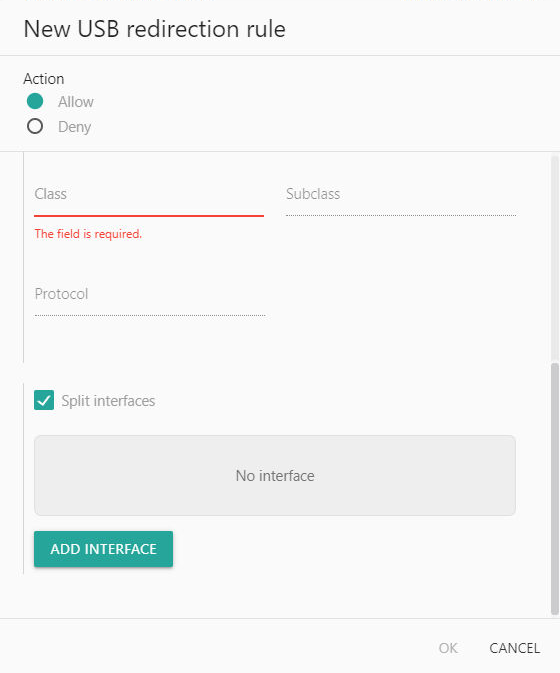
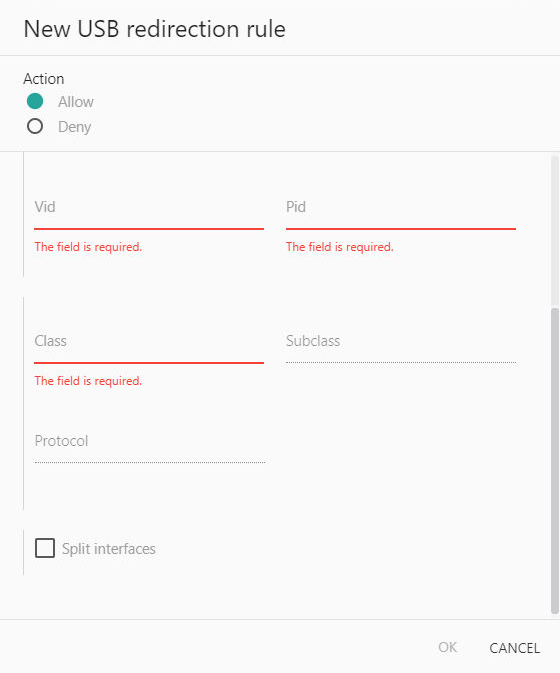
With a USB Redirection rule, a specific device is defined through the VID and PID. If a new rule uses an existing VID and PID definition, an error will be reported: a message will appear at the bottom of the New USB redirection rule window, as shown in the picture below.
On the other hand, when using Class, Subclass and Protocol (or a subset of these), the Citrix client allows multiple rules with the same parameters, without raising an error. This is particularly relevant for the Split Interface parameter.It is also possible to specify a VID, leave the PID blank, and complete the rule specifying a Class, and if needed, even Subclass and Protocol. This option allows you to create a single rule that can allow or deny an entire class of devices (e.g. audio, video, printers, mass storage) manufactured by a specific vendor (e.g. Logitech).
Rule Parameters Best Practice As a best practice, consistently use either the VID or PID parameter, or the parameter group Class, Subclass and protocol. When a PID value is defined in a rule, the use of Class, Subclass and Protocol parameters is not required and will be ignored.
¶ Split Interfaces rule parameter
The Split interfaces checkbox can be found by scrolling down to the bottom of the New USB redirection rule window.
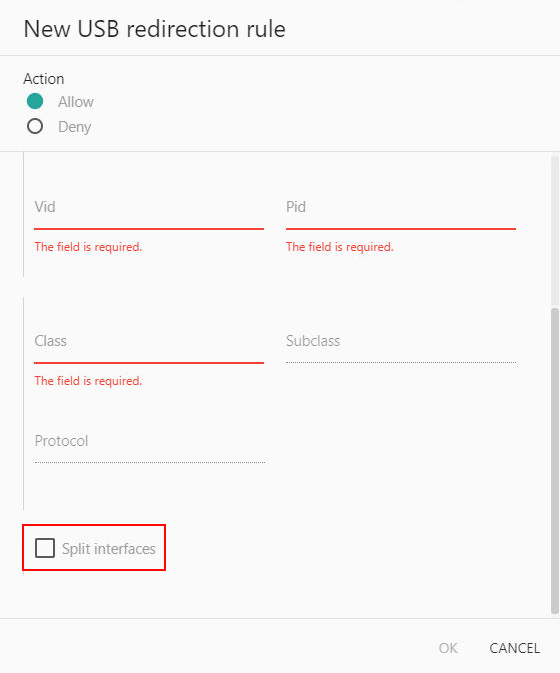
If you are using a USB composite device, this option allows you to select whether to redirect the device as a unique interface or separate it into distinct interfaces using specific interface rules.
When you check the option Split interfaces, an additional button appears to specify what USB device interfaces will be associated to the rule.
In order to add a specific interface to the Split interfaces list for the rule, click on the ADD INTERFACE button.
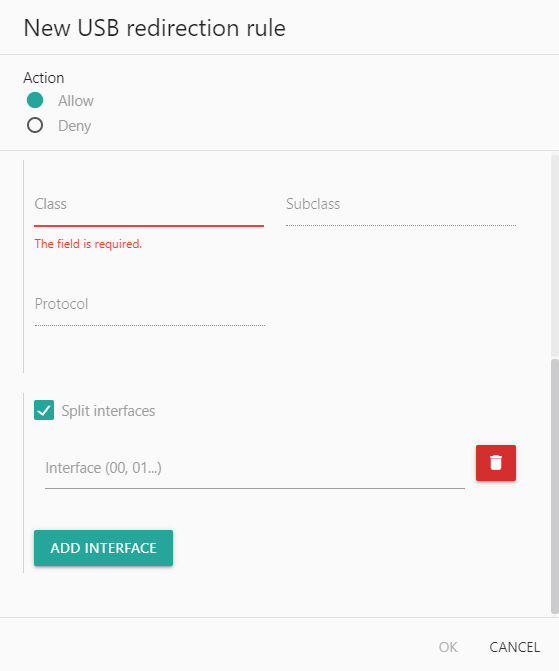
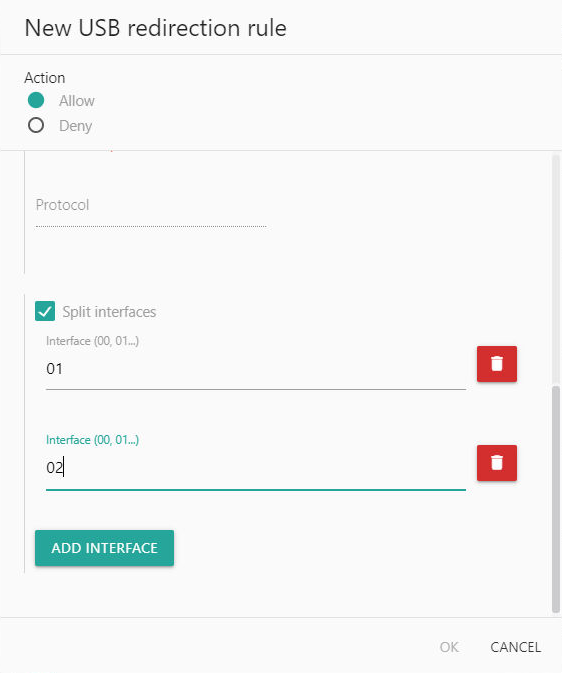
Type the interface number (two digits) in the specific field. If you need to add a further interface to the same rule, press the ADD INTERFACE button.
Split interfaces list
Only a unique interface number can be stated on a single split interface entry. If you need to specify more than one split interface, add it as a new entry.
In order to remove an interface from the editing rule, click on the red trash can icon on right of the interface entry.
Note using split interface
Caution: When identifying a device using its PID (Product ID) and VID (Vendor ID), only one unique rule is allowed per PID/VID pair. This restriction applies even when the Split Interface option is used. However, if you use Class, Subclass, and Protocol parameters to define devices, you can create multiple rules with the same identification parameters. These rules can specify different actions and interfaces for the same device type.
¶ How to create a USB redirection rule for a specific device connected to the endpoint
The simplest way to create a USB redirection rule for a specific device is to connect it to the endpoint.
To create a new USB Redirection rule, click on ADD REDIRECTION RULE button on the top of the rules section in the Citrix USB Redirection TAB.
This opens the rule configuration window showing all configurable rule parameters.
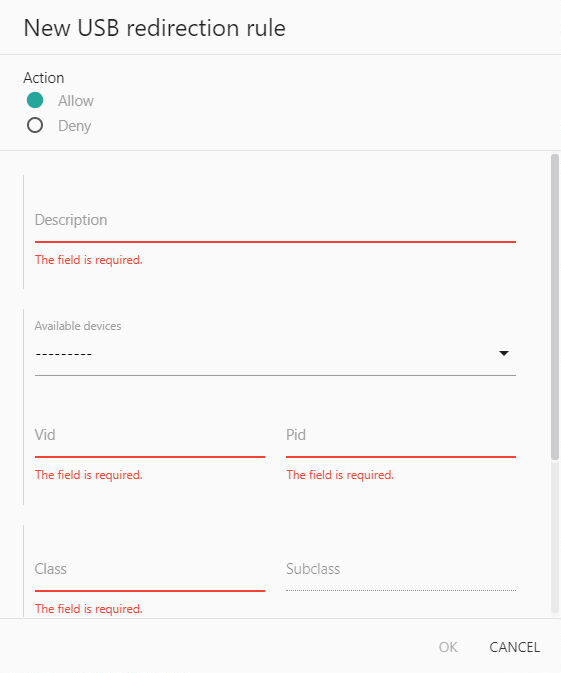
First define the rule action, choosing either Allow and Deny.
For more detail about rule action refer to Rule Actions paragraph.
Default rule action
Caution: The default value for the rule action is Allow.
Open the Available devices drop-down connected device list, clicking on the downward arrow on the right.
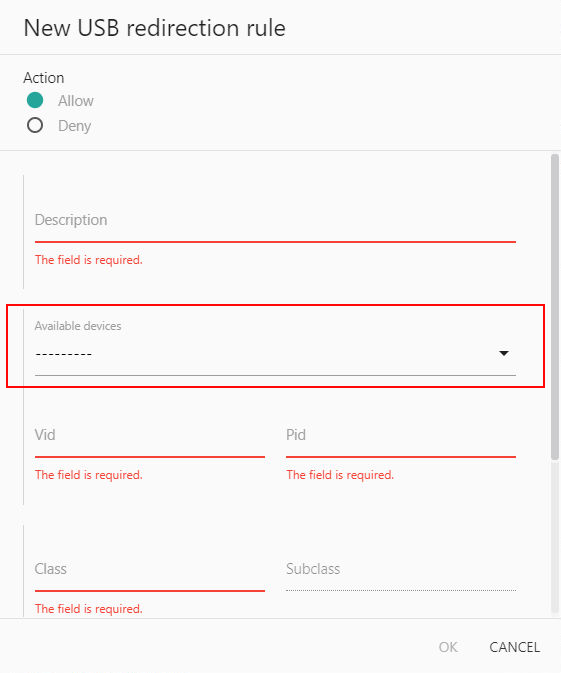
The connected devices list appears.
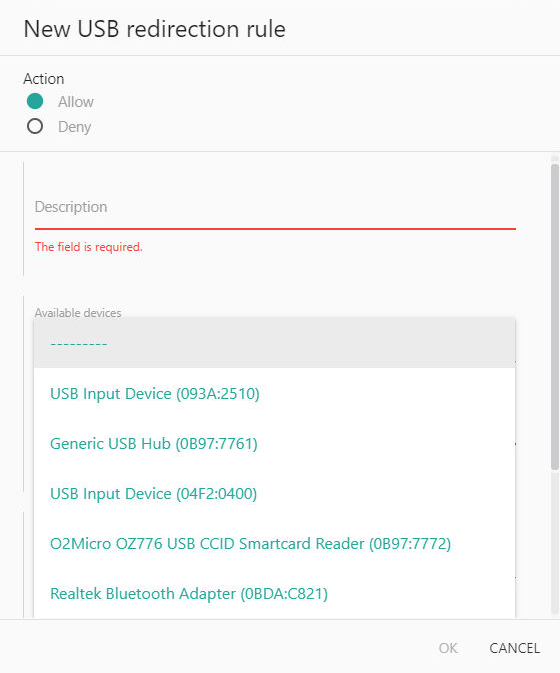
Scroll through the list to locate the device for which you want to define a rule, and select it. Keep in mind that the keyboard and mouse, if connected, will appear as USB devices in the list.
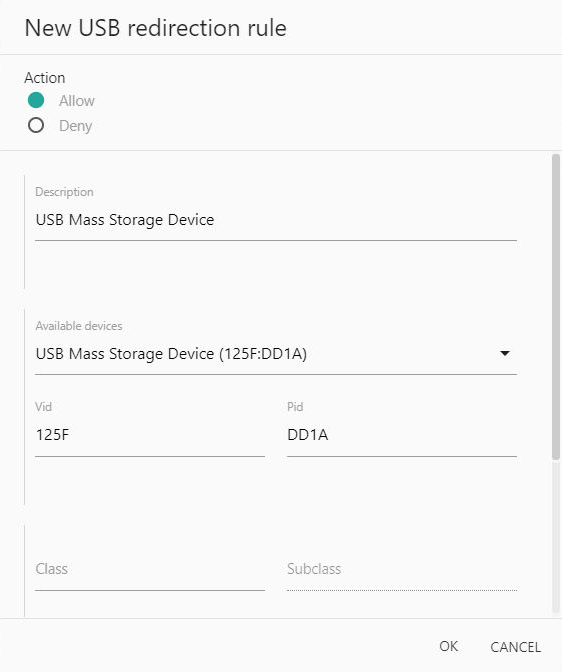
Selecting a device will automatically populate the Description, VID, and PID fields with the corresponding values from the device list. If the text in the Description field is modified and linked to a device from the Available Devices list, the customized description will take precedence over the default system-provided device name.
Rule description
The Description field appears in the rule list, helping to easily identify each rule with a meaningful name.When an item is selected from the Available Devices list, the Description field is automatically populated with the system-provided USB device name, which may have limited clarity.
To customize it, click on the Description field and replace the default text with a more descriptive and relevant name. Note that the Description field is a mandatory parameter for creating a rule.
For more details about rule object parameters refer to the link Parameters characterising the object of a rule.
For more information about VID, PID, how resolve it and about Class, Subclass and Protocol, refer to the link USB device ID (VID and PID) and USB class.
Class identifying parameters
Creating a USB redirection rule for a connected device is the standard approach when you need to identify a specific device using only the VID and PID identifiers, as detected through the "Available Devices" list feature.For this reason, there is no need to define the Class, Subclass, and Protocol when using this method to create the rule.
You can scroll down the window to access the Class, Subclass, and Protocol fields; however, these fields will not be functional when using this method.
To define USB redirection rules by specifying Class, Subclass, and Protocol, refer to How to create a USB redirection rule for a device or class of devices not connected to the endpoint.
Finally, the option to Split interfaces. For more details, refer to Split Interfaces rule parameter.
Press OK to save the new rule.
OK button enabling
If all the required parameters to create a rule have not been defined, the OK button remains disabled.
¶ How to create a USB redirection rule for a device or class of devices not connected to the endpoint
To create a USB redirection rule for a device not actually connected to the endpoint or for a class of devices that cannot use the Available device list, click on the ADD REDIRECTION RULE button at the top of the rules section in the Citrix USB Redirection tab.
The USB Redirection rule configuration window opens showing all configurable rule parameters.
Initially define the rule action, choosing between Allow and Deny.
For more detail about rule action refer to Rule Actions paragraph.
Default rule action
Caution: the default value for the rule action is Allow.
In the Description field, enter the text that will identify the rule in the rules list. This is a mandatory parameter.
Rule description
The Description field will contain the information displayed in the rule list. Ensure the description is meaningful to help easily identify each rule.
Select how the rule object will be identified: This can be done by using the VID and PID, or by grouping devices based on the Class, Subclass, and Protocol parameters.
For more details about rule object parameters, refer to the link Parameters characterising the object of a rule.
For more information about VID, PID, how resolve it and about Class, Subclass and Protocol, refer the link USB device ID (VID and PID) and USB class.
Finally, choose whether to select the Split interfaces option or not.
For more detail bout "Split interfaces" settings refer to Split Interfaces rule parameter.
Press OK to save the new rule.
OK button enabling
If the required parameters to create a rule have not been defined, the "OK" button remains disabled.
¶ Modify and Delete USB Redirection Rules
Once a USB Redirection rule has been created, it cannot be modified. To make changes, the existing rule must be deleted, and a new rule created.
To delete a rule, hover the mouse pointer over the right side of the rule list item until a red trash can icon appears inside a red circle.
Click on the Icon. The rule will be deleted immediately, without a confirmation request.