The Device Lock feature enables IT managers to enhance security on devies by disabling specific USB device models or entire classes of USB devices.
¶ USB device ID (VID and PID) and USB class
Each USB Device is identified by a unique Vendor ID (VID) and Product ID (PID), which depend on the chipset it integrates.
Additionally, USB devices are categorized into classes based on their specific application and features, regardless of the manufacturer. Each device is characterized by a Class (also referred as "Base Class" in some USB-IF documentation), a Subclass, and a Protocol ID. For more information about USB Device VID, PID, Class, Subclass and Protocol ID, follow this link https://www.usb.org/defined-class-codes .
This classification system allows for the identification of both specific USB device models (using VID and PID) and entire classes of USB devices (using Class, Subclass and Protocol), irrespective of the manufacturer.
VID, Class, Subclass and Protocol ID are defined by USB Implementers Forum (USB-IF). For further details, visit https://www.usb.org .
It is important to note that different brands may share the same VID and PID if they integrate the same chipset. Similarly, a vendor may manufacture the same device model with different chipsets, resulting in different VID and PID for two identical models.
¶ USB device VID and PID resolving
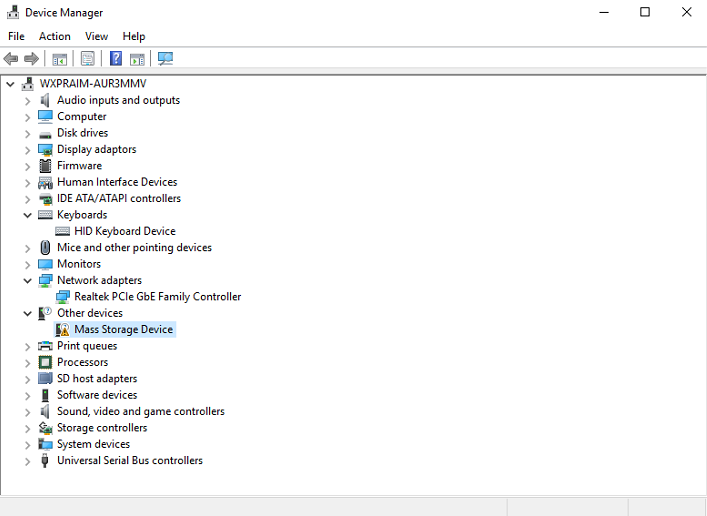
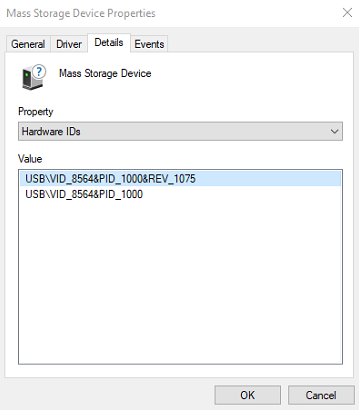
To resolve VID (Vendor ID) and PID (Product ID) for a specific USB device, open the Device Manager, right-click the Start menu and select Device Manager. Locate the device whose VID and PID you want to find. It will likely be listed under categories like Universal Serial Bus controllers or Other Devices. Right-click on the device and select Properties. In the Properties window, go to the Details tab, from the Property dropdown menu, select Hardware Ids or Device Instance Path. The hardware ID will appear as a string like this: USB\VID_XXX&PID_YYYY. VID is the four-character identifier for the vendor (e.g. VID_1234). PID is the four character identifier for the product (e.g. PID_5678).
¶ Device Lock panel
To access the USB Device Lock, click on the Device Lock tab on the left sidebar menu.

The Device Lock feature allows you to define a set of rules to lock USB devices. Once a device is added to the Lock List, it will be neither accessible nor visible to the Operating System. In other words, when a USB device is marked as locked, it is hidden and will no longer appear in the Windows resource list.
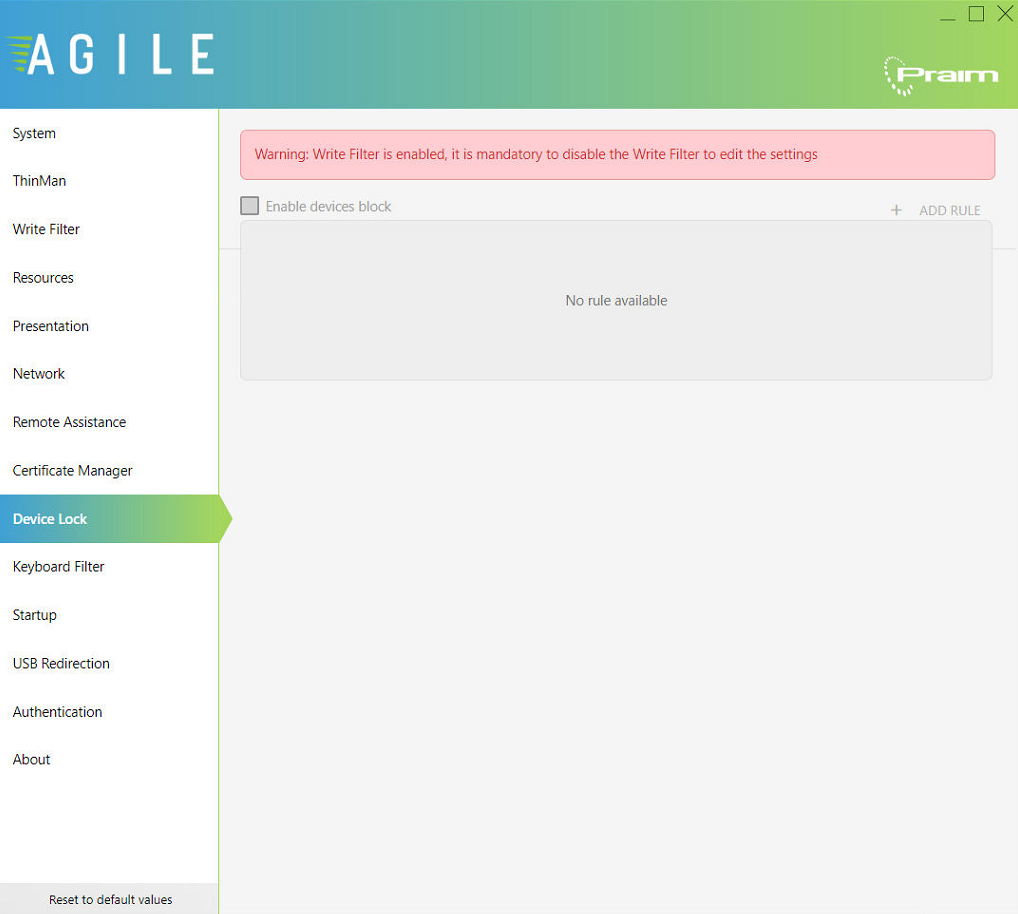
Before configuring any USB Device Lock settings, the Unified Write Filter (UWF) must be disabled. Praim Agile will automatically check this requirement and display a warning message in a red box at the top of the window, reminding you to disable the UWF.
To disable the Unified Write Filter (UWF) refer to the section Using the Write Filter in this guide.
Important Reminder
No USB Device Lock rule management is allowed until Unified Write Filter (UWF) is enabled
¶ Add USB Locking Rule
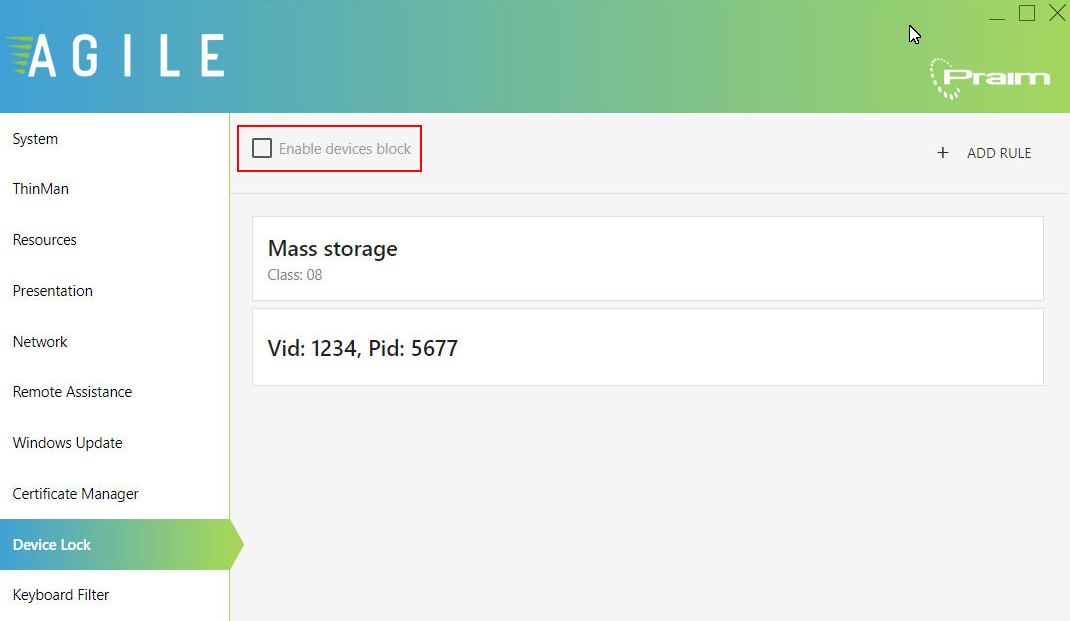
The first time you access the Device Lock section, you will find the rules list empty and the service disabled (i.e. "Enable device block" unchecked).
In this case, you can click the + ADD RULE button at the top right to begin adding USB Locking rules.
If you have already added at least one USB Device Locking rule and the USB lock feature is enabled, you must disable it by unchecking the top left box before you be allowed to access the rules list or add any new rules.
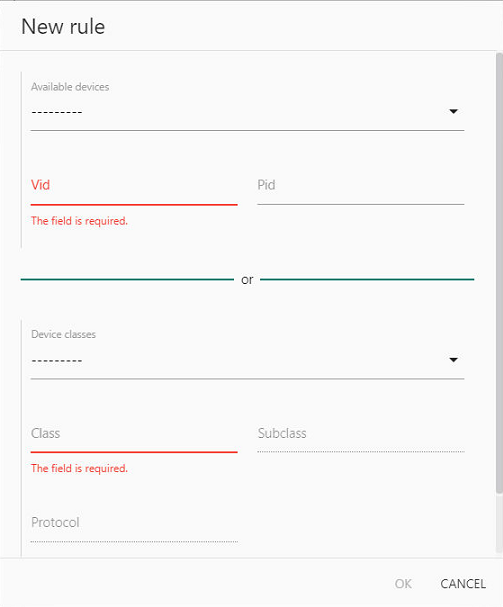
Clicking on the + ADD RULE button will open the New Rule windows. It is divided in two section: the top section manages USB device locks, while the bottom section manages USB class locks.
A rule can only specify one of these: you can lock either a specific USB device or a USB class, but not both at the same time.
¶ ADD USB Device Locking Rule
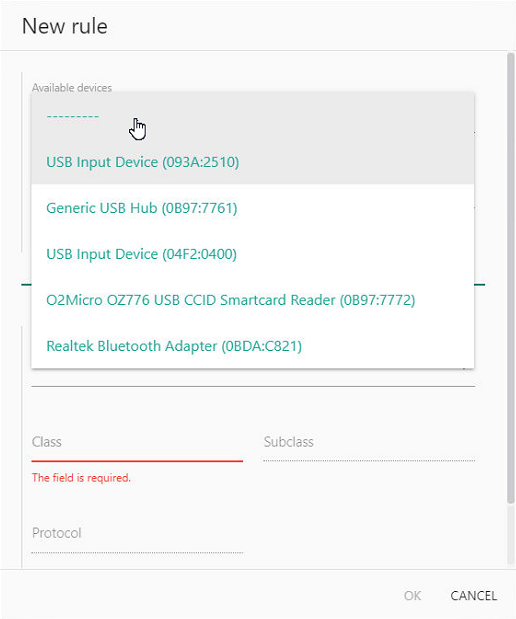
To lock a USB device that is already connected to the system (thin client or PC), access the list of available USB devices by clicking the downward arrow next to the Available Device dropdown menu.
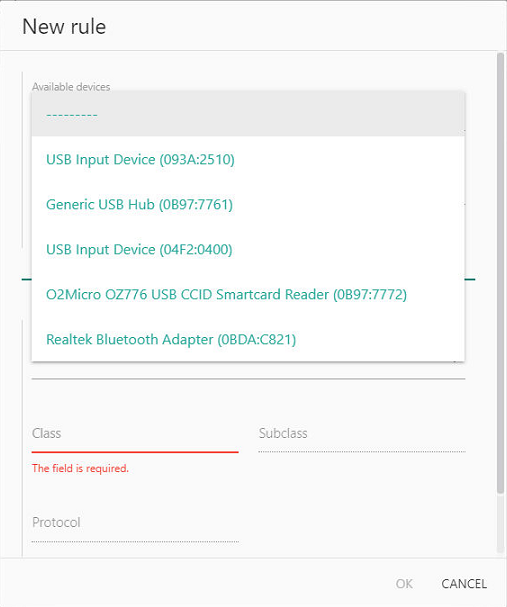
The system will display a list of all connected USB devices. Select the device you want to lock and confirm by clicking OK. The system will automatically create a USB device lock rule, based on the device name, VID and PID shown in the available device list, so you do not need to provide any additional parameters.
Refreshing USB devices List
If a USB device is connected after opening the "New rule" window, it will not appear in the USB devices dropdown list. To refresh the list and see newly connected devices, close the "New rule" window by clicking "Cancel" then reopen it. The dropdown will now display all connected USB devices.
BE CAREFUL!
The USB Available devices list show both keyboards and mice, as well as the internal USB hub that often connects all front USB ports. Carefully consider before locking these devices. If you accidentally lock the keyboard or mouse, you will need either to temporarily replace them with different hardware (with a different VID or PID from the locked ones) or connect to the device through ThinMan to remove the rules. If you, instead, have locked accidentally the internal USB HUB, use a USB socket connected straight to the motherboard to connect keyboard or mouse and remove the locking rules.
To add a locking rule without connecting the device, you can directly enter the VID and PID values in the input rule fields, bypassing the "Available Devices" list. Once you click OK, a locking rule will be created using only the VID and PID as identifiers, with no additional description.
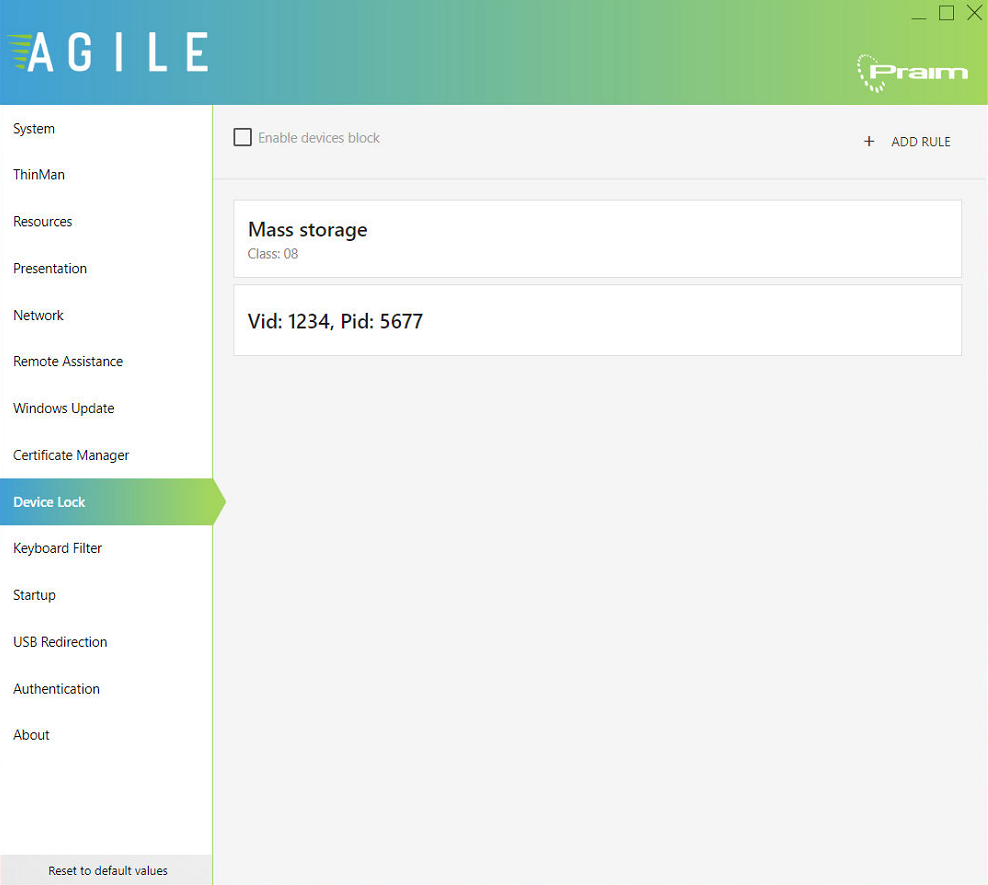
The image above shows the difference between a locking rule created by selecting a device from the "Available Devices" list and one created by manually entering the VID and PID. The first rule includes a descriptive USB type as the device identifier, while the second rule displays only the VID and PID as the identifier.
¶ ADD USB Class Locking Rule
You can lock a whole USB device class with a single locking rule. The easiest way requires only to select a class from the "Device Classes" drop down list available on the lower section of the "New rule" form.
The listed class items follow the official definitions set by the USB Implementers Forum (USB-IF). When you select a USB Class, the system will automatically fill in the "Class" parameter, and, if applicable, the "Subclass" and "Protocol" parameters as well. Currently, these last two parameters are only predefined for Keyboard and Mouse classes. However, you can edit the "Subclass" and "Protocol" parameters if further customization is needed.
SUGGESTION
While it is possible to change the default Class ID assigned to a selected USB Class, we recommend leaving it unchanged.
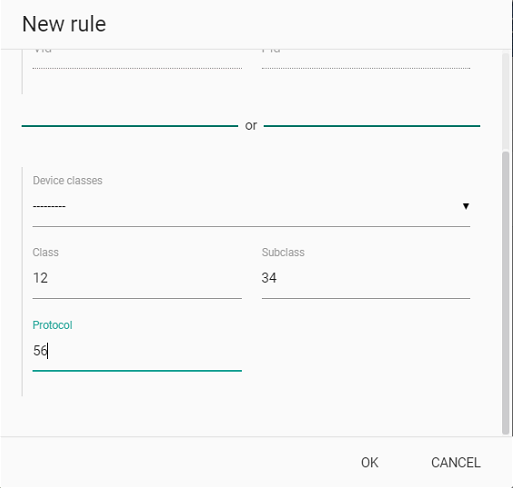
You can create a USB Class locking rule without selecting an official USB class from the dropdown list. To do this, choose the first entry in the dropdown list (i.e., "---------") and manually fill in the "Class" parameter, as well as "Subclass" and "Protocol" if applicable. The resulting rule will display "---------" as the description, with the "Class," "Subclass," and "Protocol" parameters shown in detail.
¶ Arranging the USB Locking Rules List
Once you have created multiple USB locking rules, you can arrange their listing order. The order of the rules in the list does not affect the effectiveness of USB locking; all locking rules are applied consistently, regardless of their order. The ability to arrange rules is provided purely for organizational purposes, allowing logical and practical grouping or sorting. To reorder the list, simply drag a rule with the mouse and drop it into the desired position.
¶ Enabling and disabling USB Locking Rules
For the USB locking rules to take effect, make sure to check the "Enable device block" checkbox located in the upper-left corner of the "Device lock" form.
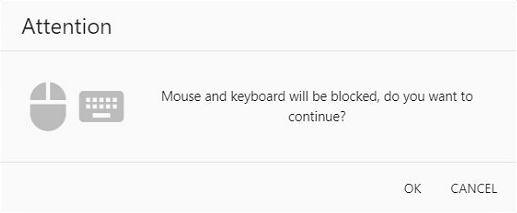
Before activate USB locking rules, the system checks if you have created any device or class locking rules related to the keyboard and/or mouse. If such rules exist, the system will alert you and request your confirmation to proceed. This precaution helps prevent accidental locking of essential input devices.
Locking Rules Protection After enabling the locking rules, we recommend activating the Unified Write Filter option (UWF) to prevent unauthorized changes or accidental deletion of rules. To disable all USB locking rules after UWF has been turned off, simply uncheck the "Enable devices block" checkbox located in the top-left corner of the Device Lock panel. This allows you to temporarily suspend all USB locking rules without permanently deleting them.
Unified Write Protection Requirement any changes to USB locking rules, including enabling, disabling, or management, require the Unified Write Filter (UWF) to be disabled. The system will display a reminder with a specific warning at the top of the Device Lock panel. Please note that enabling or disabling UWF always require a system reboot.
¶ Modifying and Deleting USB Lock Rules
USB locking rules cannot be modified. Instead, if you need to make changes, you must delete and recreate the rule. To do this, access the rule list, hover over the rule item, and click the trash bin icon that appears on the right side. Once the rule is deleted, you can create a new rule with the desired settings.
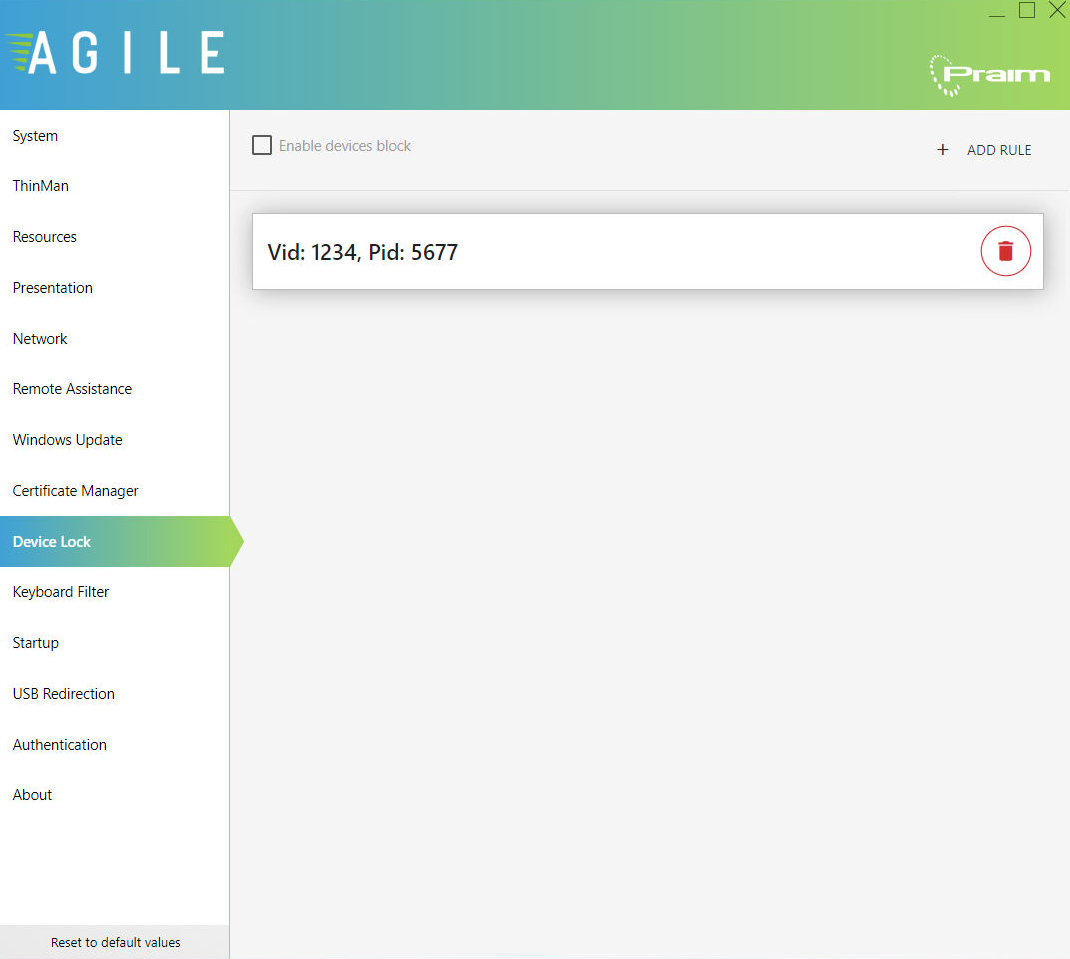
IMPORTANT NOTE After you click on the red bin, the rule will be immediately deleted, without any further confirm request!