ThinOX supports many types of VPN technology. This page explains how to configure the various VPN client.
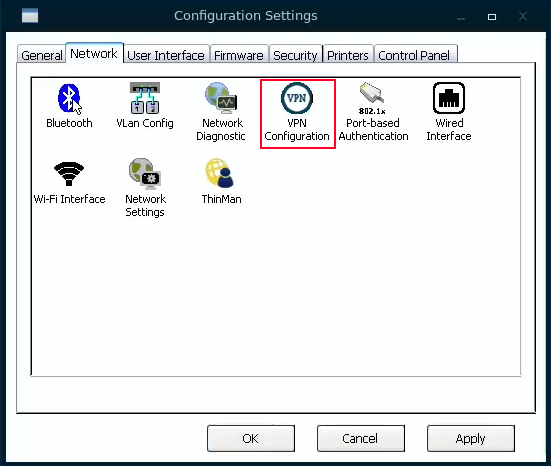
From the "Network" tab click on the "VPN Configuration" applet to configure the VPN client on ThinOX.
¶ Preliminary Operation
Save in a USB Mass Storage key the configuration files that are related to the VPN connection. Whether you have only a *.zip file, decompress it.
The number and the name of the files may vary depending on many configurations parameters and from the type of the VPN connection.
IMPORTANT - READ CAREFULLY: OpenVPN Configuration Files
---- FOR OPENVPN CONFIGURATION FILES ---- Typically there are: couple of "*.crt" files, couple of "*.key" files, a "*.pem" file, a "*.conf" file and a "*.ovpn" file ("*" means a generic filename).Instead of the last two files sometimes is present only one of them.
CASE 1: In case there is only one of the file with name "*.ovpn" or "*.conf", rename the single file in "openvpn.cfg" (the name is case sensitive, so type the name in lowercase character).
CASE 2: In case there are both, rename only the file with name "*.conf" in "openvpn.cfg" (the name is case sensitive, so type the name in lowercase character). IMPORTANT: the name of the file HAS TO BE "openvpn.cfg" (case sensitive). Other names will not work in the OpenVPN configuration.
Copy all these files in the USB Mass Storage key.
Plug the USB Mass Storage key into a thin client USB Port.
¶ Generic parameters available for all the VPN connections
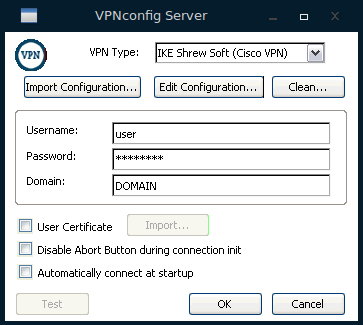
"Username", "Password" and "Domain" field can be compiled or not. If at least the Username and Password fields are compiled, the VPN connection will use those credentials to connect to the VPN Server.
"Disable Abort Button during connection init": if enable the user cannot abort the VPN connection during the init phase.
"Automatically connect at startup": if enabled will launch the VPN connection after the network is connected.
Button "Clean": when pressed will clean the configuration of the VPN from the device.
¶ VPN connection running
The VPN connection is automatically started after the local network is reached if the "Automatically connect at startup" parameter is enabled.
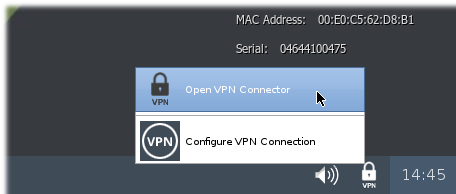
If the VPN is not started automatically you can start it manually from the taskbar right-click the VPN Icon and selecting the "Open VPN Connector" menu.
How to hide the "Configure VPN Connection" menu from the taskbar
To NOT show the user the "Configure VPN Connection" menu from the taskbar you have to enable the "Deny Connection Changes" parameter on the Security tab in the Settings configuration window.
If at least the "Username" and "Password" fields are compiled in the VPN configuration window, then the VPN connection will use those credentials to connect to the VPN Server.
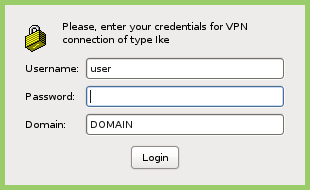
If those fields are partially compiled (or not at all), the device will show a login request. The field in the login window will be pre-compiled with the values entered in the VPN configuration window.
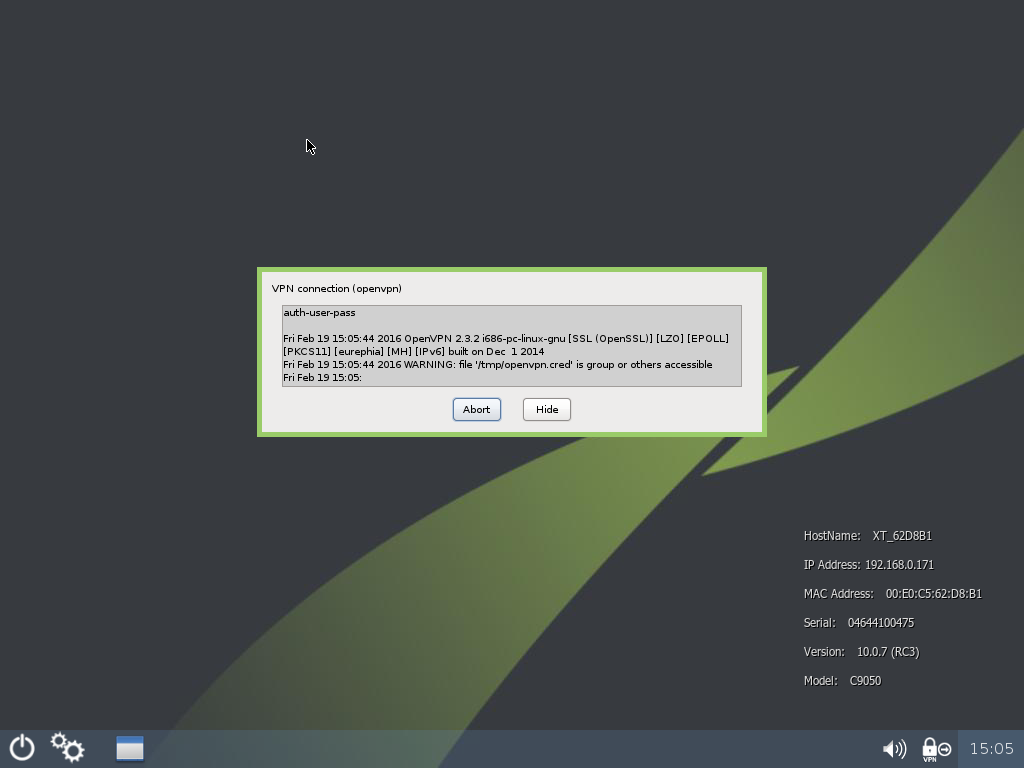
When you press login, the VPN starts connecting to the server. You can see the progress of the operation in the central window. On the taskbar, the VPN icon has an arrow near it. You can "Abort" the operation or "Hide" the progress window clicking on the buttons.

After the connection is established, you will see the VPN icon with a check-mark near it on the taskbar. At this stage, you can stop the VPN
connection right-clicking the VPN Icon on the taskbar and selecting the "Open VPN Connector" menu. On the progress window, click on "Stop" to terminate the VPN connection.
¶ IKE Shrew Soft (CiscoVPN)
This protocol also implements the Cisco VPN.
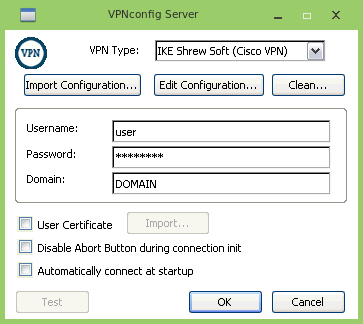
Select as the VPN Type, the IKE Shrew Soft (Cisco VPN) value.
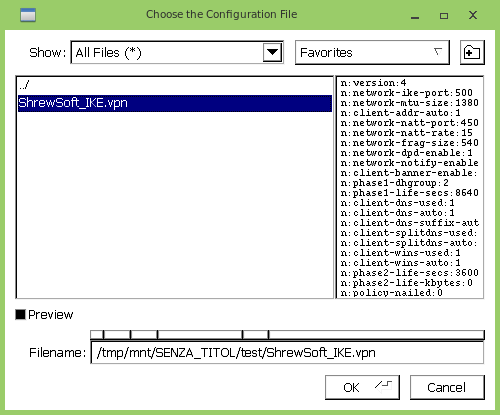
Click on Import Configuration... and browse the USB mass storage key. Select from it the IKE configuration file and click on OK to copy the file on the device.

Once the file is copied on the device, you can eventually change it by clicking on Edit Configuration.... This will open the editor window.
To close the file click on the X placed in the upper right corner of the window. If the file was previously changed a request to Save or Discard the modification is shown. Click on the desired action.
¶ Dell SonicWall NetExtender
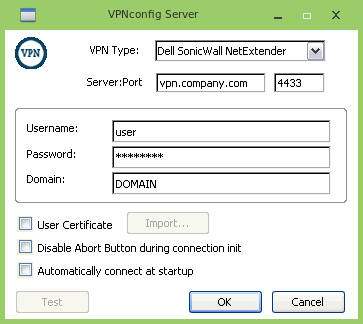
Select as the VPN Type, the Dell SonicWall NetExtender value.
On the Server and Port fields insert the hostname (FQDN) or the IP address of the server and the port (default for SonicWall is 443) where the client must connect.
Click on OK to save the configuration.
¶ OpenVPN
OpenVPN configuration file name
The name of the OpenVPN configuration file HAS TO BE openvpn.cfg (case sensitive). Other names will not work in the OpenVPN configuration. Read Preliminary Operation paragraph on this page.
OpenVPN does NOT support IPSec
Remind that with OpenVPN client you cannot connect to IPSec VPN (see https://openvpn.net/index.php/open-source/339-why-ssl-vpn.html).
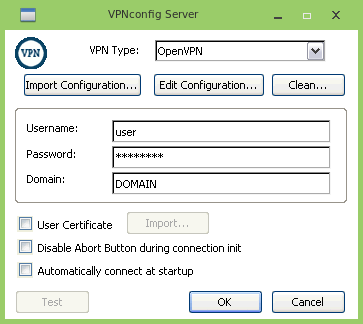
Select as the VPN Type the OpenVPN value.
For every file previously copied into the USB Mass Storage key execute this procedure:
- Click on Import Configuration...
- Browse the USB Mass Storage key, double-click on the directories to locate the previously saved files
- Select the file and click Import.
Be sure to import all the OpenVPN configuration files.
Once the files are copied on the device, you can eventually change the openvpn.cfg (the name is case sensitive, so type the name in lowercase character) by clicking on Edit Configuration.... This will open the editor window. To close the file click on the X placed in the upper right corner of the window. If the file was previously changed a request to Save or Discard the modification is shown. Click on the desired action.
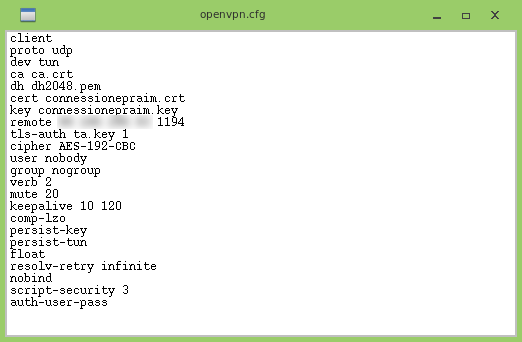
openvpn.cfg created on Windows
When using the Open VPN client connect on Windows to create the openvpn.cfg file, it is necessary to modify the file by adding the following line:up "/etc/openvpn/update-resolv-conf foreign_option_1='dhcp-option DNS 192.168.1.1' foreign_option_2='dhcp-option DNS 192.168.1.2'"
where 192.168.1.1 and 192.168.1.2 are the DNS values.