ThinMan Web Console is a limited ThinMan console (only monitoring and power management options are available) that is reachable via internet browser. It allows to access ThinMan Server from any device with an internet browser.
To use the web console it is necessary to define users and roles via ThinMan Access Control configurator.
¶ ThinMan Web Console login and logout
Start an internet browser with the ThinMan Server Address (IP Address or hostname, be sure to use https protocol). E.g. https://192.168.0.122.
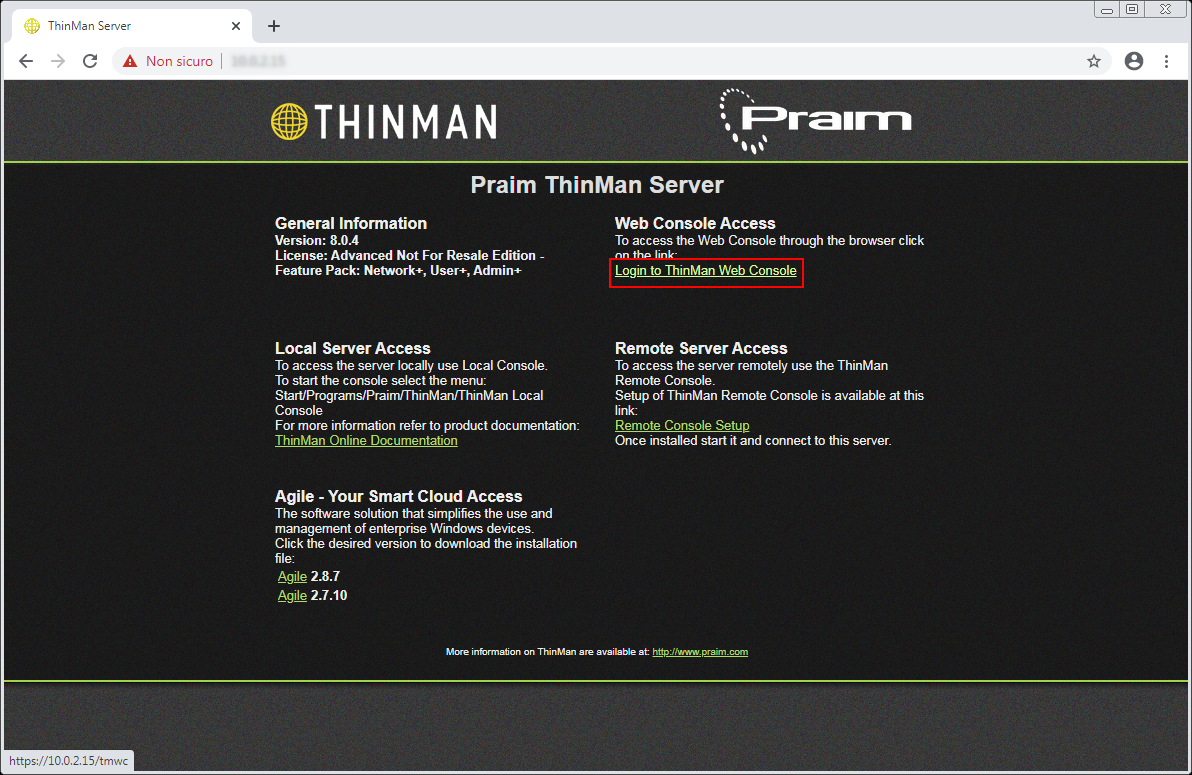
If it has not been installed a CA certificate on the ThinMan Server the browser will allert that the connection is not private.

Proceed to the page by clicking on Advanced and then on the link to the page.
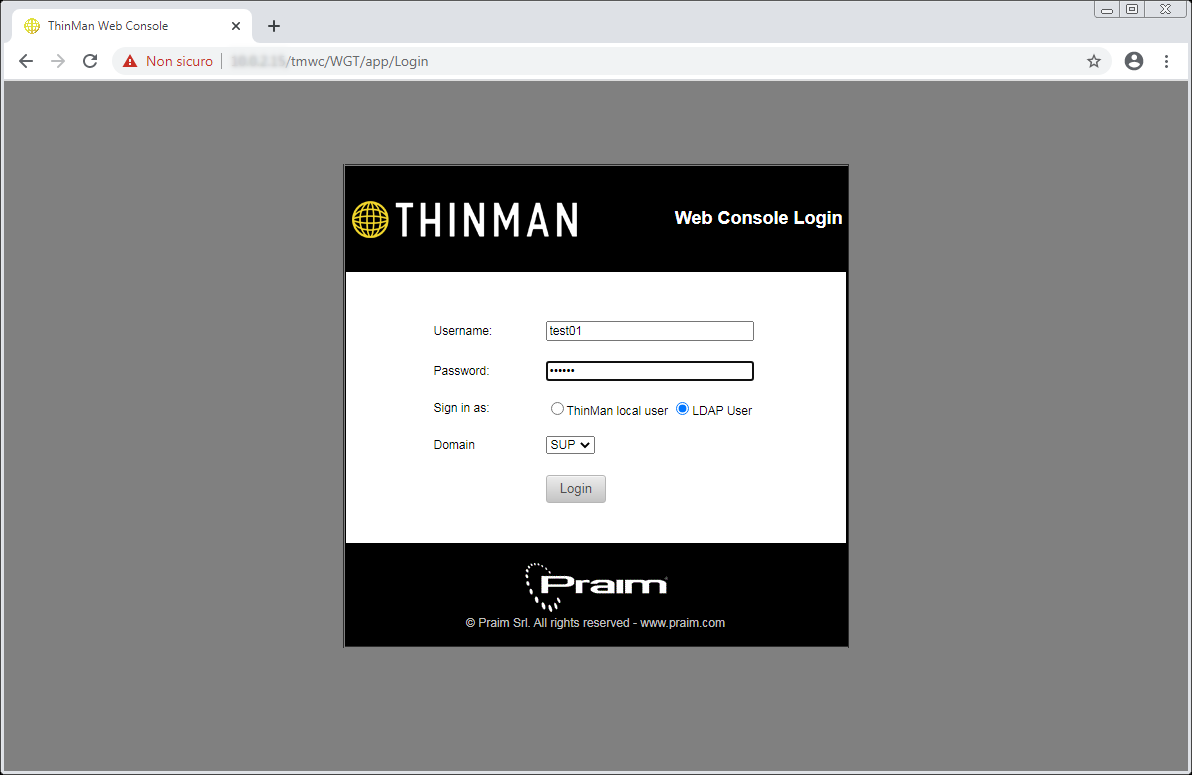
A login page will appear (Web Console Login). Write the username and password (previously defined on the ThinMan Access Control configurator) and click on Login.
Once logged in you will see the user interface.
¶ Home
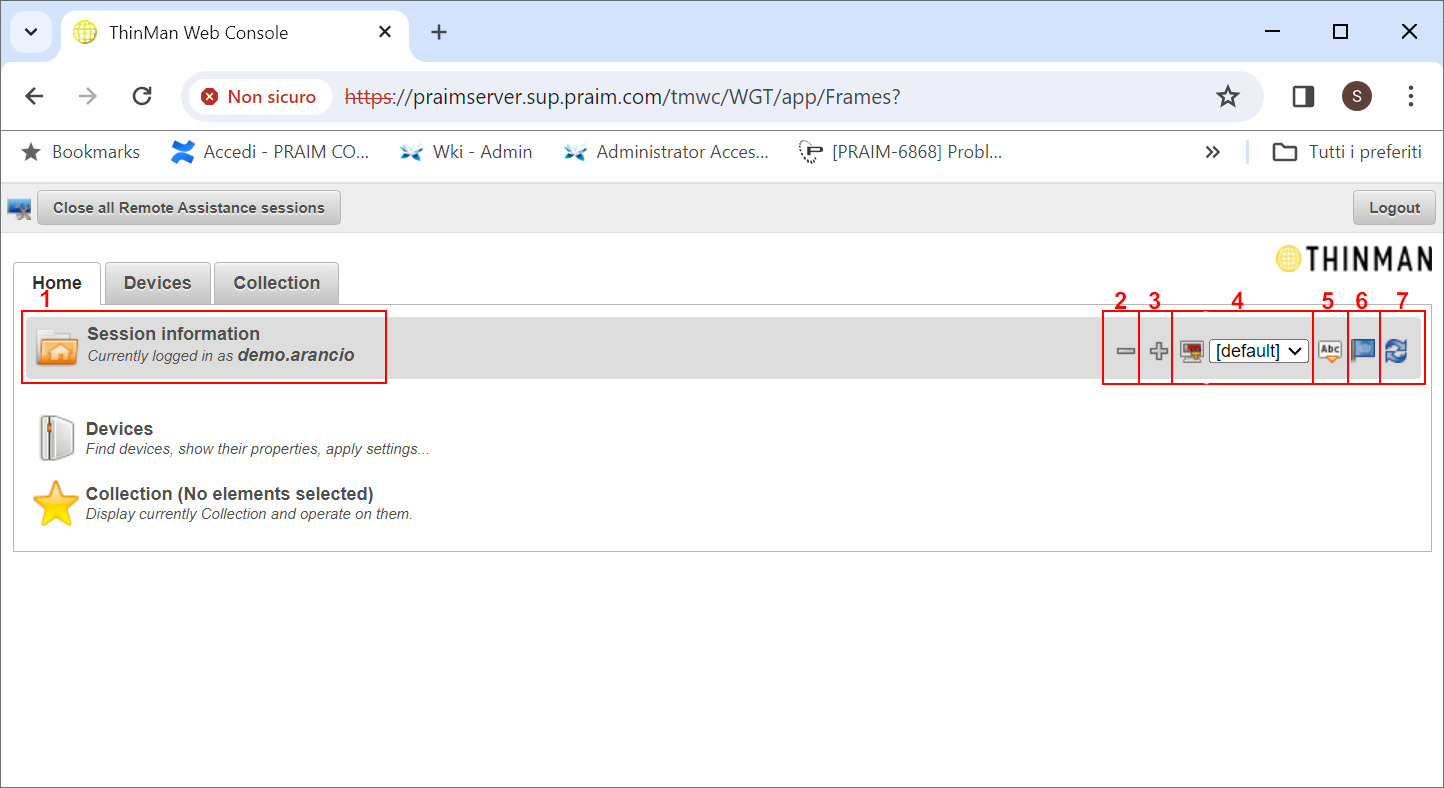
On the Home tab you will see Session Information with the currently logged user.
To logout from the ThinMan Web Console click on the Logout button.
¶ User Preferences
User preferences are some configuration on the environment that depend on the logged user. Once saved, they are used each time the user logs in into ThinMan Web Console.
¶ Preference Set
A Preference Set is a named configuration that saves filtered fields and columns visibility on each tab. E.g. save the devices ordered by name or model as a Preference Set.
A Preference Set can be loaded by selecting it from the combo box (see above image, section 4). In the above example, every time the saved preference set is selected, the interface will show the devices ordered by name or model.
A Preference Set can be created by clicking on + icon (see above image, section 3). When a Preference Set is created it inherits the configurations of the current Preference Set.
A Preference Set can be deleted by clicking on - icon (see above image, section 2).
The current Preference Set can also be renamed by clicking on the corresponding icon (see above image, section 5).
When logging out from ThinMan Web Console, the current Preference Set will be used the next time.
¶ Language
Click on the corresponding icon (see above image, section 6) and select the language for the user interface.
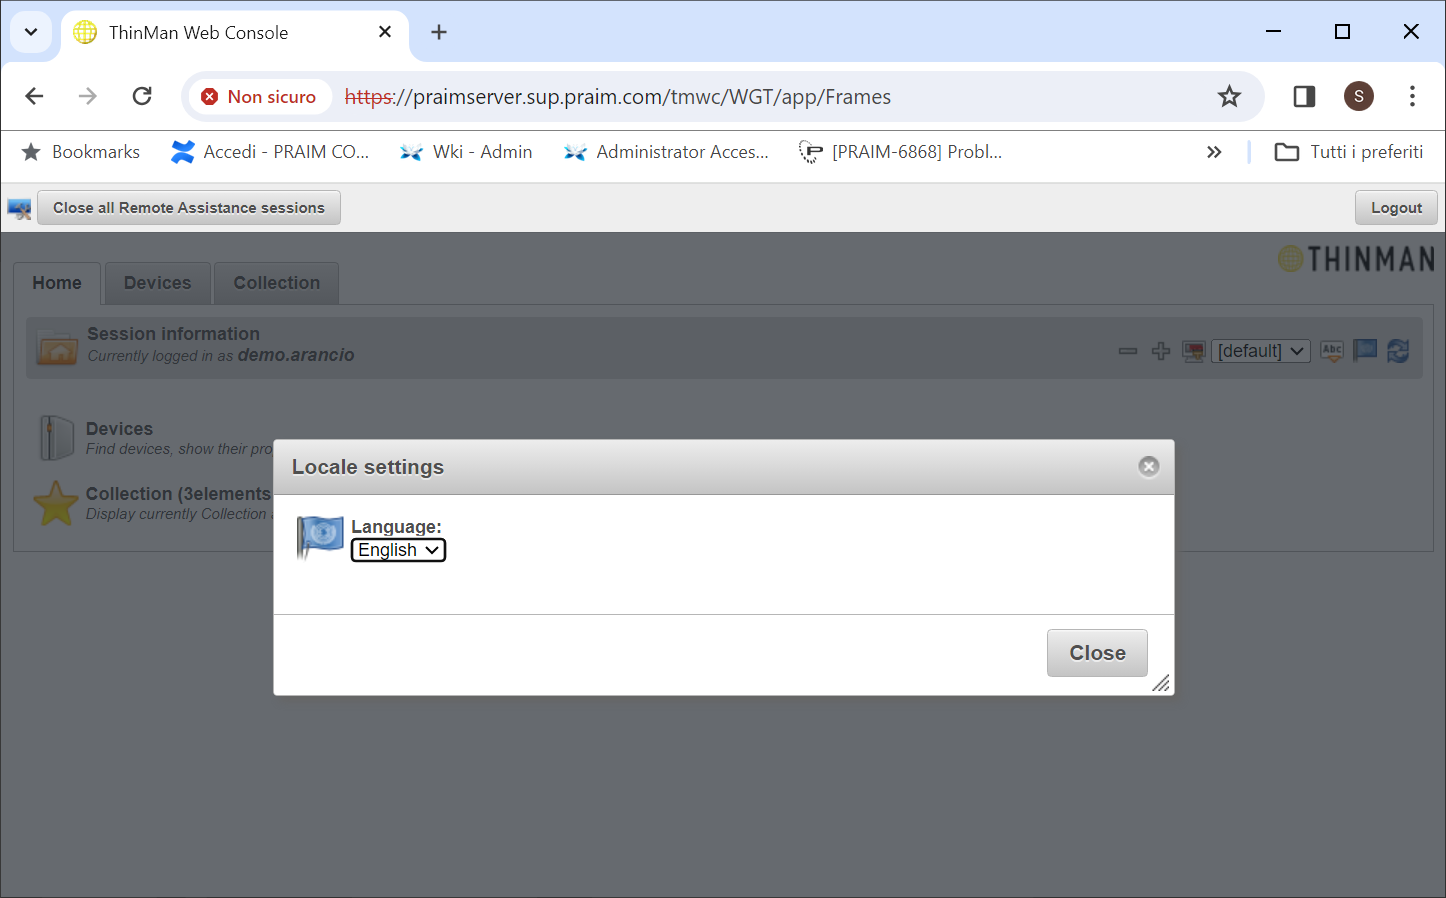
Confirm to apply the change.
¶ Table Refresh
See above image, section 7.
By clicking on this icon, it is possible to enable/disable the automatic update of the device table information. All devices status (on/off/disconnected) are updated.
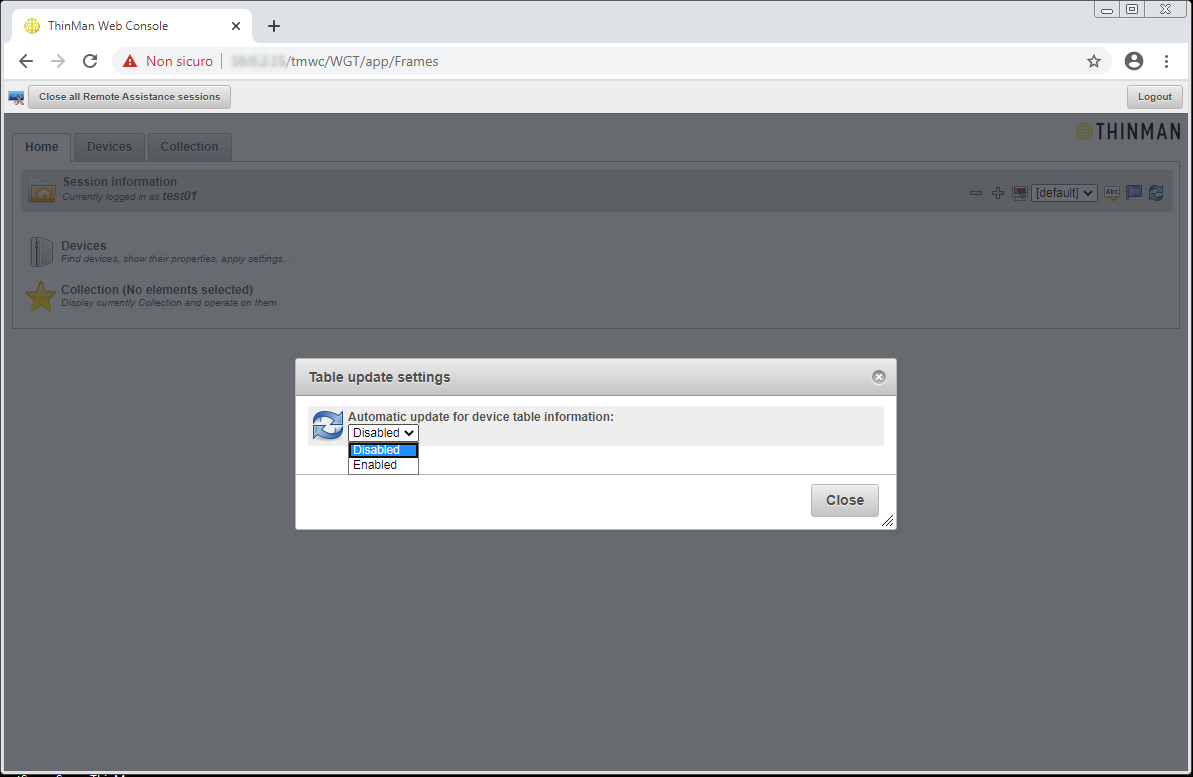
Note
In a very dynamic environment, automatically updating the device table information can lead to a high refresh rate that can disturb ThinMan user. Try disabling this feature and let the user proceed by manually refreshing the browser.
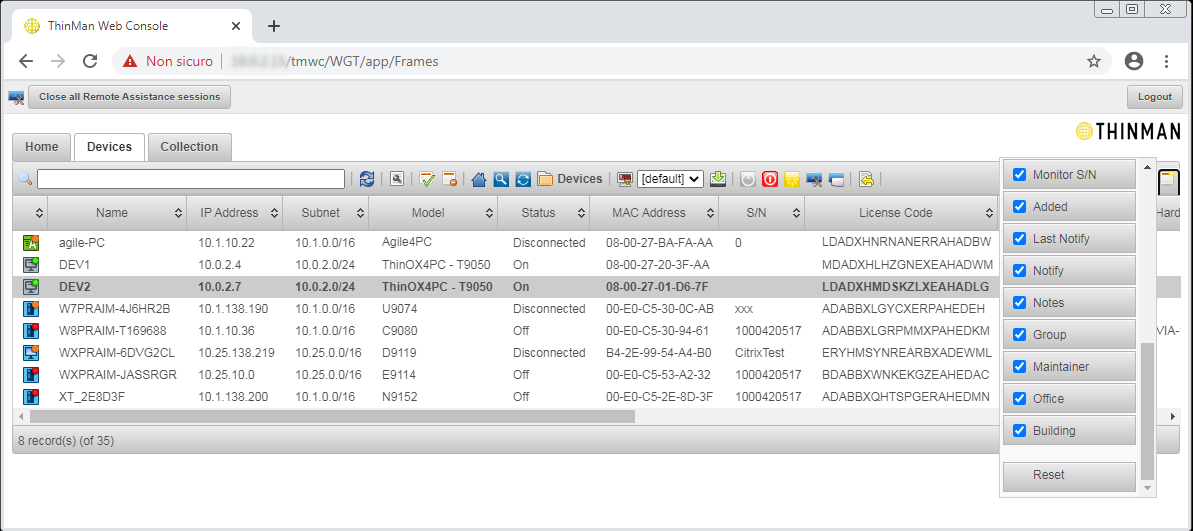
¶ Devices tab
On this tab, all the devices managed by the ThinMan server are listed.
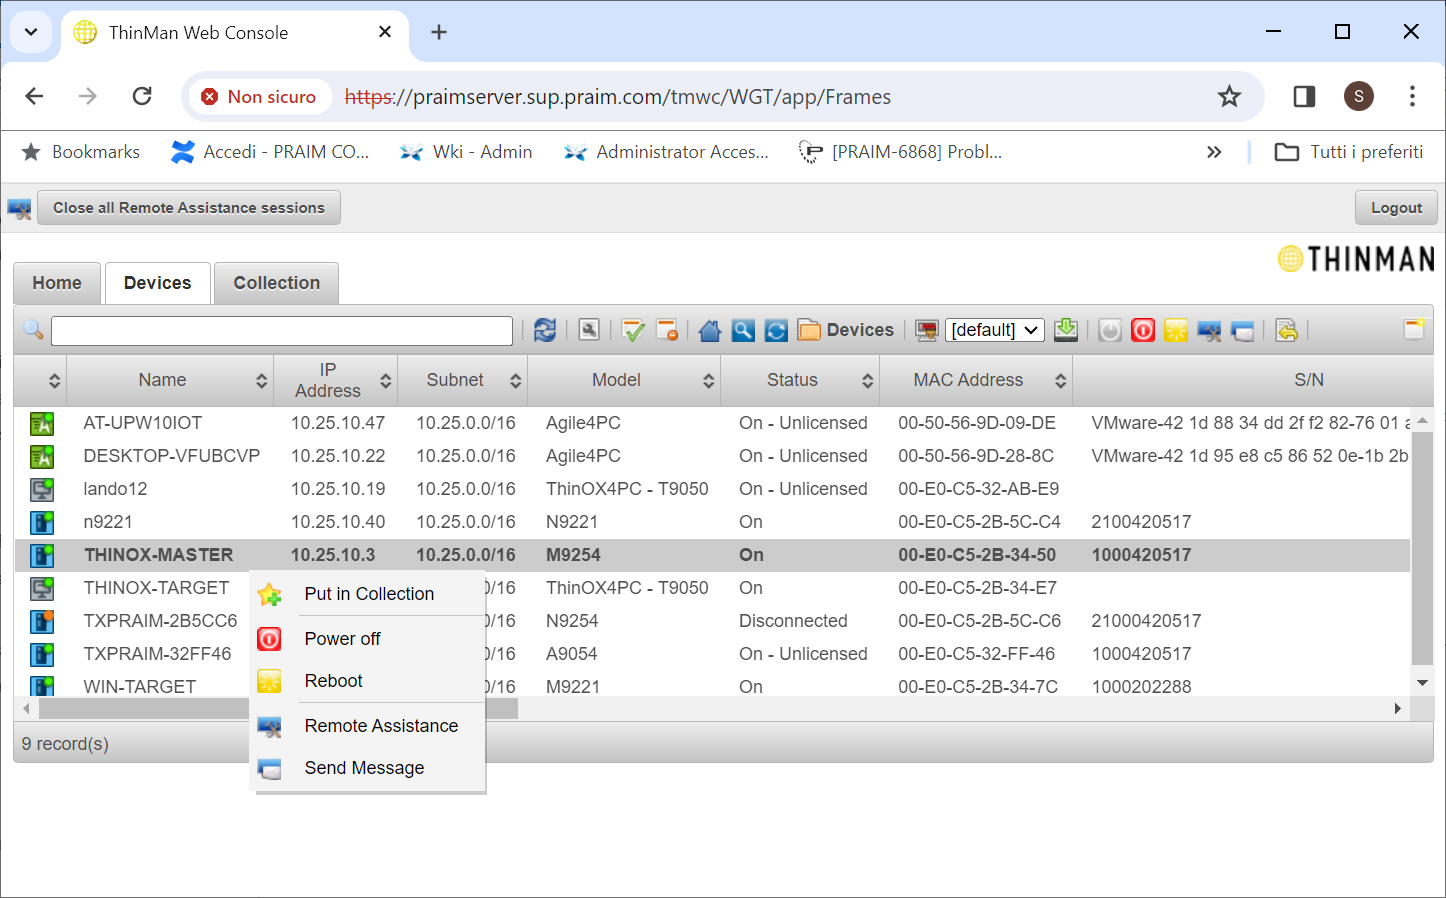
Right click on one or more devices(use ctrl/shift + click to select more than one device) to see the available operations:
- Monitoring: it is possible to verify the status of devices (power on/off, disconnected)
- Put in collection: it is possible to select one or more devices and add them to the collection tab.
- Power on/off and reboot one or more devices.
- Add one or more devices to the collection.
- Send a message to one or more devices.
¶ Collection tab
By default, you will find no elements on this tab. You can add devices to the collection from the Devices tab through the Put in collection operation.
Note
Remember that through the ThinMan Access Control, it is possible to apply a filter to the ThinMan user in order to visualize only specific groups of devices.
¶ Toolbar
The toolbar located on the Devices and Collection tabs contains multiple functionalities related to objects or visualization mode.

¶ Filter
It allows filtering objects, returning only those matching the text written on the textbox (see above image, section 1). It can be useful for finding a device by:
- IP Address: E.g. 192.168.0.
- Model: E.g. N9254.
- MAC Address: E.g. 00-E0-C5-44.
- Firmware version: E.g. 12.0.16.
- Hostname or group name: E.g. Test
¶ Refresh
Clicking on this button will refresh the list of objects. It is useful when the Automatic Device Table Information is disabled.
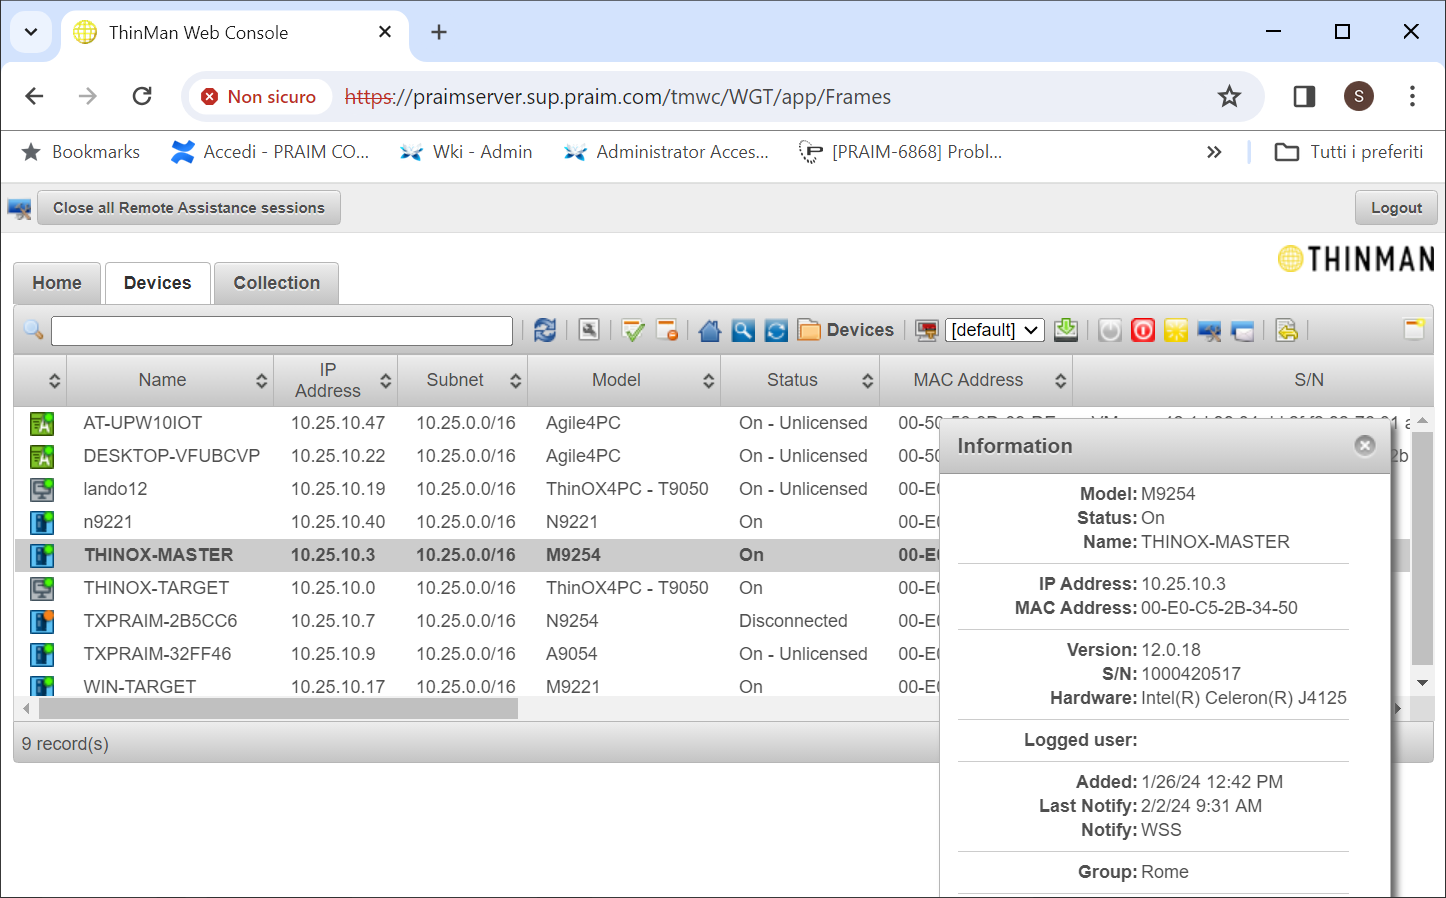
¶ Show-Hide Information
This button(see above image, section 3) will show/hide a window that reports information on the selected device.
¶ Select All
This button (see above image, section 4) will select all devices in the list. Multiple selection can be made pressing Ctrl while selecting with the mouse one or more devices.
¶ Select None
This button (see above image, section 5) will deselect all devices in the list.
¶ Select Root Group
This button (see above image, section 6) will select the root group. The list will be upgraded showing all objects.
¶ Group Selection
This button (see above image, section 7) will show a window with all the group structure. You can select a group and press the Ok button (or double click the name of the group), it will show objects belonging to that group.
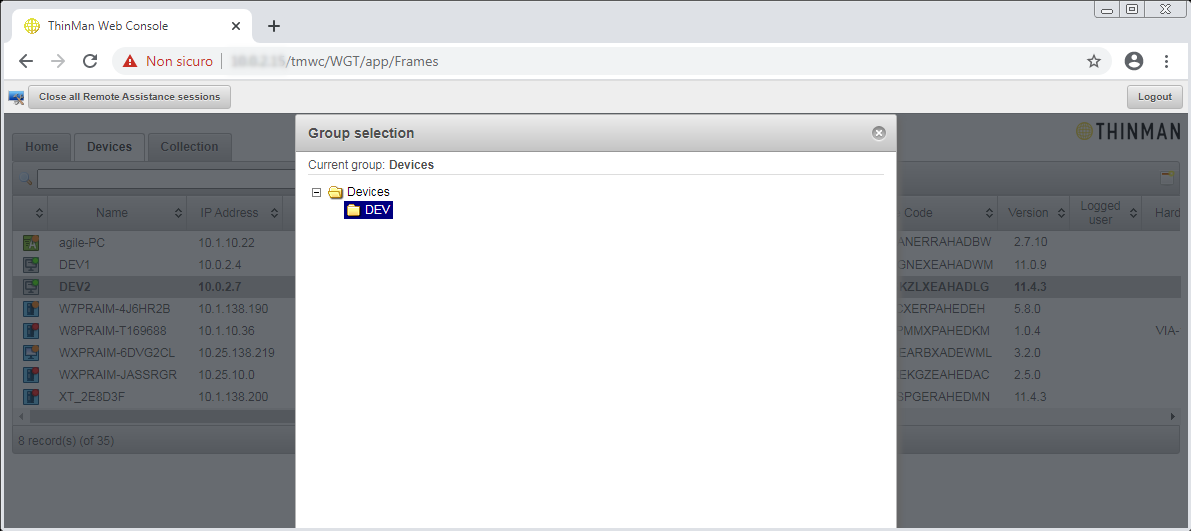
Note
Another way to select a group is to click on a group name from the group column.
¶ Active Preference Set
When selecting a Preference Set (see above image, section 8), the page will reloaded using configuration saved in that preference set.
¶ Save Settings
The Save Settings (see above image, section 9) saves the current configuration in the selected Preference Set.
¶ Various Commands
See above image, section 10.
Through these icons it is possible to:
- Power-on devices
- Power-off devices
- Reboot devices
- Send a message to a device
- Create an Inventory File (CSV Export)
By default these items are disabled. Once one or more devices are selected, the icons will be enabled. For multiple device selection press Ctrl while clicking with the mouse.
¶ Set Column Visibility
With this button (see above image, section 11) you can select which columns of attributes are visible on the user interface.
Devices can be ordered by clicking on the column name (E.g. below the list is ordered by device name in ascending order).
Columns visibility and order is automatically saved on the Preference Set, you do not need to save them explicitly.
¶ Browse
This button (see above image, section 12) allows to browse all the network or a specific group to find new devices. The browsing is executed by the ThinMan Server as explained in Network Browsing and Device Refreshing.
¶ Refresh
This button (see above image, section 13) is a deprecated functionality.
It is used by old devices that do not support the WSS communication protocol. It updates the status of one or more devices. The refresh is executed by the ThinMan Server as explained in Network Browsing and Device Refreshing.
¶ Remote Assistance
After starting a remote assistance command, the client opens a new Remote Assistance tab displaying all active connections for the current session, each represented by a thumbnail showing the corresponding device name.
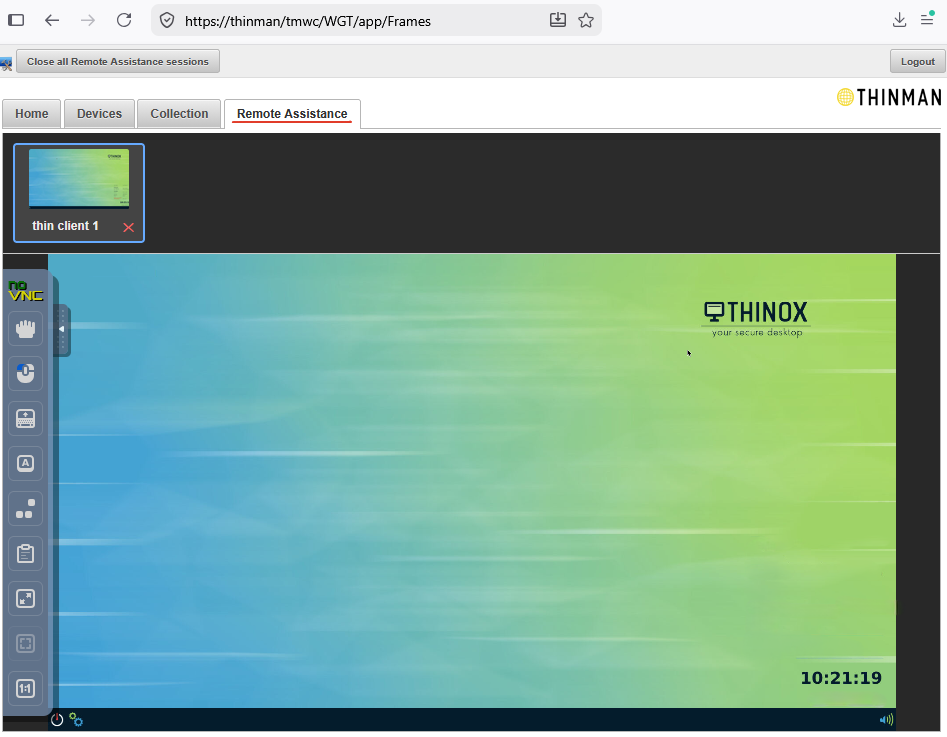
¶ Expanding a session
Click on a thumbnail to expand it to full view.
¶ Closing a session
Click the X icon to close the Remote Assistance session.
¶ Contextual toolbar
An expanded session displays a scrollable contextual toolbar providing session management functions, including:
- Fullscreen mode
- Resizing (1:1 scale)
- Move/Drag Viewport mode
- Shared clipboard
- Special keys sending
On mobile devices, additional controls are available, such as:
- Active mouse button selection
- View keyboard
¶ Communication security
The security level of the Remote Assistance communication depends on whether a certificate is installed on ThinMan Server and on the communication protocol used by the device.
¶ With a certificate installed on ThinMan
-
Protocol WSS Safe: The communication is encrypted using TLS and the server certificate is validated against a trusted certification authority.
-
Protocol WSS (not-safe): The communication is encrypted but the certificate is not validated. This condition exposes the connection to potential man-in-the-middle (MITM) attacks.
-
Other protocols: is not recommended for production environments.
¶ Without a certificate installed on ThinMan
- This configuration is not recommended for production environments.