Backup and restore procedure depends on the chosen ThinMan operation mode (see ThinMan Operation Modes for more information).
Note
Restoring a backup file to a new ThinMan Server is possible only if the new ThinMan is installed in the same Operation Mode from where the backup was extracted.
ThinMan version of Backup and Restore procedures
The Backup procedure (explained below) generates files specific to the current ThinMan version. These files cannot be used in a restore process on a different ThinMan version. Therefore, ensure you have the corresponding ThinMan installer in case you need to revert to a previous version. For example, if you are upgrading ThinMan from version 8.2.3 to 8.6.3, first backup your ThinMan 8.2.3 installation. After upgrading to 8.6.3, if you need to roll back, you will need to uninstall ThinMan, reinstall 8.2.3, and then restore the backup.
¶ Backup and Restore for a ThinMan with Internal Database
Close the Local Console if it is eventually running.
¶ Backup Procedure
In order to make a COMPLETE backup of ThinMan and its components, you will need to follow the steps below:
-
Before starting the backup, disable the Windows Images Manager.
-
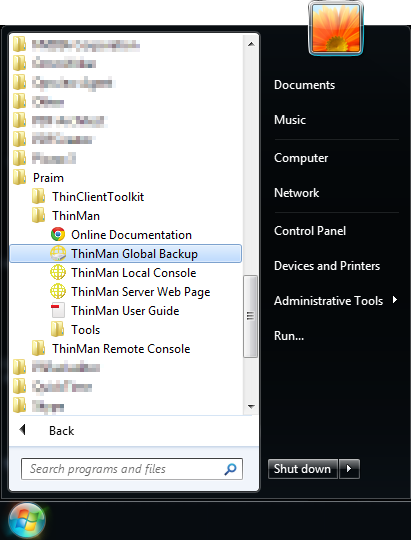
Execute the "ThinMan Global Backup"
- From Windows Start Menu: Praim - ThinMan - ThinMan Global Backup
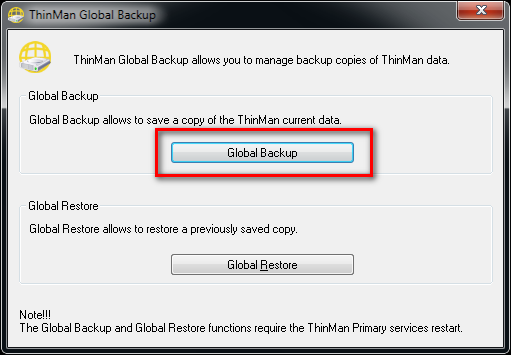
- Click on "Global Backup" Confirm the stop for the ThinMan Services, they will be restarted at the end of the operation.
- Save the backup file Decide where you want to save the file and enter its name.
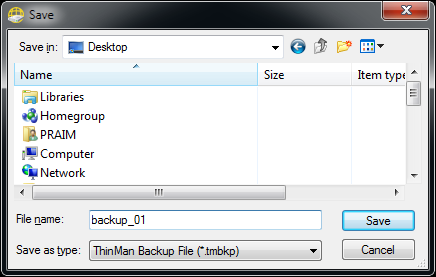
- The ThinMan Services will be stopped, the global backup file will be created, and the ThinMan services will be restarted.
-
Save the condor.properties file <TMAppPath>\Server\conf\condor.properties
-
Save the Template Repository files Save all the files contained in <TMAppPath>\Template
-
Save the Package Repository files Save all the files contained in <condor.datadir>\ServerData\repository (C:\ProgramData\Praim\ThinMan\ServerData\repository, if the condor file has not been modified; otherwise see inside the condor.properties file the value of condor.datadir).
Cannot find the ProgramData folder ...
Read more about How to Access the ProgramData Folder
-
Save the Device Log files If you want to keep the device log files history, save all the files contained in <condor.datadir>\DeviceLogs (C:\ProgramData\Praim\ThinMan\DeviceLogs, if the condor file has not been modified; otherwise see inside the condor.properties file the value of condor.datadir)
-
Save the Scheduled Inventory files If you want to keep the Scheduled Inventory files history, save all the files contained in <condor.datadir>\ServerData\inventory (C:\ProgramData\Praim\ThinMan\ServerData\inventory, if the condor file has not been modified; otherwise see inside the condor.properties file the value of condor.datadir)
Backup Files - IMPORTANT!!!
In order to restore ThinMan, you will need all the files save during the backup procedure:
- Global Backup file
- Backup condor.properties file
- Backup Template repository files
- Backup Package repository files
- Backup Device Log files (optional)
- Backup Scheduled Inventory files (optional)
¶ Restore Procedure
To restore a ThinMan backup, you will need all these files:
- Global Backup file
- Backup condor.properties file
- Backup Template repository files
- Backup Package repository files
- Backup Device Log files (optional)
- Backup Scheduled Inventory files (optional)
In order to make a COMPLETE restore of ThinMan and its components, you will need to follow the steps below:
- Execute the "ThinMan Global Backup" From Windows Start Menu: Praim - ThinMan - ThinMan Global Backup
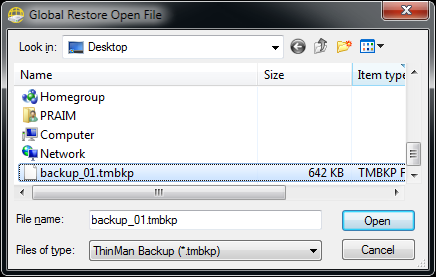
- Click on "Global Restore". Confirm the stop for the ThinMan Services, they will be restarted at the end of the operation.
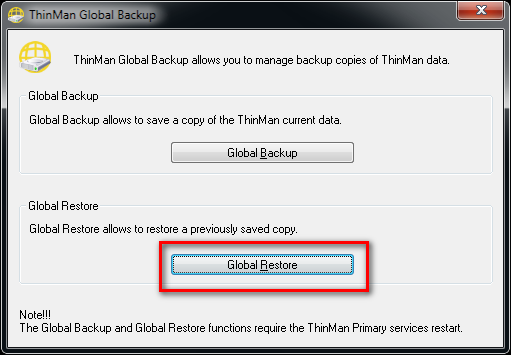
- Select the Global Backup file to restore.
-
Then, confirm all the requests you will find on the process.
-
The ThinMan Services will be stopped, the global backup file is used to restore the data contained in it, and the ThinMan services will be restarted.
-
Copy the Backup condor.properties file to <TMAppPath>\Server\conf
In case the condor.properties file contains the condor.address parameter, modify it with the right value. -
Copy the Backup Template Repository files to <TMAppPath>\Template
-
Copy the Backup Package Repository files to <condor.datadir>\ServerData\repository (C:\ProgramData\Praim\ThinMan\ServerData\repository, if you have not been modified the condor file; otherwise see inside the condor.properties file the value of condor.datadir).
-
Copy the Backup Device Log files to <condor.datadir>\DeviceLogs (C:\ProgramData\Praim\ThinMan\DeviceLogs, if you have not modified the condor file; otherwise see inside the condor.properties file the value of condor.datadir)
-
Copy the Backup Scheduled Inventory files to <condor.datadir>\ServerData\inventory (C:\ProgramData\Praim\ThinMan\ServerData\inventory, if the condor file has not been modified; otherwise see inside the condor.properties file the value of condor.datadir)
-
Open the Local Console to ensure proper operation.
-
Enable the Windows Images Manager, only if enabled before.
Note
Notice that ThinMan Server is not accessible from the thin clients during these operations because ThinMan services are down.
¶ Backup and Restore for a ThinMan with external database
¶ Backup Procedure
-
Follow the "Backup Procedure" explained in the chapter Backup and Restore for a ThinMan with Internal Database.
-
The second step is to create a database dump of the Master Database. Open a DOS console on the MySQL Server host and execute the command:
c:\> <path-to-mysql-bin>\mysqldump.exe --user=<user> --password=<pass> --result-file=<file> --databases <database-name> --add-drop-database
Parameters are:
- <user>: is the MySQL database user who is granted to access the database
- <pass>: is the password of the user
- <file>: is the file name that will be created by the MySQL dump (typically with ".sql" extension)
- <database-name>: is the name of the database where the data are stored
Note:
The command will create a file (whose name is specified in the --result-file parameter) that contain the ThinMan data saved on the MySQL database server.
¶ Restore Procedure
-
Stop all ThinMan Services (see How to Stop and Start ThinMan Services)
-
Restore the MySQL data in the database with the command (use the file with ".sql" extension) launching a DOS console and entering the command:
c:\> <path-to-mysql-bin>\mysql.exe --user=<user> --password=<pass> <database-name> < <file>
Parameters are:
- <user> is the MySQL database user who is granted to access the database;
- <pass> is the password of the user;
- <database-name> is the name of the database where the data are stored;
- <file> is the file name that contain the MySQL dump (typically with ".sql" extension).
-
Restart the ThinMan Services (see How to Stop and Start ThinMan Services)
-
Follow the "Restore Procedure" explained in Backup and Restore for a ThinMan with Internal Database.