The ThinMan Remote Console has a user interface similar to the ThinMan Local Console. It can be installed on any Windows based PC.
ThinMan Remote Console Requirement
The ThinMan Remote Console requires to enable and configure the ThinMan Access Control. Thus, the Feature Pack Admin+ is required.
Important
Since version 8.4.0, the ThinMan Remote Console and the ThinMan Local Console can coexist but you will be able to connect only to the locally installed ThinMan server (localhost).Also, the ThinMan Remote Console connection has been modified, introducing a WSS connection to the exposed HTTPS port. For more information, read below.
¶ Installation
Open a browser pointing to the ThinMan Server (use either the IP Address or hostname, be sure to use https protocol).
Ignore the certificate problem.
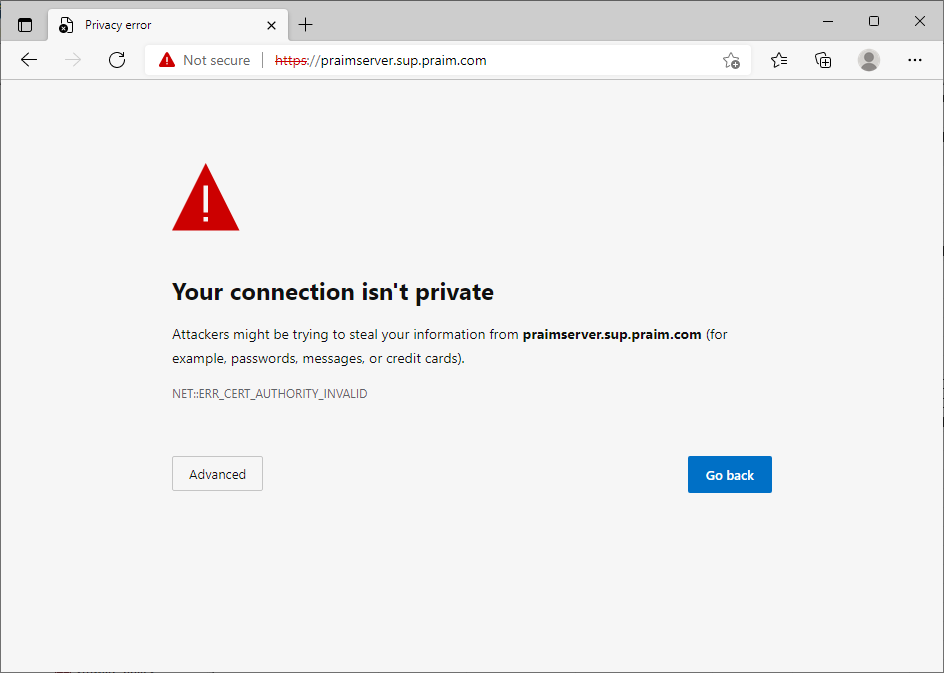
Proceed anyway to the site.
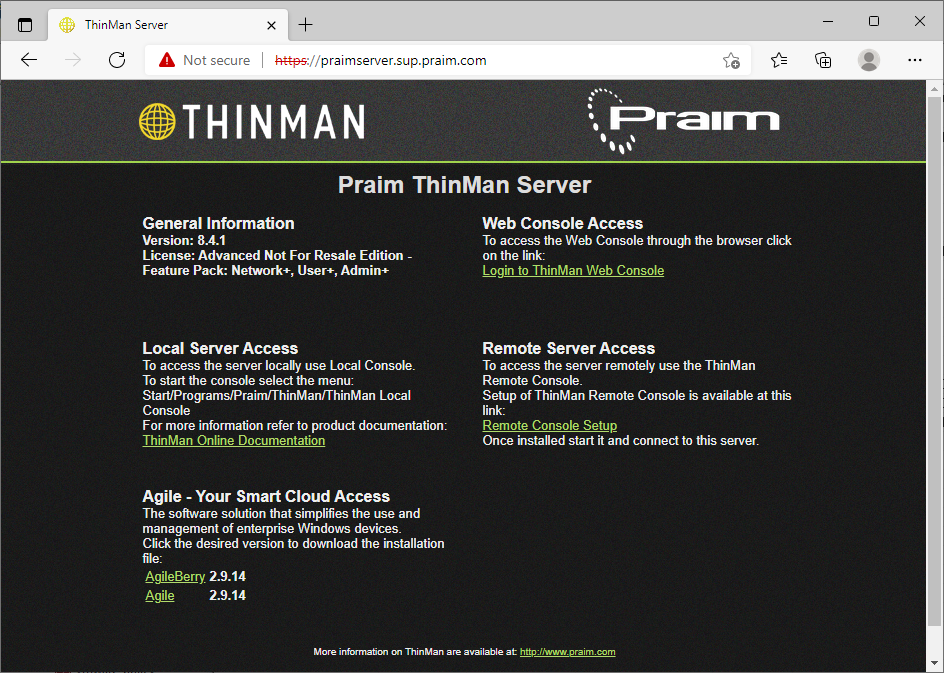
Download from the link Remote Console Setup the setup installation file on your computer and execute it.

Select the appropriate language for the program (default is "Italiano") and click the Next.
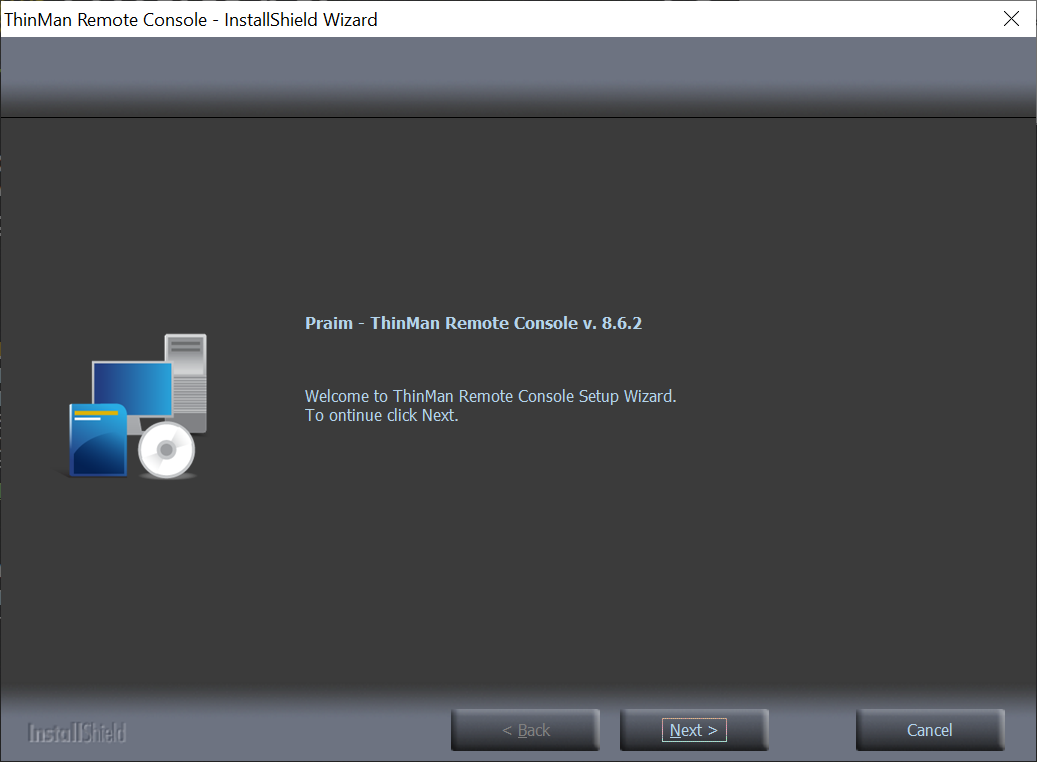
This window will inform which version is installing. Click on Next to continue.
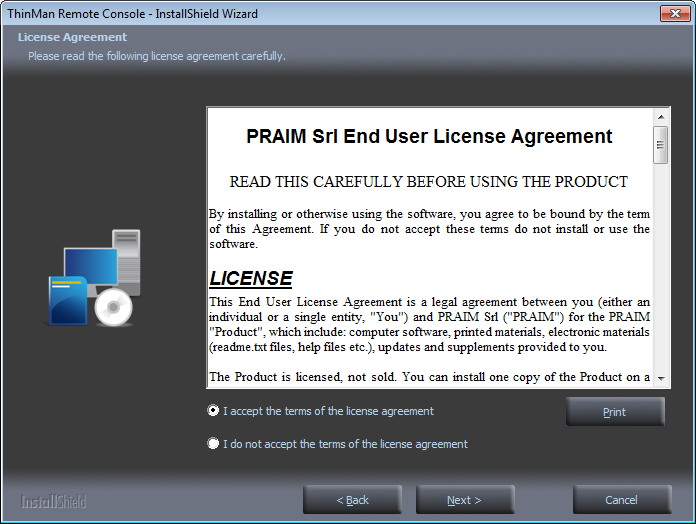
Read the License Agreement" and choose I accept the terms of the license agreement, then click Next to continue. It is possible to print the License Agreement by click on Print.
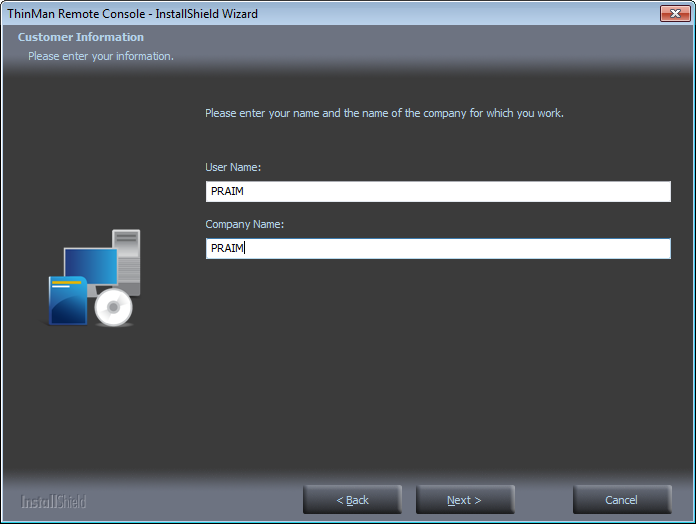
Type User Name and Company Name and click Next to continue.
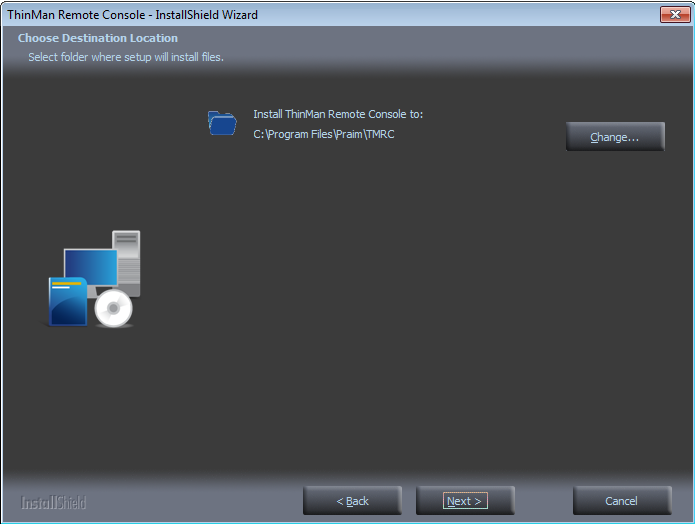
Select where install the software in the file system by clicking Change, in this case a second window will open on the display. If the default position is accepted click on Next to continue.
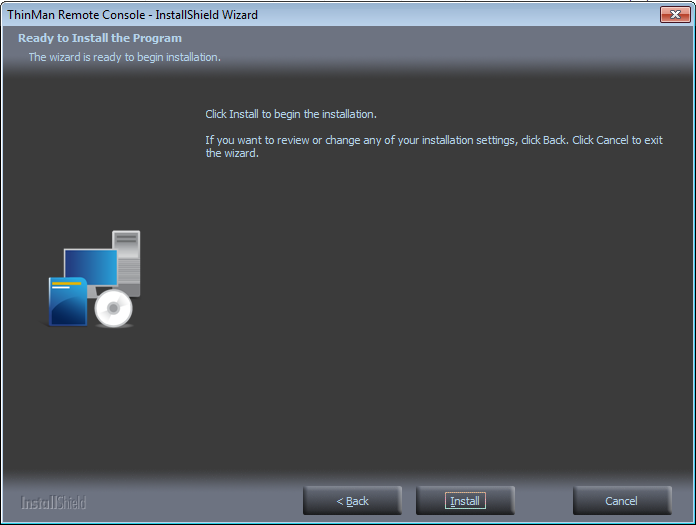
Click Install to begin installation. It is possible to change all the previous parameters by clicking on Back.
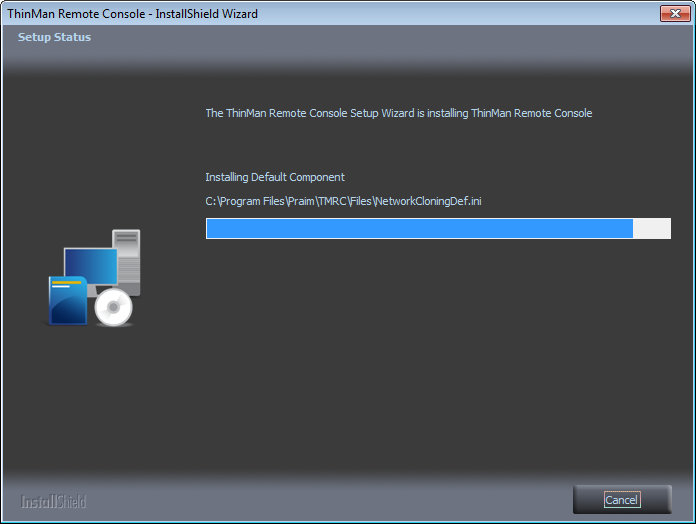
During the installation, it is shown the progress status bar. Wait for the next window to appear. Note that in this phase it is possible to cancel the operation by pressing Cancel.
The software is now installed.
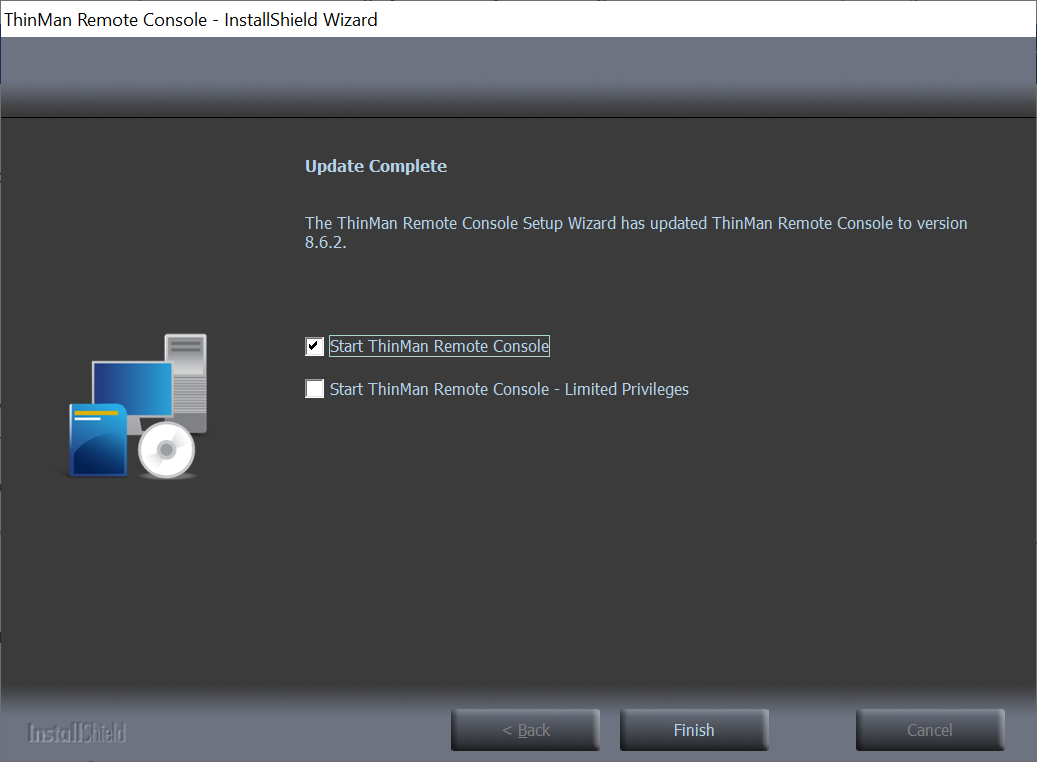
Click on Finish to end the installation.
¶ Access Configuration
Prior to use ThinMan Remote Console you have to configure which users/groups may use the console and establish their roles. For more information, read ThinMan Access Control.
¶ Use of ThinMan Remote Console
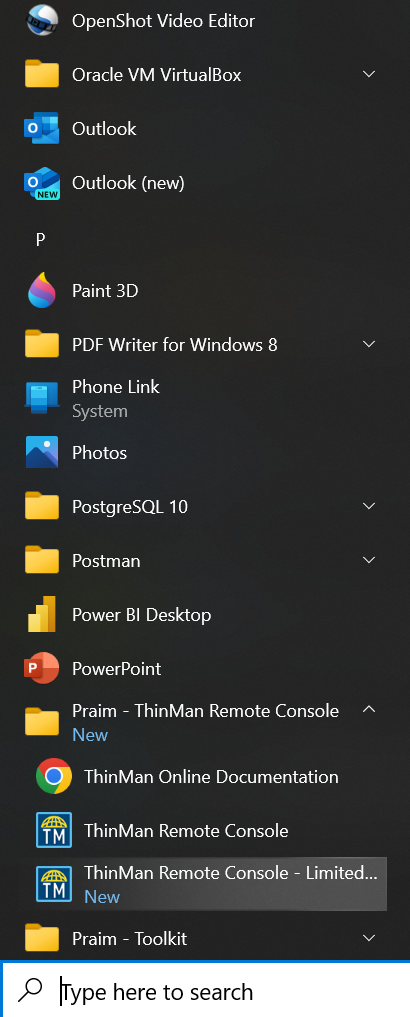
ThinMan Remote Console user interface can be launched under Windows menu Start. In case, the Windows user has no administrator privileges, he can access the ThinMan Remote Console with limited privileges.
¶ ThinMan Remote Console
Start console from Windows menu Start -> Praim - ThinMan Remote Console -> ThinMan Remote Console.
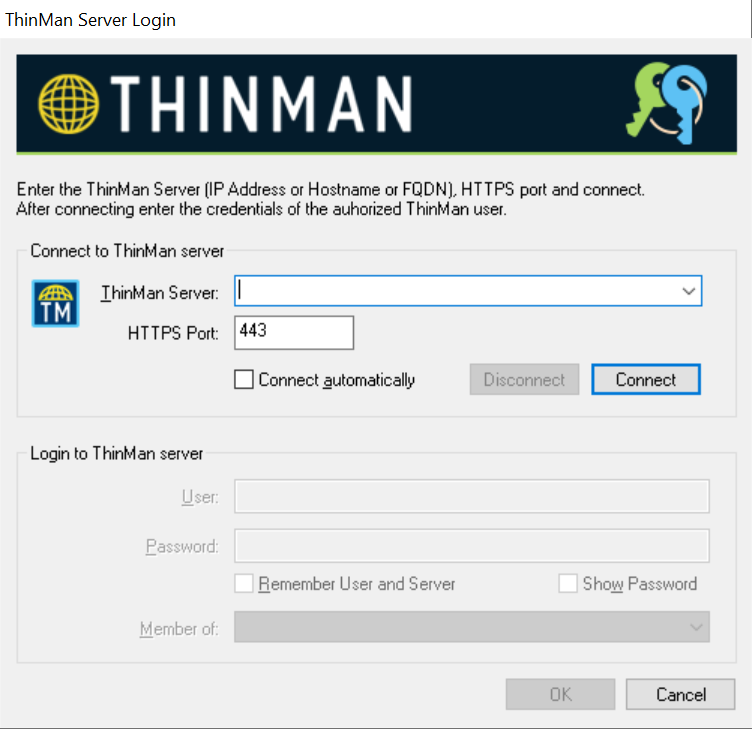
Since version 8.4.0 the ThinMan Remote Console connection has been modified, introducing a WSS connection to the exposed HTTPS port.
ThinMan Remote Console - version lower than 8.4.0
Below it is shown the user interface in lower versions.
A new window will appear requesting the Server Hostname/IP, press Connect.
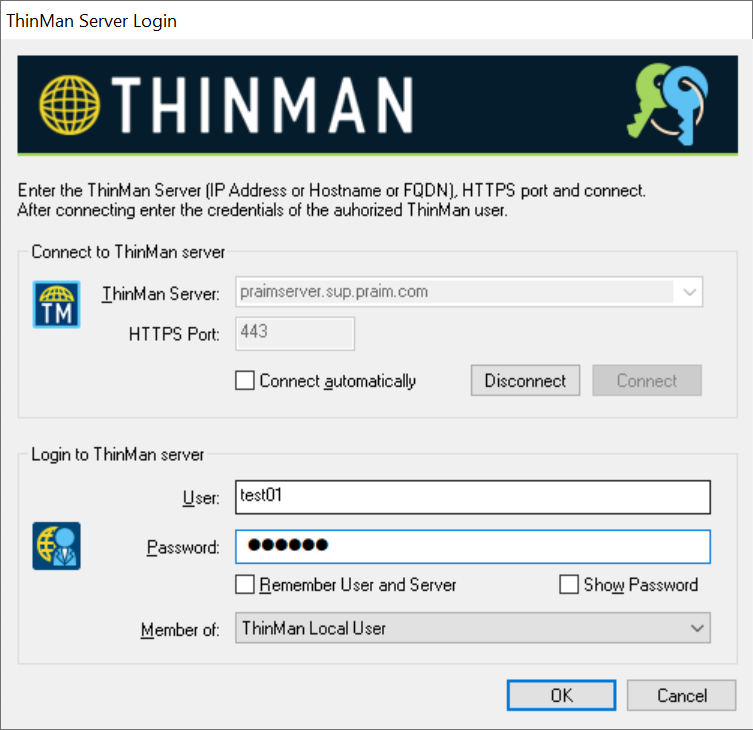
Then, it will be asked a user and password member of LDAP users or ThinMan local users.

The console will connect to the ThinMan Server and show all trees and functionality that are granted depending on the user roles (see ThinMan Access Control for more information).
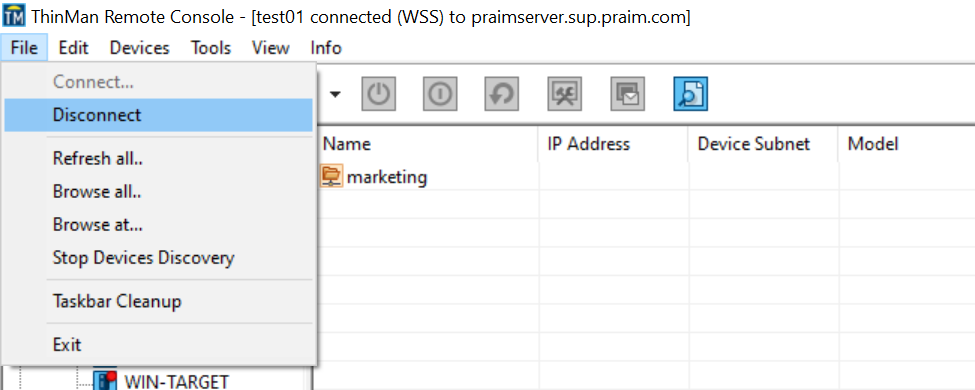
You can disconnect the user from the console simply selecting menu File -> Disconnect.
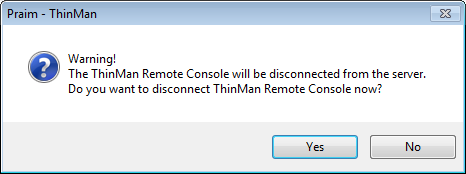
You will asked to confirm the disconnection from the console. Click on Yes to confirm the disconnection.
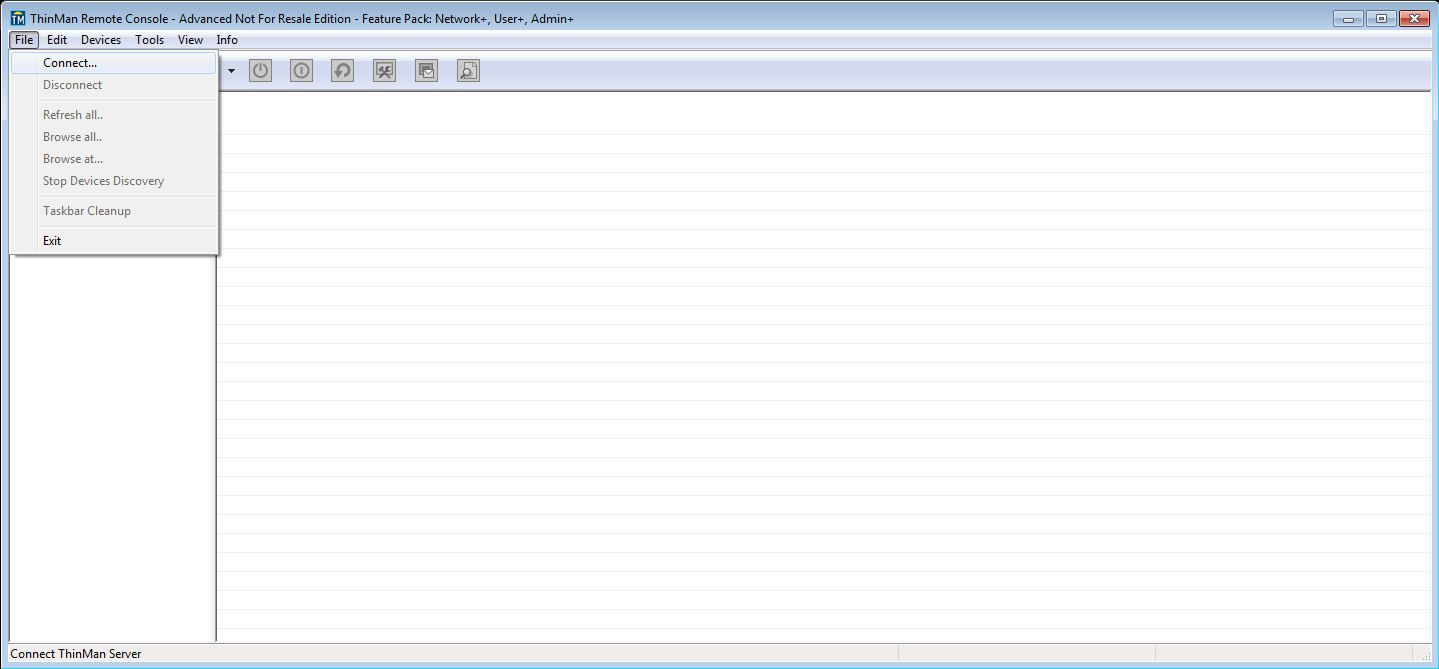
Now the console is disconnected. Select menu File -> Connect to connect to the server.
¶ Limited Privileges
Start console from Windows menu Start -> Praim - ThinMan Remote Console -> ThinMan Remote Console - Limited Privileges.
In this case, the ThinMan user will be limited to execute specific operations:
- Offline configurations: the user will be able to capture the offline configuration but will not be able to access any of its components (connection manager, device settings, certificate manager)
- Manage Templates: the user will not be able to save templates neither to access to the template repository.
- Profile Manager: the user will not be able to access any component of the profile manager (configuration profiles, users policies, devices policies).