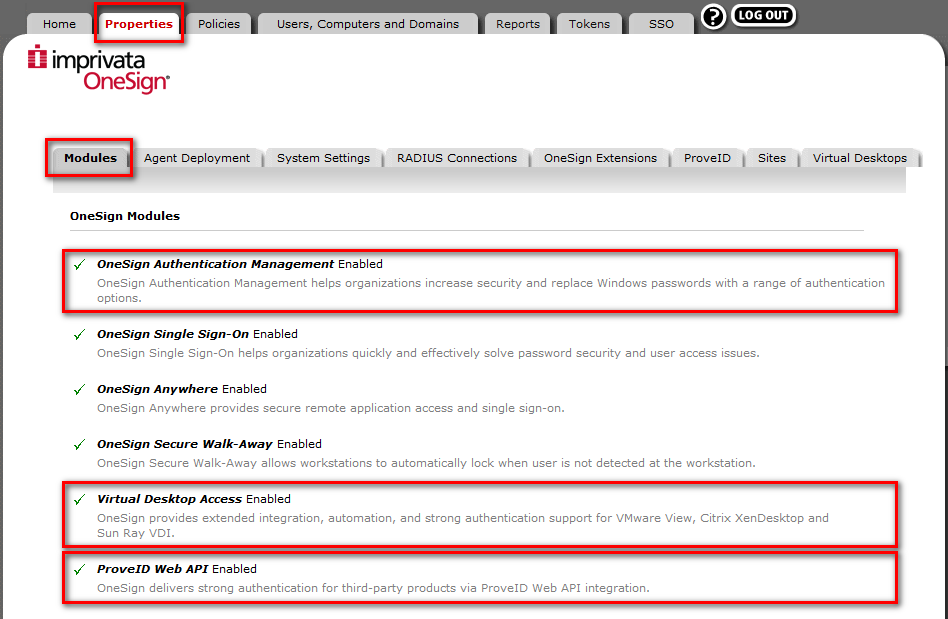
¶ Check License
To use OneSign Environment you must check the OneSign license.
Follow this procedure to check the installed modules:
- Open the OneSign Administrator Properties page
- Go to “Modules” tab
- The following modules have to be enabled:
- OneSign Authentication Management
- Virtual Desktop Access
- ProveID Web API (free of charge but it must be requested from Imprivata)
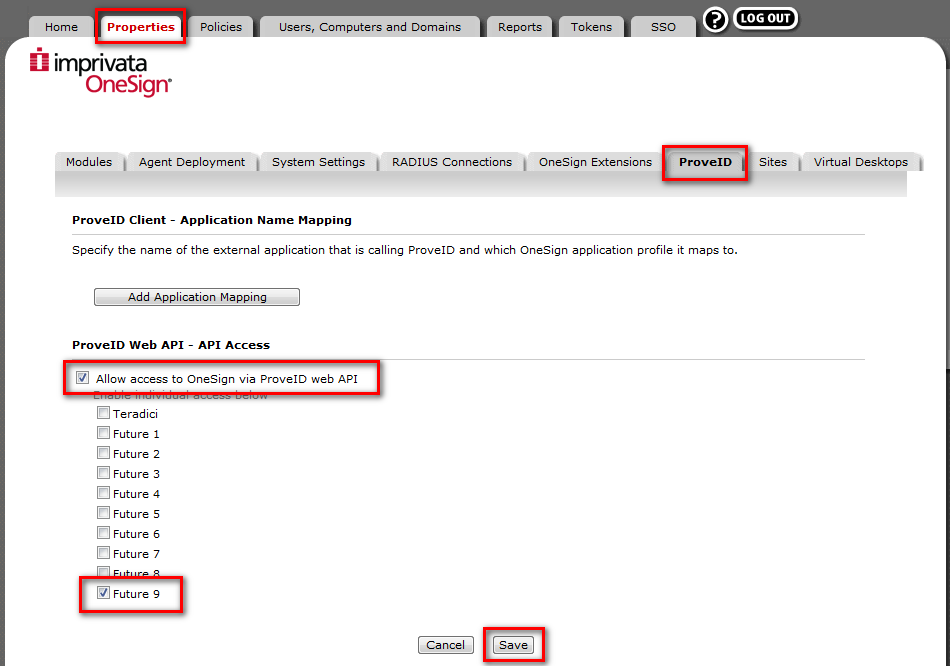
¶ Enabling ProveID Web API
To set up ThinOX thin client support in your OneSign Enterprise enable the “Future 9” option doing the following:
- Open the OneSign Administrator Properties page
- Go to “ProveID” tab
- Enable “Allow Access to OneSign via ProveID Web API”
- Flag “Future 9” option
- Click on “Save” button to save configuration
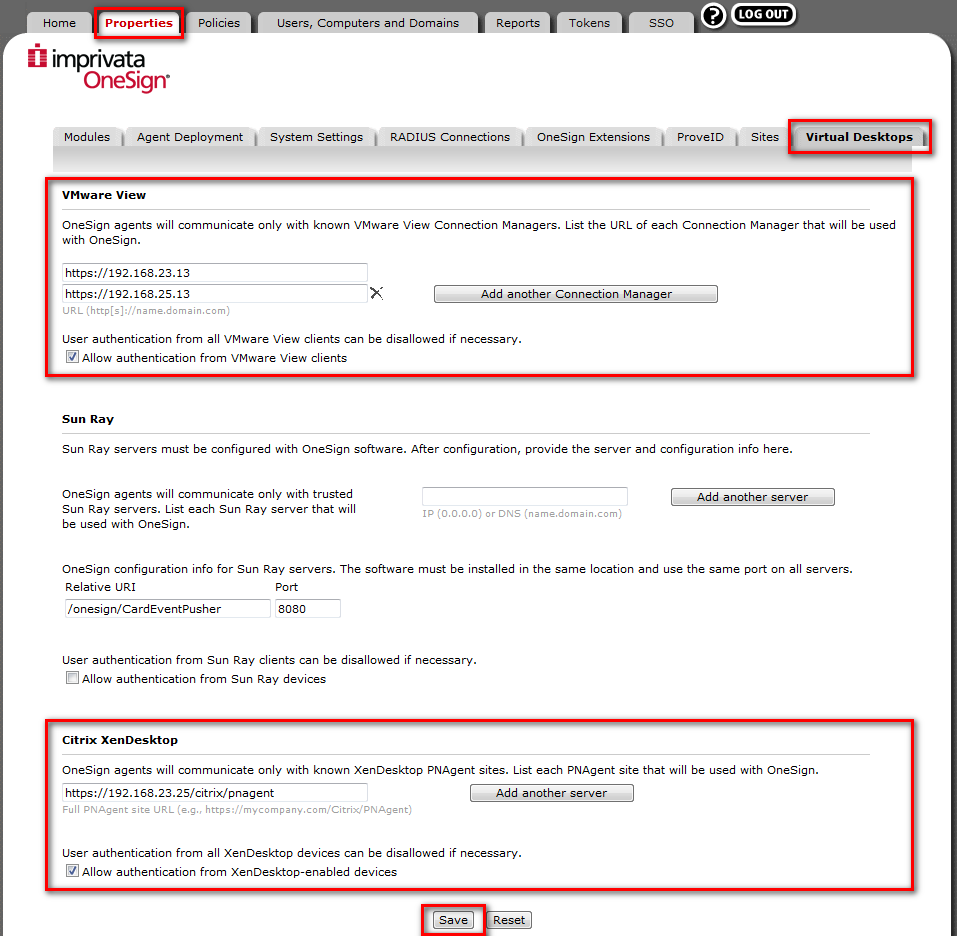
¶ Configuring VDI Options in OneSign
To use VMware or Citrix infrastructure in OneSign Environment you must insert VMware and Citrix related information. Do this procedure to insert related informations:
- Open the OneSign Administrator Properties page.
- Go to “Virtual desktops” tab.
- Add in the two sections “VMware View” and “Citrix XenDesktop” information related to VMware and Citrix server using the respective “Add server” button.
- Remember to flag the respective “Allow authentication from VMware View Client” and “Allow authentication from XenDesktop-enabled devices” .
- Click on “Save” button to save configuration modification.
See figure below for an example.