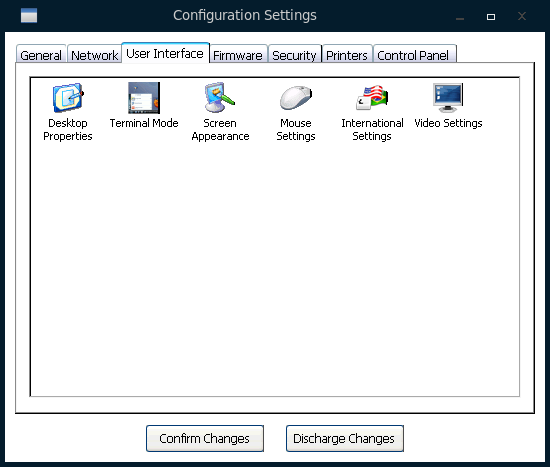
The User Interface tab allows to customize:
- Desktop properties
- Terminal mode
- Screen appearance
- Mouse settings
- International settings
- Video settings
¶ Desktop Properties
When Desktop Mode is selected, the following parameters are available for a further desktop customization.

-
Current Mode: shows the current mode set on the device.
-
Taskbar: it allows you to Auto Hide the taskbar.
-
Desktop Icons: it allows to create shortcut icons on the terminal desktop:
- Control Panel: display the control panel icon on the desktop.
- Connection Manager: display the Connection Manager icon on the desktop.
- Show USB Devices: when plugged, shows the USB devices (mass storage devices) icons on the desktop.
- Popup Explorer on Hotplug Devices: automatically open the file explorer window when a USB device is plugged in.
- User Partition parameters: if a User partition is available (depends on the device model) these parameters allow to activate the User Partition, to show it on the desktop, to give write permission to the user or to share it via SMB protocol on the network. The SMB protocol can be enabled/disabled in Network Settings.
¶ Terminal Mode
It allows you to set different terminal GUI operation modes.
¶ Full Desktop

It is the default mode. Full Desktop mode provides a familiar Windows-type look experience (taskbar, desktop with resource icons).

¶ WBT Kiosk Mode

If the Show Connection Manager parameter is enabled, the Connection Manager is displayed on the desktop where the users may launch the connections. Optionally, when the parameter Deny Connection Changes is disabled, users can also define and edit connections.

When the Show Connection Manager parameter is disabled, the user will not be able to access to the connections manager. This case is particularly useful when you want to configure a single resource(connection) and launch it automatically when the device is turned on (Enable connection Autostart)

WBT/Kiosk mode provides a minimal user interface that limits the final user interaction. If the Connection Manager is not shown on the device startup, the users need to press CTRL+ALT+End to display the Connection Manager.
Changing from WBT/Kiosk Mode to Desktop Mode
When the Connections Manager is shown, press the F2 function key to open the Settings window. Go to User Interface -> Terminal Mode and select Full Desktop.
¶ Window Switcher Shortcut
It allows the configuration of the hotkeys on the terminal as follows:
- WBT mode: use CRTL+ALT+Arrow (Up or Down) to toggle between active applications. Default value for WBT mode GUI.
- ALT-TAB List: use ALT+TAB to display a list of active applications. Default value for Desktop mode GUI.
- ALT-TAB: use ALT+TAB to toggle between active applications.
- CTRL-TAB: use CRTL+TAB to toggle between active applications.
- Shift+PagUp: use Shift+PagUP to toggle between active applications.
- Win arrows: use Windows-key+Arrows to toggle between active applications.
- None
The Window Switcher Shortcut can be influenced by the settings of every connection created on the thin client.
¶ Screen Appearance
It allows to customize the device wallpaper and the information shown on the desktop.

-
Wallpaper: it allows to select an image for desktop wallpaper (remember that a personalized wallpaper can be sent to the device using the ThinMan Console), and how to align it in the screen. Notice that it has to be a file of extension jpg and the dimension of the file using the import button will be determined by the free config space while through the ThinMan console (ThinOX: Personalize -> Wallpaper Image ) allows a jpg file of max dimension 512 KB.
-
Additional Desktop Content
-
Desktop Logo: it is possible to:
- Disable the option of showing a logo on the desktop.
- Leave the default ThinOX logo
- Change the default ThinOX logo by selecting the Custom option with the possibility of modifying its position (Top Right, Top Left, Bottom Right, Bottom Left)
-
Show Information: The information shown includes Time and date, Hostname, Network Connections, ThinMan Info, Hardware Info and Remote Assistance access, you can decide to:
- Never show any information on the desktop
- Always show specific information on the desktop
- Show the information on the desktop Only during Remote Assistance.
The information will be displayed in the bottom right corner of the desktop.
-
Taskbar: if you prefer to show the date and/or time on the taskbar, deselect the Time and date option on the Show Information section and select one of the following options: Hide Time and Date, Show Time, Show Time and Date.


-
Screen Saver
The Screen Saver parameters have to be configured through the Power Management applet in the Control Panel.
¶ Advanced Configuration

¶ Screensaver
It is possible to personalize the screensaver logo(see image below).

The file should have an extension *.xpm. Remember to activate the Scren Saver option on the Control Panel - Power Management


¶ ThinMan Login Window
In case you are using the ThinMan Login feature. You can customized the ThinMan Login Window by choosing another image. The maximum image size is 408x62 pixel with extension *.png.

¶ Mouse Settings
It allows to set the type of mouse in use and to customize both the pointer speed and acceleration.

-
Speed: it controls the sensitivity of the mouse to movement. A slower speed means a lower mouse sensitivity.
-
Acceleration: it controls the mouse acceleration.
-
Hide Cursor: if enabled it will not show the mouse cursor.
-
Disable Right Button: when enabled it does not allow to use the right button.
-
Invert Buttons: inverts right and left click behavior. Useful for left-handed users.
¶ International Settings
Through this dialog box, the users can set both the language for the system and the keyboard.

-
System Language: selects the language for the user interface.
-
Keyboard Layout: selects the layout for the keyboard.
- Edit: by clicking on Edit users can customize the keyboard definition file.
-
Enable NumLock at Startup: it automatically enables NumLock when Thin Client starts.
-
Repeat Rate and Delay: The Repeat Rate controls the rate at which a key is repeated after being held. The Repeat Delay controls the time delay before a key is repeated after being pressed; as the Repeat Delay is increased, the time a key must be held before it is repeated increases accordingly.
-
Apply key combination "Win+L" on remote computer: when enabled the "Win+L" keyboard shortcut is not managed from the thin client keyboard manager but is sent to the virtual desktop.
¶ Video Settings
It allows configuring many aspects of monitors and screen resolution.

¶ Mode
On the Video Settings window, you will see all the monitors connected to the device represented by a color.
Select the Single Monitor option whether you want the monitor to be a clone of the primary monitor and the Multimonitor option when you want the monitor to be an extension of the primary monitor.

Once you have selected the Mode (Single/MultiMonitor) click on OK to apply the changes. Open again the Video Settings window, now you will see the Identify Monitors button enabled; by clicking on it you will be able to recognize each monitor, a color will appear on each monitor with its specific characteristics (see image below).

On the Video Settings window, you can drag and drop each monitor to established how you want to use them.

The above disposition will be seen from a ThinMan remote assistance as shown in the image below.

Also, you can:

- Disable a monitor.
- Set a monitor as Primary(the monitor containing some icons on the desktop).
- Rotate a monitor.
- Manually set the resolution: Uncheck the Enable Autodetect option in order to select the resolution and choose the resolution you want to apply to the monitor.


¶ Force Monitor Awakening
Do not change this option unless you have a particular monitor that goes on standby (according to the power management settings) and does not awake by unknown reasons.
¶ Text Size
It changes the size of the text on the Thin Client. When using vmware - DPI synchronization, this percentage will be used by the remote desktop's DPI setting .